Social Icons

Saturday, December 27, 2014

Amelia at Nine Months

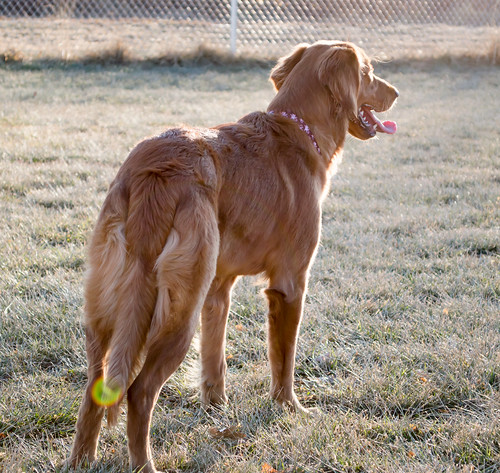
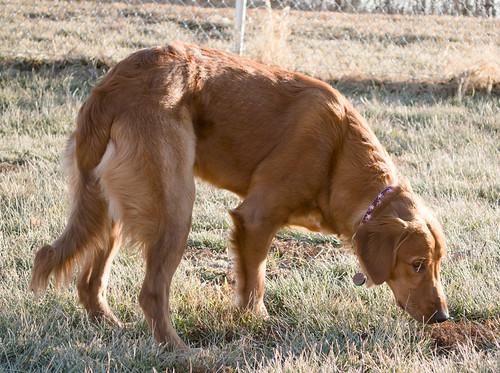
Can you believe that it has been 7 !months that we have had her already? She has had her nine month birthday recently, and I am in disbelief! She has grown into this gorgeous creature, and has become the absolute love of my life. How did I live without this unbelievable animal?

amelia-06

I feel like every post I do on her becomes into this love story about her, but to be honest, its totally true. My existence revolves around her, and with every day, I love her more. Even my husband feels jealous of my adoration to this dog. That says a lot. What more can I say?

amelia-03

We have gotten much better with her, as a family. She is brilliant, learns so quickly, and definitely knows how to get what she wants. We take her to the dog park often, which is without a doubt, her most favorite place to be. We live in a very small one bedroom apartment, so getting her out to the dog park to run and play, even makes me happy to see.

amelia-07

We found a more local dog park, which is much smaller than we have previously been visiting. At the bigger park, it is much more populated, and she will follow other dogs and people around. We always have to chase her back to us. So, the smaller park is much better - we are usually the only people there, and she does not stray from us. We bring a ball and just let her run. For me, I love watching her run and get all her energy out, being in a small apartment for a large dog, is probably not the ideal.

amelia-05

She is also sleeping through the night outside of her crate, and in bed with us. (Well, actually, it is usually me not being able to fit in the bed with the husband, two cats, and the dog - so Amelia and I somehow end up on the couch.) But that's okay, I find the couch more comfortable than the mattress anyway.

amelia-04

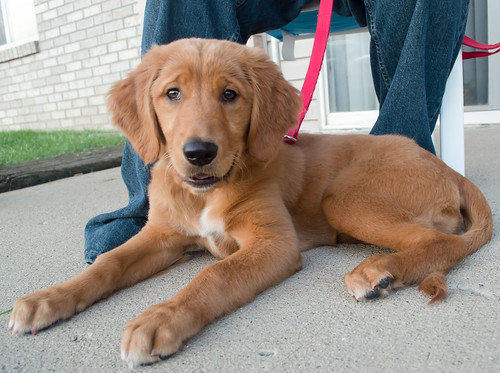
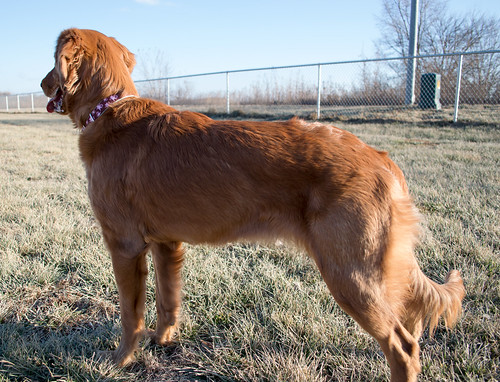
Amelia has gotten much more beautiful with her coat now as she's growing older. Her "feathering" is coming in beautifully on her tail and rear end, making her look unmistakable as a golden retriever. Recently we have only been questioned of her breed as a "setter." It used to be "is she a lab?"

DIY Washi Tape

Lately, I have been getting into a new hobby, called smash booking. Or, junk journaling. Over the past couple weeks, I have spent quite a bit of money buying supplies and getting ready to start actually creating. Smash booking, is what I like to think of as scrapbooking, without all the photos. It focuses less on pictures, but more on embellishments, or whatever else you want to "smash" into the book.

 In my quest to buy supplies for this new thing, I came across something called Washi Tape. This is like a low-tack tape that is decorative, perfect for smashbooking. However, the price... Makes me cringe every time I come across it. For a little roll,the price is at least $3. Sure,it doesn't sound like much, but when you have at least 4 different patterns that you feel you can't leave the store without... It adds up. So, my cheap self, decided to find a way to make my own. I googled, and came across a video. I wish I would have saved the link, because it was really helpful. (If anyone knows the video where this tutorial came from, please let me know!).

I took photos of the process of how I made my own washi tape. It was rather easy, but quite time consuming. However, I love being able to find any kind of paper I like, and be able to make tape out of it. Will be great for unique projects, where you just can't find the right kind of washi tape for. Anyway, on to the photos!

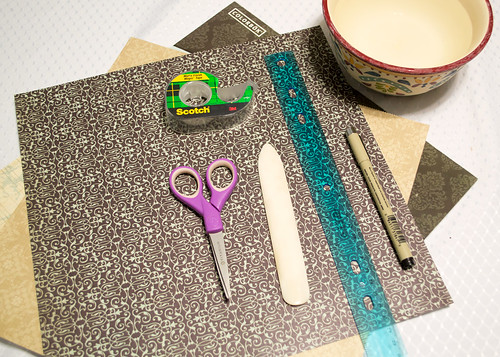
washi-tape-supplies

These are the supplies you will need.
  • A ruler. Instead of the ruler and pen, you can use a paper cutter if you have one. I didn't, so I took the time to measure the paper out with a ruler and cut by hand.
  • Scissors. To cut the paper if you don't have a paper cutter, and to cut excess tape.
  • Patterned paper. I used a sheet from a scrapbooking pad of paper that I bought from Walmart for $5.
  •  Tape. Obviously. I used just regular scotch tape, with a matte finish. You will need quite a bit of it.
  • A bowl of water.
  •  Bone folder. I am not really sure if this is needed, but I think it is handy to have for this project.

washi-tape-measured

First thing you want to do, is to measure how big you need your strips. My tape was 3/4 inch thick,so  I cut my paper to be a bit bigger than the width of the tape. I measured them an inch wide, each strip.

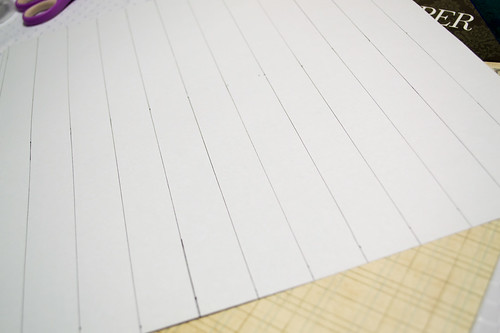
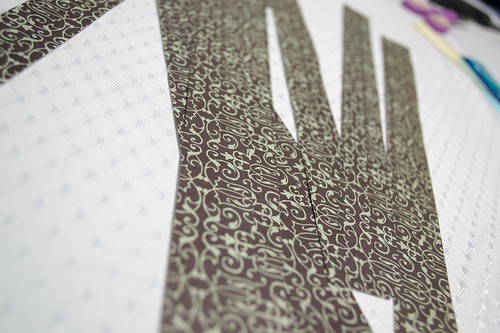
washi-tape-strips

Next, cut out your strips from the paper. Again, this would be tons easier and quicker if you had a paper trimmer on hand. I did not.

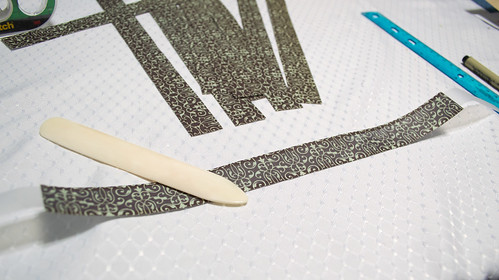
washi-tape-tape

Third, you are going to apply the tape directly to the front of each paper strip.  Trim off any extra tape from the sides. I personally, didn't bother with trimming the paper off the sides, because you'll end up rubbing the paper off anyway. But, you can trim up the sides if you want to. However, if you have extra tape hanging off the paper, be sure to cut that off. I ran the bone folder over the top a few times, just to be sure I got a good transfer seal on them.

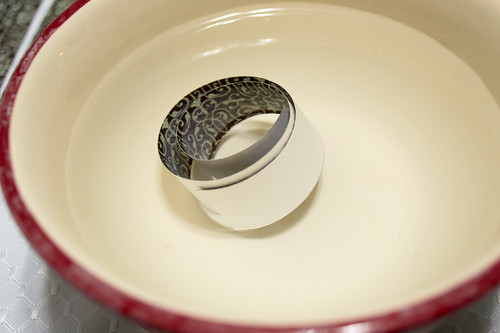
washi-tape-water

Now that you have your paper with tape attached, dunk into the water for a few seconds. I have found you don't want to leave them in the water too long because the pattern will kind of chip off with the paper in the next step.

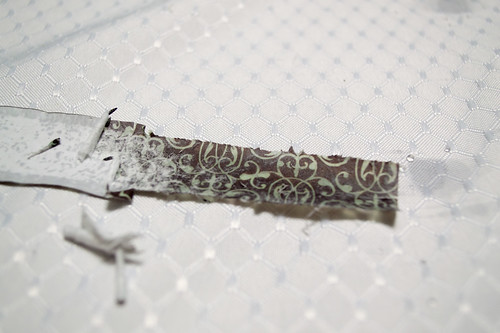
washi-tape-rub

After a few seconds, the paper should be wet and saturated. Take it out of the water, and rub your fingers over the paper. It should start to ball up, and separate from the tape, leaving the pattern behind. Keep rubbing until all the paper is gone. If it gets too difficult to remove, dunk it in more water and continue rubbing.

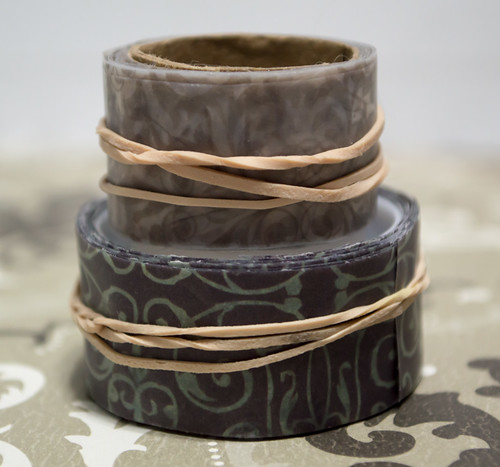
diy-washi-tape

Some tips, mainly for myself if I intend to keep at this project.

  • After being attached to paper, doused in water, and then rubbed on, the tape will lose the majority of it's sticky-ness. I suggest to use a clear adhesive of some kind to stick it to wherever you need to to stick to. 
  • The tape will also not lay completely flat, usually. Again, use a strong, clear adhesive of some kind to force it to lay straight.
  • I found that different sheets of paper, yield different results. For example, one sheet of paper from the scrapbooking pad, came off rather easily when rubbed, while another sheet (from the same pad) didn't come off nearly as easily, and still had quite a bit of paper attached. Which can be good, depending on how grungy and opaque you'd like your tape. I don't mind, in fact, I prefer to have some differences in my tape.
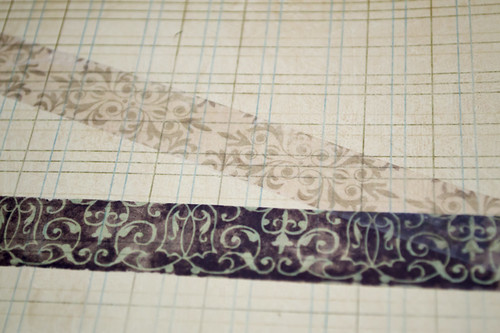
diy-washi-tape-finished

Pretty cool, huh?

Monday, August 25, 2014

Laundry Room

When we moved into this apartment back in March, one of the most awesome parts of it is that it came with washer and dryer hookups. So, I could have my own washer and dryer. However, we have never had the money to get them. Every time I would go into Lowes, Home Depot or even Sears, I would price them, then leave because well, they are expensive. I started looking and Craigslist, and Facebook Swap groups for used sets, but we have no truck to pick them up. It was disappointing. We had to find somewhere that delivered.

My birthday is coming up next month, and the only thing I wanted was a way to do my own laundry. My husband currently spends his days off over at his mother's house, doing our laundry. He doesn't remember specific washing instructions I give him, and he left my favorite pair of my shoes over there a few weeks ago, that no one is able to find now. I felt like I need my own way to do laundry.

I considered the Wonderwash. It looks awesome, easy on water, and requires no electricity. I was concerned about the drying time. I feel like the clothes would be soaking wet, and I have no where to dry them. It would be awesome drying outside on a clothesline, but... Well, I live in an apartment. The clothes would have to dry inside somewhere. That being said, the Wonderwash wasn't logical for me.

Tyler told me to start looking for a used set. I called around and found one. They were still way much more than we wanted to pay, but they delivered. We went up there, and purchased them. When we were paying for them, it was an additional $75 for delivery and what she called "installation". This was cool because we never installed a set before, and if installation was included with delivery, that was even better.

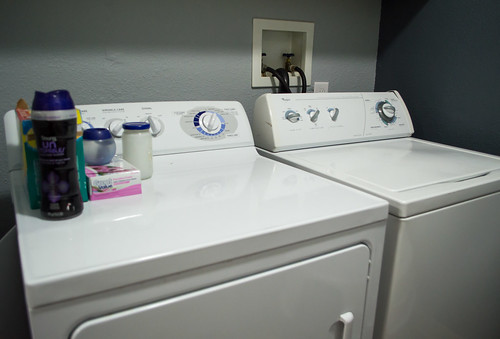
laundry-03

Guy came, dropped off the appliances in the middle of the laundry room, and handed us hoses. And left. My husband and I looked at each other after he left, dumbfounded. We both were like, wasn't he supposed to install them? I called the company back, to question why didn't he install them. Apparently, delivery was free, but if they bring it into the house and supply the hoses, that's what they call "Full Service Installation." therefore, he did what he was supposed to and we were not entitled for a refund. I was pissed. Maybe don't use the word installation to people? He paid $75 for what we thought was installation, but really was just to wheel the things 10 yards into the house and putting hoses into our hands. Ugh. Would never purchase another used appliance from them again.

But anyway, he hooked up the washer and dryer, and I spend the whole day doing all my laundry. I love having clean clothes. And I love having my washer and dryer in my own apartment.

laundry-02

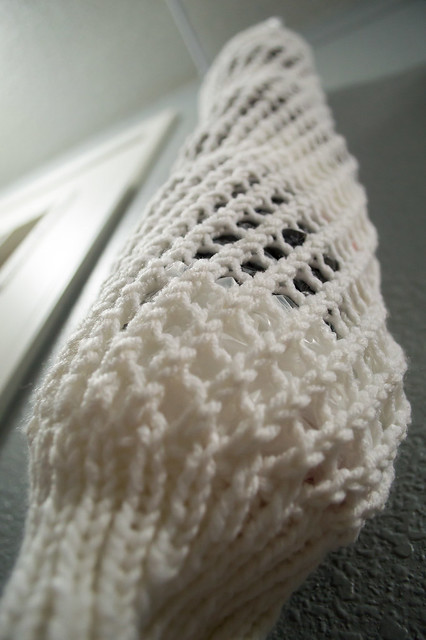
I started to knit a grocery bag caddy a while ago, and finally finished it in time for the appliances to get here. Was trying to pretty up my new laundry room, and it turned out pretty nice! I like it, and it holds a ton of bags in it. Didn't require much yarn, either. I am thinking that I'll revisit this pattern around Christmas, because they will make wonderful gifts.

laundry-04

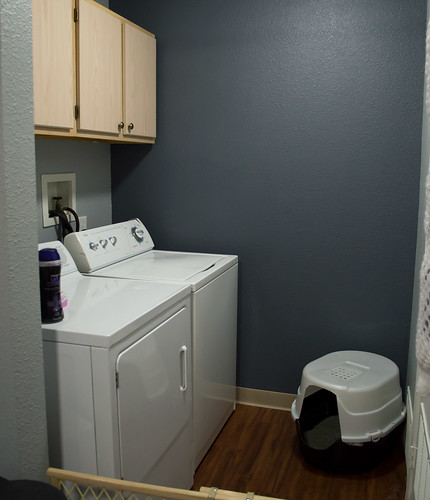
The dryer doesn't go all the way to the wall because our vent is somewhat where it isn't supposed to be, so we have to have a tubing system of some kind back there, which won't let it go all the way back. It is kind of a tight squeeze in there, really only enough room to turn around in. I could, possibly move the wash machine back further,but my OCD wants them side by side. Add the cat litter box in this room, and it feels even smaller.

So pretty! Even with all the drama of that day they came, I love my washer and dryer!

Thursday, August 14, 2014

Almost 5 Months

Amelia is a little over almost 5 months old today, so I think it is time for a little progress report.

We have been visiting the dog park almost every weekend now that she is fully vaccinated and healthy. She loves the dog park! She runs and plays with all the dogs, and is so exhausted when we get back to the car, which is awesome. Occasionally, we will run into a mean dog, but she will just run to try to get away. When we see it happen, we leash her and take her to another part of the park. I worried about her at first because it was a huge park, and I knew if she ran from me, I would never catch her. But, she is the one who never lets us out of her sight.

amelia-bullystick-06

She has begun to lose her baby teeth as well! The other day, I had given her a bully stick, and had a bit of a freak put moment when I found blood on it, and on the carpet as well. I looked over her body, and found she had lost one of her larger, back teeth. After cleaning the mess, I later found the tooth on the floor (by stepping on it). As weird as it sounds, I was really excited to find one, so that I could keep it, yay! I think the majority of her teeth are her adult ones by now, she lost 2 of the sharp canine teeth, so now I think we only have the remaining top canines left to go.

amelia-bullystick-05

We are doing loads better with her chasing the cats. We started training what I call "bad no cat, good no cat". I put a bunch of little treats in a small baby food jar, and pretty much kept it with me at all times. When a cat was walking by, and Amelia would stare at it, I would say "hey" or something similar to get her attention and look at me. When she turned her head to me, I would say "good no cat!" And give her a treat. My theory was that if I can praise her for looking away from the cat, she might see that as a not wanting to look at the cat?

It has been working really well so far. The other day, she was laying on the carpet with a toy, and a cat came up to her. I watched the entire encounter, waiting for Amelia to give chase, but she never did. The cat first started to sniff her tail, then her legs, and slowly sniffed up to her face, but Amelia never moved. When the cat started to walk away, I thew a huge "good no cat" party for her, and gave her an almost handful of treats for that one. I was so proud.

Occasionally, we will still have a "bad no cat", when she will start chasing one, or walk up to the cat, trying to mouth him. When that happens, I will tell her "bad no cat" and lead her into her crate. We only leave her there for about 5 or 10 minutes, then start the process again. We are getting it, bits at a time!

amelia-bullystick-04

I have been wanting to try and wean her off of the crate at night. So a couple nights ago, we wanted to test her a bit We brought everything we could up off of the floor and out of reach, and closed the bedroom door off. My husband did not want her out at night because he was certain she would have an accident on the floor. My concerns were that she would find something to destroy while I was sleeping. She did a lot of getting on the bed and then getting back off, but eventually, she went into her crate by herself and slept there. We closed the crate up a little while afterwards. Confusing because she will whine for a while after we put her to bed, but she goes and sleeps by herself last night? I don't know.

amelia-bullystick-01

We are slowly getting it with her. We have had our bad days, and our good days. Lately I feel like we have more good days than bad.

Saturday, August 2, 2014

Nail Polish Collection

I used to chew on my nails for the majority of my life. It was really bad sometimes because I would chew them down so low that my nail beds would actually bleed. That isn't to mention the horrible, countless hang nails that I would get. After dealing with them for so many years, my new years resolution last year was to simply stop biting on my nails.

I went and got acrylic nails done, thinking it would help me. It kind of did. I did not bite on my nails, but having to pay $20 to get them done every couple of weeks was not going to do it for me. Besides, I wanted real nails. I vowed to let the acrylics grow out, and then work on strengthening my real nails.

Once I removed the fake nails, my real nails were incredibly weak. They were not even breaking because they were so weak, they were bending instead. They had the feel of a drinking straw. It was discouraging. I tried many different strengthening products, spent a lot of money on them. But what worked for me was moisturizing my cuticles with Burt's Bees Cuticle Balm, and the NailTek system. They slowly became stronger.

The biting itself was rather easy to stop, once I really set my mind to it. My theory was that if I kept my nails painted, I could pick off the polish, but not stick my fingers in my mouth. I figured, as long as I was picking polish off, I wasn't destroying my nails. It worked. Eventually, I stopped picking at my polish, and had no interest in biting my nails.

However, once I started buying nail polish, I had trouble stopping. There was always a color that I didn't have, a new collection I didn't have, or a creative glitter that I felt I needed. This lead to a huge explosion of nail polish that I accumulated.

Recently, I found that I had nail polish scattered through the house, and decided to take some time yesterday and reorganize them all back into my shelves. I was shocked at how much it grew since the last time I did this.

So now, I will give you all a peek into the most intimate part of my life... my nail polish collection. It has gotten so overwhelming in the past year and a half that I am almost embarrassed of it. But Anyway, here we go!

melmer

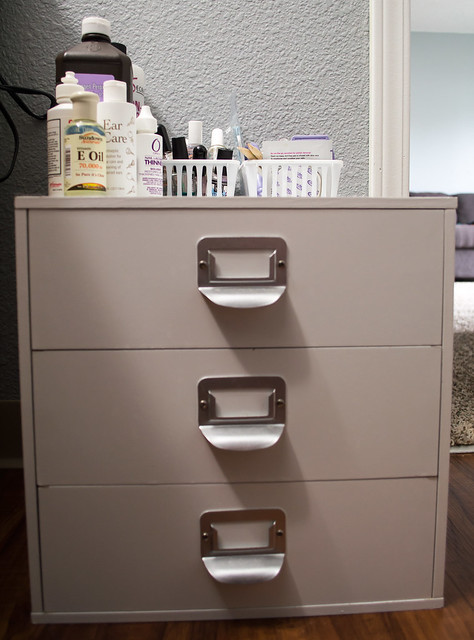
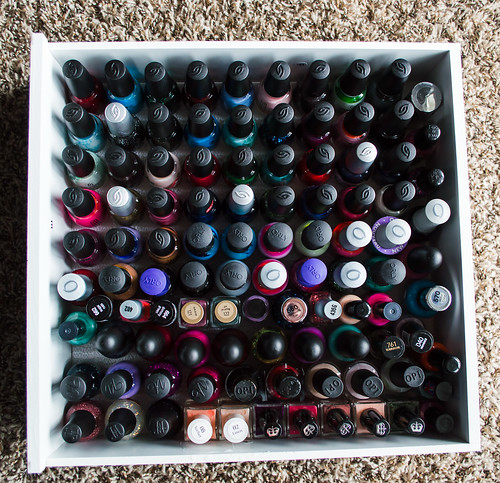
This is what a large portion of the nail polish community call a Melmer. It is basically a drawer storage system that they sell at Michael's and craft stores. I believe it is mainly supposed to be for scrapbooking storage, but it is fantastic size for nail polish bottles. I store all of mine in one of these.

shelves

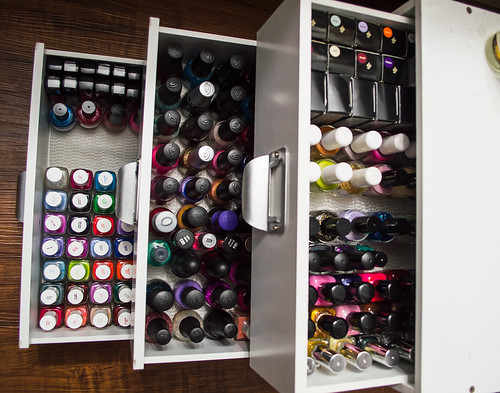
It holds a lot! I really wanted a Helmer from Ikea, which is twice the size, but it would have cost a fortune to get it to me. I would have had it shipped to me.

Now, for a closer look into each drawer!

fire-shelf

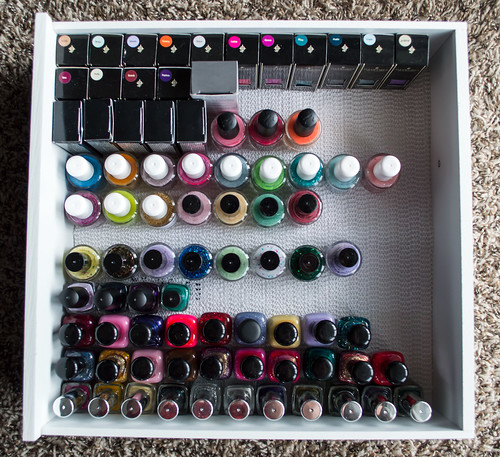
This is the first drawer, which I affectionately call "the fire drawer." Meaning, if the building catches on fire, or some other catastrophe happens, this is the drawer I would pull out and take with me to safety. It holds my more expensive polishes, my indies and other ones that are more difficult to get. Ones that I have ordered from Etsy (such as Different Dimension) and others which I had to jump through hoops to get delivered to the United States (like my A England's and Emily de Molly). A lot of these would be difficult to replace.

randoms

The second drawer is more common ones, ones I picked up on a whim, clearance or sales. There is a lot of China Glaze in here, because the Sally's Beauty Supply near me used to have good sales and I found them on clearance sometimes. I would pick up several at a time.

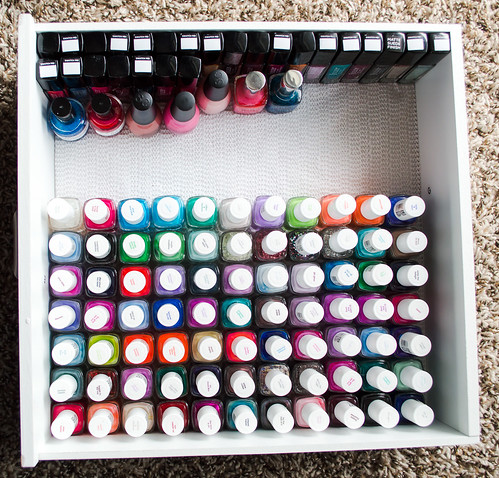
essies-julep

The last drawer simply is Julep and Essie polishes (and a couple other randoms that won't fit in the second drawer). I used to subscribe to the Julep Maven box, but found that the price of the polish was expensive compared to the size of the product you got. I much rather preferred their beauty products. Anyway, this drawer has the most room left because I strictly only buy Essie nail polish now. After all the brands I have tried and owned, I found that my nails will only allow Essie polish to stay on longer than a day. Everything else, does not last longer than 24 hours. I am told that my nails are too oily and won't keep nail polish on. So, the majority of nail polish I apply will just peel off in sheets.

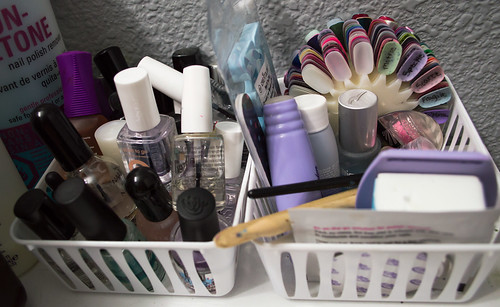
accessories

Up on top of my drawers, are my accessories. I have a modpodge of everything up here. Cuticle pushers, nail files, a stamping kit that I never used, and even swatches. Also here are all my top coats, strengtheners, glossers, bonders and base coats.

So there you have it! While I was organizing everything and had all the polishes sitting on the table, both my husband and I was in disbelief. It is one thing to see them all tucked neatly under the bathroom sink in a set of drawers, but when they take up a huge portion of your dining room table, looking at you in the face, you view them a little differently. Hah!

Wednesday, July 16, 2014

Michelle's Baby Blanket

A friend of mine recently had a baby late last month. I was excited for her, but at the same time... a little jealous because of my lack of ability to have children (as some may know, my husband and I have been trying for almost a year now). She's one of my closest friends I have here, and she has done a lot for me. Such as, photographing my wedding, which was huge.

I don't like to knit for other people. Usually, you know I care about you if I knit something. I will knit the occasional sock for Christmas for a very close family member (Tyler got his first pair of socks last year), but I usually knit things for myself. It's difficult to explain why, though. Everything I make I feel like I put a ton of work into, and a lot of people don't realize how much work goes into knitting. That being said, I need to know that the people I gift handmade knitted items to will appreciate the work put into them.

Michelle has recently become one of the few in my "knitting gift" circle. She loves everything that she receives, has done so much for my husband and I, so I wanted to give something to her to celebrate the beginning of their new baby's life. I decided to make them a baby blanket!

baby-blanket-01

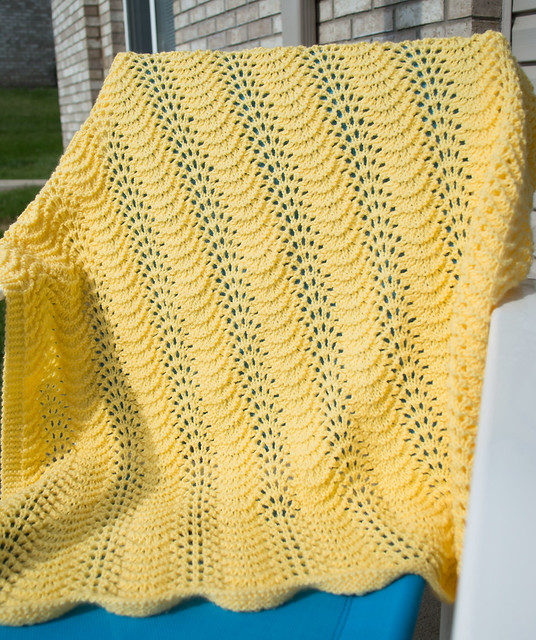
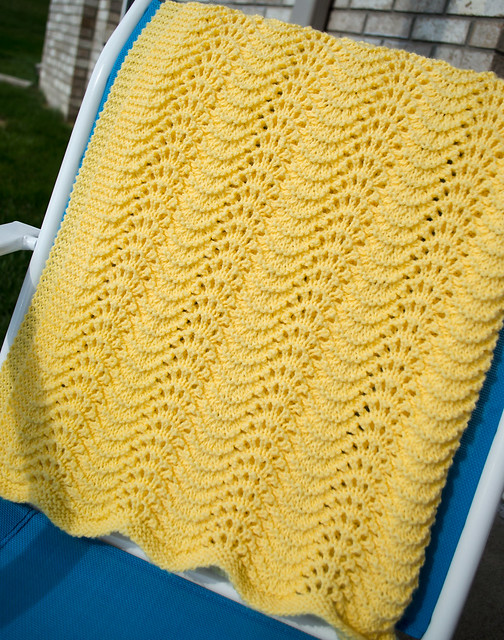
The pattern is just a simple Old Shale pattern found in a stitch dictionary. I wanted to make her something that looked impressive, yet was easy enough to get done in a quick amount of time. I had started this a week before the baby was born, so it needed to be done... quick! I panicked, thinking I wasn't going to be done in time, but after a couple of days of really furious knitting, I finished. I didn't finish before the baby was born, but it was done when I saw her next.

baby-blanket-02

Her and her husband chose not to know the gender of the baby, so I picked out a neutral yellow color. It turned out really pretty! And, she loved the blanket, which definitely made all the furious knitting worth it.

Sunday, July 13, 2014

Amelia At 15 Weeks Progress

Amelia turned 15 weeks this week! She had her final set of puppy vaccinations on Friday, which I was excited about. Those are finally done, so we have been trying to take her out, finally on grass. We have been careful not to take her on strange grass, because I have been terrified about her contracting parvo, or even distemper.

amelia-03

We take her out to potty on the grass outside of our apartment, but when we go for walks elsewhere, we walk out in the street. Occasionally, I come across drivers who have an issue with it (like the grouchy woman who was determined to make her point that I should be on the sidewalk), but I imagine they don't realize that I have a reason for it. So the fact that we can start behaving like a normal dog walking family, and not some obsessing weirdo, is a good thing.

amelia-02

Anyway, we have been having issues with her having loose stools. Every time we visited the vet, we came home with some kind of medication. First it was some medicine that we had to give her in pill form, next, we were given some powder that we were to sprinkle on her food. Neither worked to hardened her stool up. Finally, I decided to switch her food. We switched from Nutro Max Large Breed Puppy to Purina ProPlan Large Breed Puppy. We changed food cold turkey because I thought... How much worse can her poop get? I was glad I did, because almost instantly, we had much more solid poops.

With all the medication she was being put on and the problems with her stool, I was also starting to get even more disappointed with our breeder. I had paid much more money for this puppy than I ever spent on an animal, I expected her to be healthy. However, apparently it was my fault for feeding her food that she didn't like! Oops!

amelia-01

We have successfully got her potty trained with a bell, which is really exciting because that was my number one thing I wanted. I did not want a dog that had accidents in the house. As much as I complained about her "not getting it" when it came to potty training, I think I was extremely lucky in how quickly she picked it up (as opposed to those who struggle for months with potty training). Now that we have been training other things, such as sit and stay, I am coming to the conclusion that yes, she is also very smart. We now know sit, stay, and on occasion, down. We make her sit and stay for food, any kind of treat she gets, and even before we open the door to come in the house from a walk. It has been a difficult road to train her, but I am determined! So far, it has been worth it.
 
 
Blogger Templates