Recently I did a little post on my nails and how I feel about them. They have been through so much with me, as I vowed to never chew my nails again, and the constant battle to make them stronger. Well, one negative thing about my nails is that... I have the hardest time keeping nail polish to stay on for longer than 24 hours. I have a TON of polishes, and I have found I have the best of luck with essie polishes. Well, provided that I reapply top coat every day, and even then I only get three days maximum out of it. That being said, I am constantly on the look out for a polish that can last longer than just a few days. I've been told that my nails are oily, and that is why polish peels off in sheets. It makes sense, but it is still very frustrating.
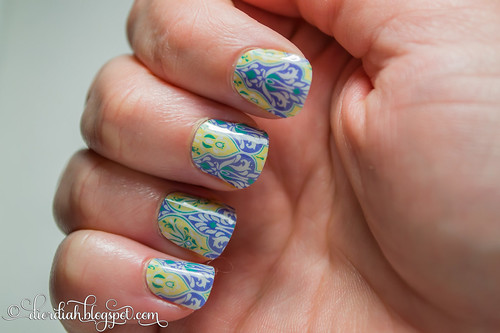
I got my hands on some Jamberry. The idea that they were essentially a sticker that could last for up to three weeks was awesome. I was really excited to try them! I thought they might be the answer to my problem with nail polish - if polish would not stay on, Jamberry might. However, the cost... was way to expensive for me just for daily use. It had to be used for something special.
A few weeks ago, my husband won a "date night" from his work. Where we would have a limo ride, dinner, and a movie. What a perfect opportunity to use the Jamberry that I had been hoarding! All day, I watched videos, read articles and researched the proper way to apply these expensive little stickers, and finally got the courage to put them on. I spent two hours working with them, trying to apply them properly, and was so excited to finally have them on.
They were gorgeous! I loved them, took pictures of them, showed them off to my husband, and I genuinely thought they were the most beautiful things I have ever put on my nails. Until two hours later when I took a shower. I got out of the shower, was running my fingers through my hair, and noticed that my hair got snagged on my nails. Which is never a good thing.
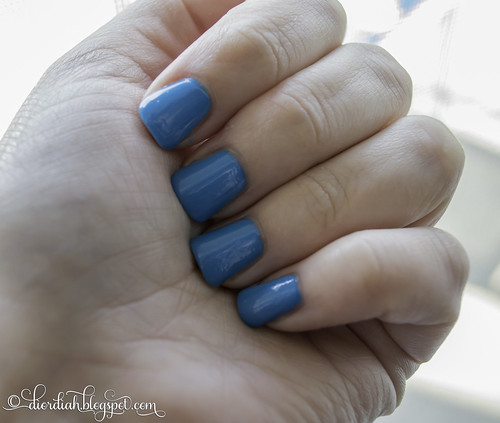
Upon inspection, the whole sticker just peeled right off with hardly any effort on my part. Not just the one either. ALL of them lifted off. I was so heartbroken, I would have been so happy if they had just lasted at least the 24 hours until the date night was over, as that was the whole point of why I put them on. It was completely disappointing. I had to stay up late that night, painting my nails with one of my favorite Different Dimension polishes.
They did not touch my cuticles, or any oils on my skin. I am positive I did nothing wrong, which made the whole experience more irritating. I think I just need to resign myself to the fact that my nails just prefer to be naked.
Showing posts with label beauty. Show all posts
Saturday, May 23, 2015
Wednesday, April 29, 2015
My Nails Today
Once upon a time, I was a serious nail chewer. I had been doing it for as long as I could remember. I never had nails, I'd chew my nails and the skin around them until they bled. On a daily basis. My nails were a serious embarrassment, and every time I went out, or anything, I felt like I needed to hide my fingers. They were horrible looking. Stumpy nails, bleeding hangnails, ugh. The latest photo that I took of my fingers in this state, was when I posted about some knitting projects I made. They looked so terrible then! One day, I decided I did not want to hide my fingers anymore. I made the decision that day to stop chewing on them.
It was difficult to do. I had to consciously pull my fingers out of my mouth most of the time, remind myself to stop. I found that if I kept my nails painted, I was more likely to keep them out of my mouth. Because of this, I bought a lot of nail polish. I was making a good amount of money in a job I hated, so I spent a lot of money on polish. A little while ago, I even took my blog on a tour of my nail polish unit. Taking photos of those, and posting them was just a little embarrassing, I (or my husband) did not realize how much I had... or how much money went towards it.
While I do not buy any nail polish anymore, I definitely accomplished my goal of not chewing on my fingers anymore. It was a long process of keeping my nails painted, making sure my cuticles stayed moisturized to stop the hang nails, and constant reminding myself to keep them away from my face.
I am so proud of my nails now. I never bite on them anymore. At this point, they actually grow so long that I have to trim them all the back down because they get in the way. A few years ago, I never imagined that I would ever have that problem. My current nails are proof to myself that I really can do whatever I set my mind to. I just need to make a decision, and commit to it, like I did with my nails.
It was difficult to do. I had to consciously pull my fingers out of my mouth most of the time, remind myself to stop. I found that if I kept my nails painted, I was more likely to keep them out of my mouth. Because of this, I bought a lot of nail polish. I was making a good amount of money in a job I hated, so I spent a lot of money on polish. A little while ago, I even took my blog on a tour of my nail polish unit. Taking photos of those, and posting them was just a little embarrassing, I (or my husband) did not realize how much I had... or how much money went towards it.
While I do not buy any nail polish anymore, I definitely accomplished my goal of not chewing on my fingers anymore. It was a long process of keeping my nails painted, making sure my cuticles stayed moisturized to stop the hang nails, and constant reminding myself to keep them away from my face.
I am so proud of my nails now. I never bite on them anymore. At this point, they actually grow so long that I have to trim them all the back down because they get in the way. A few years ago, I never imagined that I would ever have that problem. My current nails are proof to myself that I really can do whatever I set my mind to. I just need to make a decision, and commit to it, like I did with my nails.
Saturday, August 2, 2014
Nail Polish Collection
I used to chew on my nails for the majority of my life. It was really bad sometimes because I would chew them down so low that my nail beds would actually bleed. That isn't to mention the horrible, countless hang nails that I would get. After dealing with them for so many years, my new years resolution last year was to simply stop biting on my nails.
I went and got acrylic nails done, thinking it would help me. It kind of did. I did not bite on my nails, but having to pay $20 to get them done every couple of weeks was not going to do it for me. Besides, I wanted real nails. I vowed to let the acrylics grow out, and then work on strengthening my real nails.
Once I removed the fake nails, my real nails were incredibly weak. They were not even breaking because they were so weak, they were bending instead. They had the feel of a drinking straw. It was discouraging. I tried many different strengthening products, spent a lot of money on them. But what worked for me was moisturizing my cuticles with Burt's Bees Cuticle Balm, and the NailTek system. They slowly became stronger.
The biting itself was rather easy to stop, once I really set my mind to it. My theory was that if I kept my nails painted, I could pick off the polish, but not stick my fingers in my mouth. I figured, as long as I was picking polish off, I wasn't destroying my nails. It worked. Eventually, I stopped picking at my polish, and had no interest in biting my nails.
However, once I started buying nail polish, I had trouble stopping. There was always a color that I didn't have, a new collection I didn't have, or a creative glitter that I felt I needed. This lead to a huge explosion of nail polish that I accumulated.
Recently, I found that I had nail polish scattered through the house, and decided to take some time yesterday and reorganize them all back into my shelves. I was shocked at how much it grew since the last time I did this.
So now, I will give you all a peek into the most intimate part of my life... my nail polish collection. It has gotten so overwhelming in the past year and a half that I am almost embarrassed of it. But Anyway, here we go!
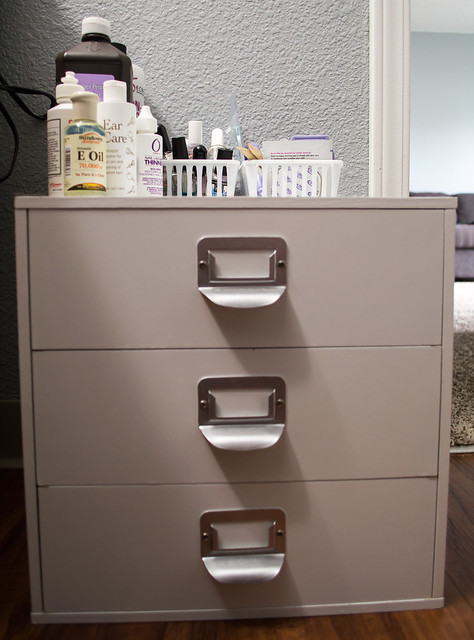
This is what a large portion of the nail polish community call a Melmer. It is basically a drawer storage system that they sell at Michael's and craft stores. I believe it is mainly supposed to be for scrapbooking storage, but it is fantastic size for nail polish bottles. I store all of mine in one of these.
It holds a lot! I really wanted a Helmer from Ikea, which is twice the size, but it would have cost a fortune to get it to me. I would have had it shipped to me.
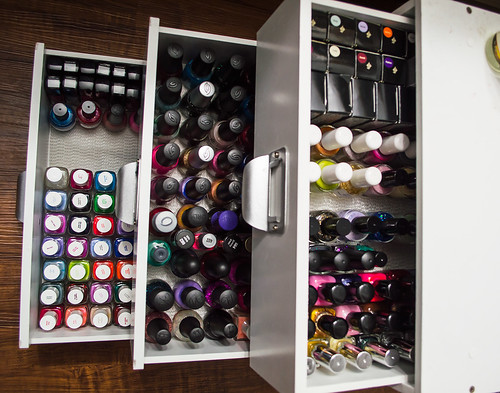
Now, for a closer look into each drawer!
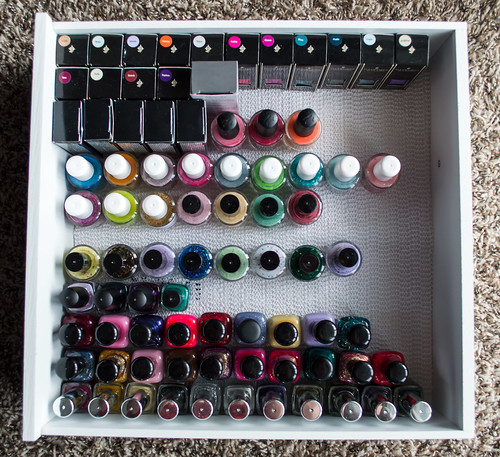
This is the first drawer, which I affectionately call "the fire drawer." Meaning, if the building catches on fire, or some other catastrophe happens, this is the drawer I would pull out and take with me to safety. It holds my more expensive polishes, my indies and other ones that are more difficult to get. Ones that I have ordered from Etsy (such as Different Dimension) and others which I had to jump through hoops to get delivered to the United States (like my A England's and Emily de Molly). A lot of these would be difficult to replace.
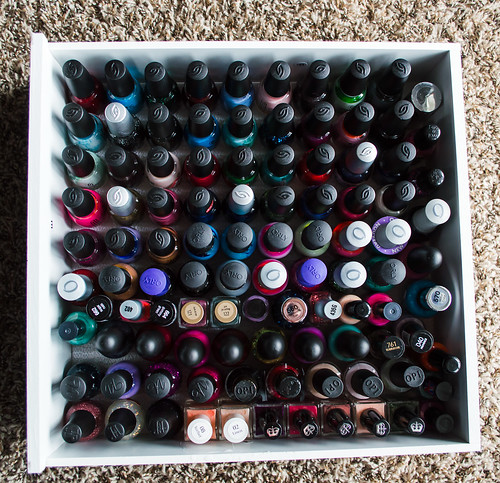
The second drawer is more common ones, ones I picked up on a whim, clearance or sales. There is a lot of China Glaze in here, because the Sally's Beauty Supply near me used to have good sales and I found them on clearance sometimes. I would pick up several at a time.
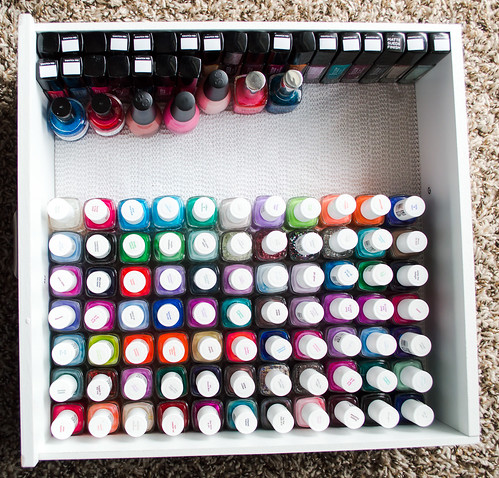
The last drawer simply is Julep and Essie polishes (and a couple other randoms that won't fit in the second drawer). I used to subscribe to the Julep Maven box, but found that the price of the polish was expensive compared to the size of the product you got. I much rather preferred their beauty products. Anyway, this drawer has the most room left because I strictly only buy Essie nail polish now. After all the brands I have tried and owned, I found that my nails will only allow Essie polish to stay on longer than a day. Everything else, does not last longer than 24 hours. I am told that my nails are too oily and won't keep nail polish on. So, the majority of nail polish I apply will just peel off in sheets.
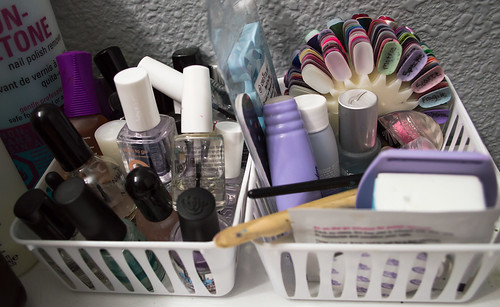
Up on top of my drawers, are my accessories. I have a modpodge of everything up here. Cuticle pushers, nail files, a stamping kit that I never used, and even swatches. Also here are all my top coats, strengtheners, glossers, bonders and base coats.
I went and got acrylic nails done, thinking it would help me. It kind of did. I did not bite on my nails, but having to pay $20 to get them done every couple of weeks was not going to do it for me. Besides, I wanted real nails. I vowed to let the acrylics grow out, and then work on strengthening my real nails.
Once I removed the fake nails, my real nails were incredibly weak. They were not even breaking because they were so weak, they were bending instead. They had the feel of a drinking straw. It was discouraging. I tried many different strengthening products, spent a lot of money on them. But what worked for me was moisturizing my cuticles with Burt's Bees Cuticle Balm, and the NailTek system. They slowly became stronger.
The biting itself was rather easy to stop, once I really set my mind to it. My theory was that if I kept my nails painted, I could pick off the polish, but not stick my fingers in my mouth. I figured, as long as I was picking polish off, I wasn't destroying my nails. It worked. Eventually, I stopped picking at my polish, and had no interest in biting my nails.
However, once I started buying nail polish, I had trouble stopping. There was always a color that I didn't have, a new collection I didn't have, or a creative glitter that I felt I needed. This lead to a huge explosion of nail polish that I accumulated.
Recently, I found that I had nail polish scattered through the house, and decided to take some time yesterday and reorganize them all back into my shelves. I was shocked at how much it grew since the last time I did this.
So now, I will give you all a peek into the most intimate part of my life... my nail polish collection. It has gotten so overwhelming in the past year and a half that I am almost embarrassed of it. But Anyway, here we go!
This is what a large portion of the nail polish community call a Melmer. It is basically a drawer storage system that they sell at Michael's and craft stores. I believe it is mainly supposed to be for scrapbooking storage, but it is fantastic size for nail polish bottles. I store all of mine in one of these.
It holds a lot! I really wanted a Helmer from Ikea, which is twice the size, but it would have cost a fortune to get it to me. I would have had it shipped to me.
Now, for a closer look into each drawer!
This is the first drawer, which I affectionately call "the fire drawer." Meaning, if the building catches on fire, or some other catastrophe happens, this is the drawer I would pull out and take with me to safety. It holds my more expensive polishes, my indies and other ones that are more difficult to get. Ones that I have ordered from Etsy (such as Different Dimension) and others which I had to jump through hoops to get delivered to the United States (like my A England's and Emily de Molly). A lot of these would be difficult to replace.
The second drawer is more common ones, ones I picked up on a whim, clearance or sales. There is a lot of China Glaze in here, because the Sally's Beauty Supply near me used to have good sales and I found them on clearance sometimes. I would pick up several at a time.
The last drawer simply is Julep and Essie polishes (and a couple other randoms that won't fit in the second drawer). I used to subscribe to the Julep Maven box, but found that the price of the polish was expensive compared to the size of the product you got. I much rather preferred their beauty products. Anyway, this drawer has the most room left because I strictly only buy Essie nail polish now. After all the brands I have tried and owned, I found that my nails will only allow Essie polish to stay on longer than a day. Everything else, does not last longer than 24 hours. I am told that my nails are too oily and won't keep nail polish on. So, the majority of nail polish I apply will just peel off in sheets.
Up on top of my drawers, are my accessories. I have a modpodge of everything up here. Cuticle pushers, nail files, a stamping kit that I never used, and even swatches. Also here are all my top coats, strengtheners, glossers, bonders and base coats.
So there you have it! While I was organizing everything and had all the polishes sitting on the table, both my husband and I was in disbelief. It is one thing to see them all tucked neatly under the bathroom sink in a set of drawers, but when they take up a huge portion of your dining room table, looking at you in the face, you view them a little differently. Hah!
Tuesday, June 10, 2014
DIY Lotion Bars
I am finally getting through the pictures that I took for my visit in California! I'm still working on the majority of them, but I also did some DIY projects while I was there. It was much easier to do these beauty DIY things, because my family there literally had most of the stuff on hand. While, I, usally have to buy a lot of the stuff I want to DIY on Pinterest.
So, one thing I did while I was there was made some Lotion Bars. I was eyeballing this recipe forever on Pinterest, and we decided to make some. I took some photos along the way. I probably quickly became the family weirdo, taking photos of the process of making lotion bars. Hah.
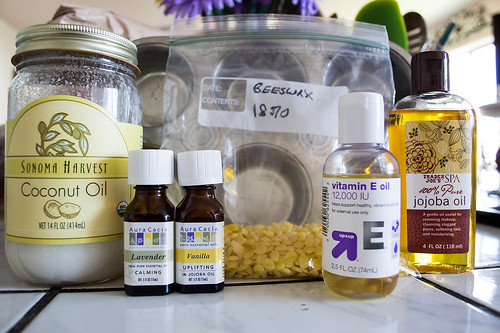
Here's the ingredients we used. Not pictured, but we also used grape seed oil. I had forgotten to include it in the photo. Anyway, grape seed oil, unrefined coconut oil, essential oils (we had Lavender and Vanilla), beeswax, vitamin E oil, and jojoba oil. You'll also need a cupcake pan. We were not sure if this recipe was going to ruin her cupcake tins, so just to be safe, we picked up one from the local Goodwill for 25 cents.
Finding the beeswax was a chore. We had tried Joann's - they didn't carry it. Michaels normally carried it, but they were sold out. We ended up at a local health food store, where they finally had it, sold by the pound. We only picked up half a pound of it, which was plenty for us.
First thing we did was create a double boiler with a large pot and some Pyrex container that she had in her kitchen. It worked out well!
You'll want to mix equal parts together:
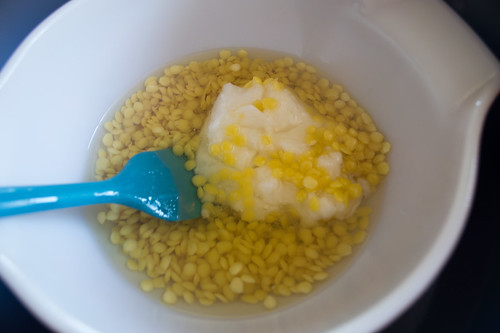
Wait for the mixture to melt completely in the double boiler, which for us, took about 10 or 15 minutes. Once it's a pure liquid, you'll want to add your essential oils, and other things. We did a couple of drops of vanilla and lavender together, then about a teaspoon of each Vitimin E oil, and jojoba oil. Mix it together again, and have the cupcake pan ready.
Start pouring into your cupcake tins! It will probably be messy, and it will be hot! Mine was a mess, but you can't really tell now. I poured mine straight into the cupcake pan, but my particular family member poured hers into cupcake liners that she put in the tins. It's just a matter of preference. I've seen it done with soap molds, and silicone molds.
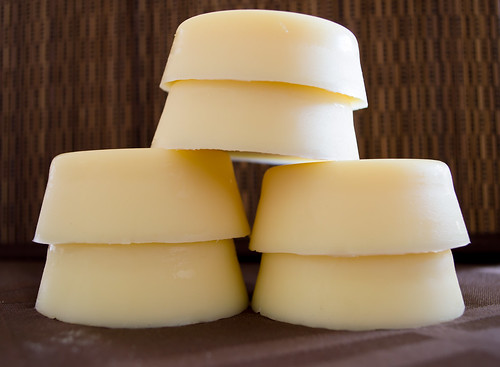
Once they are in the tins, allow to cool completely. I put mine in the refrigerator for about 3 hours. Once hardened, they just popped out of the tin with a little nudge from a butter knife. The 1/2 pound of beeswax we got made about 16 bars, which was not bad at all. My family kept 6, and sent the rest back home with me.
A few notes:
So, one thing I did while I was there was made some Lotion Bars. I was eyeballing this recipe forever on Pinterest, and we decided to make some. I took some photos along the way. I probably quickly became the family weirdo, taking photos of the process of making lotion bars. Hah.
Here's the ingredients we used. Not pictured, but we also used grape seed oil. I had forgotten to include it in the photo. Anyway, grape seed oil, unrefined coconut oil, essential oils (we had Lavender and Vanilla), beeswax, vitamin E oil, and jojoba oil. You'll also need a cupcake pan. We were not sure if this recipe was going to ruin her cupcake tins, so just to be safe, we picked up one from the local Goodwill for 25 cents.
Finding the beeswax was a chore. We had tried Joann's - they didn't carry it. Michaels normally carried it, but they were sold out. We ended up at a local health food store, where they finally had it, sold by the pound. We only picked up half a pound of it, which was plenty for us.
First thing we did was create a double boiler with a large pot and some Pyrex container that she had in her kitchen. It worked out well!
You'll want to mix equal parts together:
- 1/2 cup of grape seed oil
- 1/2 cup of coconut oil
- 1/2 cup of the beeswax pellets
Wait for the mixture to melt completely in the double boiler, which for us, took about 10 or 15 minutes. Once it's a pure liquid, you'll want to add your essential oils, and other things. We did a couple of drops of vanilla and lavender together, then about a teaspoon of each Vitimin E oil, and jojoba oil. Mix it together again, and have the cupcake pan ready.
Start pouring into your cupcake tins! It will probably be messy, and it will be hot! Mine was a mess, but you can't really tell now. I poured mine straight into the cupcake pan, but my particular family member poured hers into cupcake liners that she put in the tins. It's just a matter of preference. I've seen it done with soap molds, and silicone molds.
Once they are in the tins, allow to cool completely. I put mine in the refrigerator for about 3 hours. Once hardened, they just popped out of the tin with a little nudge from a butter knife. The 1/2 pound of beeswax we got made about 16 bars, which was not bad at all. My family kept 6, and sent the rest back home with me.
A few notes:
- These can be really greasy for a while after application. I personally love them right after drying off from a shower, I just wipe the bars on my body and get dressed. My family member, however finds them too greasy, so she applies it before drying off, which works better for her.
- Next time I make these, I think I will sprinkle some lavender buds on the bottom of the mold, so they have a bit more flair in appearance.
Tuesday, April 1, 2014
DIY Face Moisturizer
Yes, I am back with yet, another natural DIY skincare! Before, I blogged about my Green Tea Toner, then again about my Spice Honey Mask. Now, I have my own Facial Moisturizer using only coconut oil, and vitamin E oil.
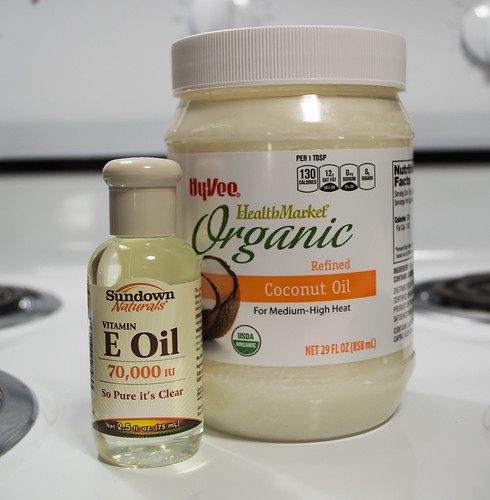
First, I went shopping for coconut oil, not realizing that there was 2 different kinds of coconut oil. There was unrefined (which was almost twice the cost), and a refined. I stood in the isle, Googling on my phone what the difference was.
I concluded that the unrefined was unbleached, has more benefits when cooked, and had more of a coconut smell. however, this was going on my face, and I don't really mind if it's bleached, or smelled like coconut, and I wasn't going to eat it. So I got the cheaper, refined one.
When I was checking out, the cashier mentioned that his daughter makes bread with it. I informed him, proudly, that it was going on my face instead. He looked, baffled, at the woman in line behind me, who then chimed in and said she uses coconut oil on her face too. Woo! I'm not the only crazy person!
I was going to use use the coconut oil by itself, but once I got home and opened the jar... there was no way this was going to be creamy enough for applying, by any stretch of the imagination. So, after Pinteresting, I found this blog post. I definitely used her recipe as a guide, which seemed so much better than the idea I started out with in my head
However, I didn't want to make very much. Since my teenage years, I've been told that I have oily skin, and I should never use oil on my face. Well, this is two different kinds of straight oil. It made me nervous, and I don't want to go making this large batch of face moisturizer that I'm not going to like. So, I started off small.
My mixture was as follows:
Even with that amount, I was still terrified that I was making too much. But I went on.
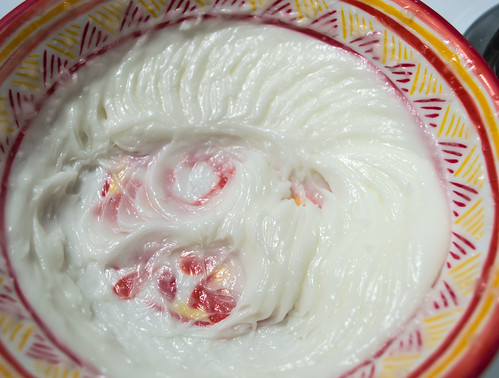
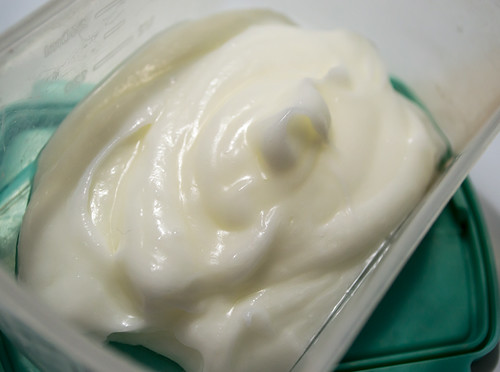
I don't have a stand mixer, or anything, so I used my hand mixer. I mixed it for a total of 7 minutes. And that's what I ended up with. It's got a lotion-like consistency, until touched. Once touched, it turns into oil.
I spooned it into a container, as my end result. It turned out really nice, actually a lot like face lotion. I would like to eventually put this in a baby food container of some kind, I think that size of that container would be the perfect amount to make at a time, and be small enough to keep in the bathroom.
I used it the next day, and have learned a few things since.
I've only been using it for a little while, so I haven't really seen any drastic results, but my face definitely feels more moisturized, and I haven't had any new pimples pop up since I have been using my DIY skincare routine.
First, I went shopping for coconut oil, not realizing that there was 2 different kinds of coconut oil. There was unrefined (which was almost twice the cost), and a refined. I stood in the isle, Googling on my phone what the difference was.
I concluded that the unrefined was unbleached, has more benefits when cooked, and had more of a coconut smell. however, this was going on my face, and I don't really mind if it's bleached, or smelled like coconut, and I wasn't going to eat it. So I got the cheaper, refined one.
When I was checking out, the cashier mentioned that his daughter makes bread with it. I informed him, proudly, that it was going on my face instead. He looked, baffled, at the woman in line behind me, who then chimed in and said she uses coconut oil on her face too. Woo! I'm not the only crazy person!
I was going to use use the coconut oil by itself, but once I got home and opened the jar... there was no way this was going to be creamy enough for applying, by any stretch of the imagination. So, after Pinteresting, I found this blog post. I definitely used her recipe as a guide, which seemed so much better than the idea I started out with in my head
However, I didn't want to make very much. Since my teenage years, I've been told that I have oily skin, and I should never use oil on my face. Well, this is two different kinds of straight oil. It made me nervous, and I don't want to go making this large batch of face moisturizer that I'm not going to like. So, I started off small.
My mixture was as follows:
- 1/2 cup of coconut oil
- 1 Teaspoon of vitamin E
Even with that amount, I was still terrified that I was making too much. But I went on.
I don't have a stand mixer, or anything, so I used my hand mixer. I mixed it for a total of 7 minutes. And that's what I ended up with. It's got a lotion-like consistency, until touched. Once touched, it turns into oil.
I spooned it into a container, as my end result. It turned out really nice, actually a lot like face lotion. I would like to eventually put this in a baby food container of some kind, I think that size of that container would be the perfect amount to make at a time, and be small enough to keep in the bathroom.
I used it the next day, and have learned a few things since.
- I refrigerated it right away. I keep the apartment rather cool in the winter, our thermostat is usually around 70 degrees. Not a good idea. When I wanted to use it, it was hard and still difficult to get out of the container. I will leave this out in the bathroom, until it gets hotter outside, then I'll probably refrigerate it.
- First time I used it, I used waaay too much. My face felt like an oil slick for the majority of the day. It was gross and I kept wiping my face all day long to get some off. Since then, I only just use a TINY bit. I mean.... tiny. It works out so much better. After applying, my face feels oily for about 5 or 10 minutes, while it absorbs, but after that, it feels better on the face.
- I feel like it is super-important to wash my face before applying this and before going to bed. I don't also suggest to use this at night, because it will get on your sheets and pillowcase. Also, night time is when your face replenishes itself, so adding cream or treatment at night, I don't think is a good idea. (At least for my face.)
- For me, I found that I probably shouldn't try to re-apply during the day. At one point a few days ago, my face felt a little dry about mid-day, so I added just a tiny bit more on my face. Afterward, I had the same issue as when I applied too much. Note to self: Once a day is good.
I've only been using it for a little while, so I haven't really seen any drastic results, but my face definitely feels more moisturized, and I haven't had any new pimples pop up since I have been using my DIY skincare routine.
Sunday, March 30, 2014
DIY Spice Face Mask
Okay, so my last post where I explained my issues with acne throughout my life, and my quest to conquer it. Like I mentioned in my previous post, I have been washing my face with only raw honey, morning and night, but once a week, I use a special concoction of spices and honey.
My recent regimen seems to be working really well for me, it's making my face look so much better with every day I use it. Anyway! Moving on to my face mask recipe.
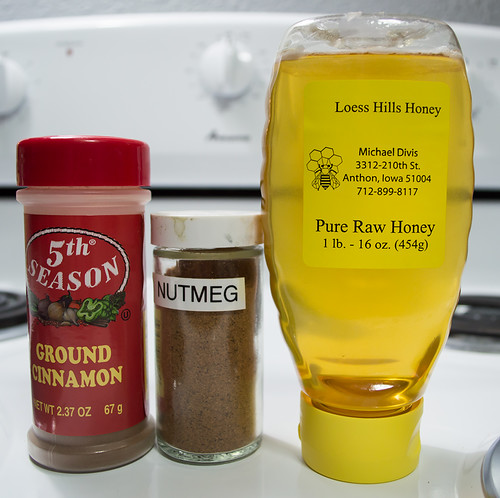
These are my ingredients. The ground cinnamon is like an anti-bacterial, the nutmeg is supposed to face acne scars, and the honey, well, is a fantastic skin soother and cleanser.
I also add one drop of water to mine. I turn on my kitchen facet until the water runs warm, then turn it almost off to where it drips. One drop does the trick to make it smoother to apply on my face.
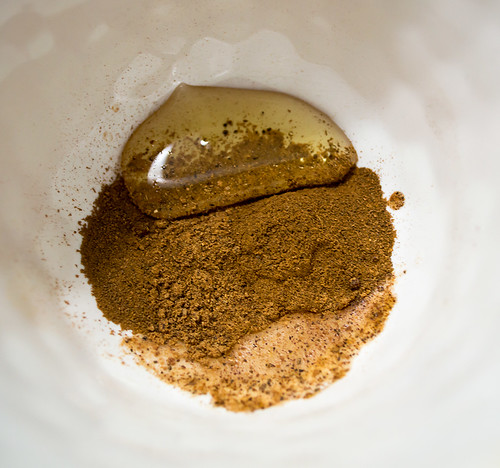
Here's my concoction before I mix it. The raw honey, spices, and my one drop of water.
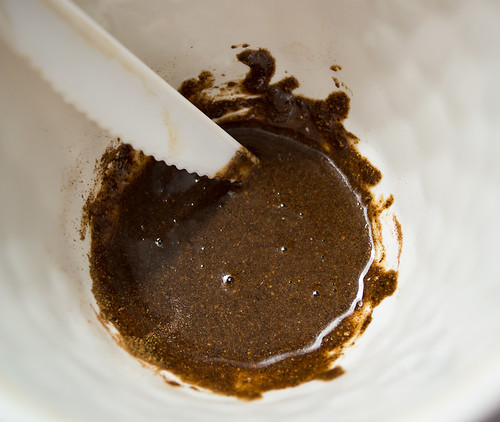
And here it is all mixed together, I like to use a plastic knife. Looks weird, right? Mine looks like a syrup-y paste when I'm done mixing. I don't know if it is supposed to be that kind of consistency, but it works for me. My husband laughs at me whenever I start putting it on my face.
I just use my fingers, take a glob of it and start putting it on my face. Once my face is covered with it, I let it sit for about 30 minutes, then rinse off with warm water (I'm apparently really messy with rinsing it off my face, because this gets everywhere. If you're like me, put a old hand towel or something down before rinsing). Follow with toner afterward.
A note: Try not to scrub this in your face. With the spices, it is important to just gently apply them, because this can be quite coarse on the skin if you scrub too hard.
I did also take a photo of what this stuff looks like on my face, but I'll spare my readers the horror of looking at that. So I won't post it.
My recent regimen seems to be working really well for me, it's making my face look so much better with every day I use it. Anyway! Moving on to my face mask recipe.
These are my ingredients. The ground cinnamon is like an anti-bacterial, the nutmeg is supposed to face acne scars, and the honey, well, is a fantastic skin soother and cleanser.
- 1 Tablespoon of RAW honey (It has to be raw honey, bought from a health food store. I live in Iowa here, and got mine from my local HyVee's heath food section. This company is also at the farmer's market once that starts up again. To be safe, if it doesn't say raw, don't use it.). I also just kind of eyeball how much honey I might need to cover my face.
- 1/2 Teaspoon of nutmeg
- 1/2 teaspoon of cinnamon
I also add one drop of water to mine. I turn on my kitchen facet until the water runs warm, then turn it almost off to where it drips. One drop does the trick to make it smoother to apply on my face.
Here's my concoction before I mix it. The raw honey, spices, and my one drop of water.
And here it is all mixed together, I like to use a plastic knife. Looks weird, right? Mine looks like a syrup-y paste when I'm done mixing. I don't know if it is supposed to be that kind of consistency, but it works for me. My husband laughs at me whenever I start putting it on my face.
I just use my fingers, take a glob of it and start putting it on my face. Once my face is covered with it, I let it sit for about 30 minutes, then rinse off with warm water (I'm apparently really messy with rinsing it off my face, because this gets everywhere. If you're like me, put a old hand towel or something down before rinsing). Follow with toner afterward.
A note: Try not to scrub this in your face. With the spices, it is important to just gently apply them, because this can be quite coarse on the skin if you scrub too hard.
I did also take a photo of what this stuff looks like on my face, but I'll spare my readers the horror of looking at that. So I won't post it.
Wednesday, March 26, 2014
DIY Green Tea Toner
I am currently at a point in my life, where I am exhausted from dealing with acne. It has always been a problem since I was a teenager. I always thought that once I got older, it would go away. I am now 28 years old, and I am still battling it on a daily basis. I tell you, it's exhausting to have acne so bad that make-up won't even cover it, at my age.
I have tried practically every product on the market, from Neutrogena, Clinique, Proactiv. Different kinds of toners, creams, cleansers and moisturizers. Nothing seems to work. So, now I am at the point where, I am thinking I need to re-evaluate what I am putting on my face.
That being said, I have decided to stop putting chemicals on my face, and try going natural with my acne solutions. I did research of what things are good for your face, and have come up with a toner, that I whipped up a couple nights ago.
This is just my solution, one that I am trying right now. Keep in mind, as you read this, it is still a new-to-my-face recipe that I'm working on.
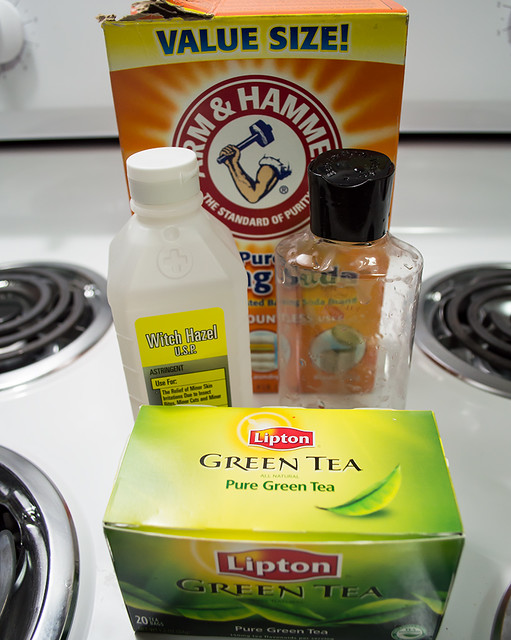
These are my current ingredients for my toner. I use about a teaspoon of baking soda, because I hear it is good for the face (and frankly, I put baking soda in everything now). Witch hazel, from my research, is a plant extract, this is a good astringent, and will cleanse the pores out pretty well and has anti-oxidants. And, green tea, for calming my sad, irritated skin (which also has anti-oxidants, as well). Also, I have a bottle to put it all in. All I had was my husband's body wash container, that was promptly cleaned out well.
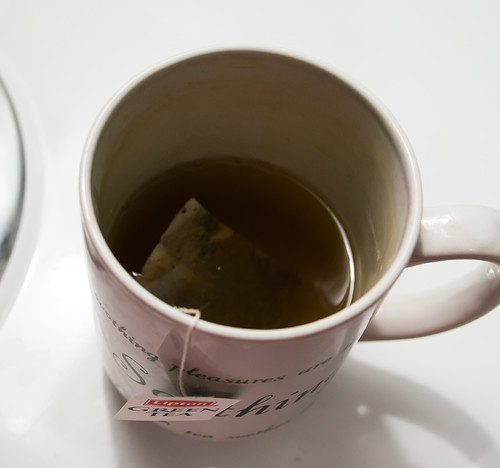
First step was brewing the tea. I just brewed my green tea as normal, as if I was going to drink it. Don't mind my stained, Dollar Tree mug. It's very well used.
So, the amount of ingredients I used:
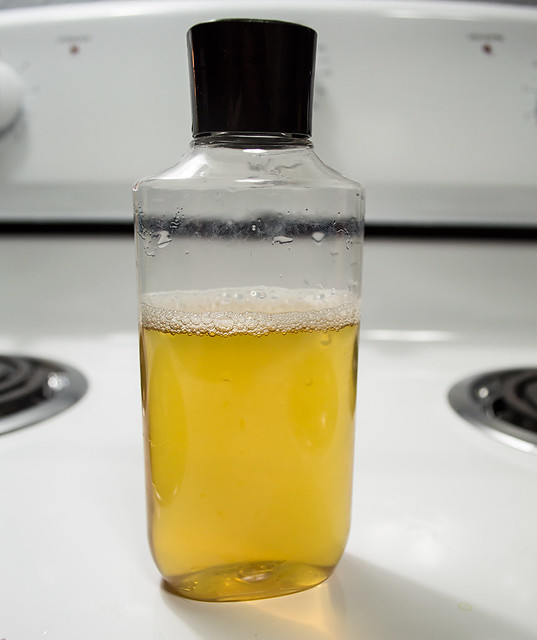
I poured my ingredients into the container and shook it up pretty well to dissolve the baking soda and mix everything together. This container should be kept in the refrigerator, and will be good for up to 2 weeks.
I've been using it for a couple days now. I've ditched my old facial cleanser, and toner, and am now using RAW honey to cleanse my face (I rub it on and let it set for a half hour), then follow by applying the toner to my face with a cotton ball.
It's so far, surprisingly going well! It's boggling to me that my face can actually feel clean, without squeaking. Literally, the things I have been using, strips my face of so much oil that my face is squeaky. But this, my face feels moisturized, yet clean. And it feels great. The better news is that: I haven't noticed any new breakouts since I've been using it, and my face is definitely appearing less red. Which is awesome.
A few notes, mainly for myself:
Hopefully, my face will look fabulous by the time I go back home to California for a couple of weeks in May!
I have tried practically every product on the market, from Neutrogena, Clinique, Proactiv. Different kinds of toners, creams, cleansers and moisturizers. Nothing seems to work. So, now I am at the point where, I am thinking I need to re-evaluate what I am putting on my face.
That being said, I have decided to stop putting chemicals on my face, and try going natural with my acne solutions. I did research of what things are good for your face, and have come up with a toner, that I whipped up a couple nights ago.
This is just my solution, one that I am trying right now. Keep in mind, as you read this, it is still a new-to-my-face recipe that I'm working on.
These are my current ingredients for my toner. I use about a teaspoon of baking soda, because I hear it is good for the face (and frankly, I put baking soda in everything now). Witch hazel, from my research, is a plant extract, this is a good astringent, and will cleanse the pores out pretty well and has anti-oxidants. And, green tea, for calming my sad, irritated skin (which also has anti-oxidants, as well). Also, I have a bottle to put it all in. All I had was my husband's body wash container, that was promptly cleaned out well.
First step was brewing the tea. I just brewed my green tea as normal, as if I was going to drink it. Don't mind my stained, Dollar Tree mug. It's very well used.
So, the amount of ingredients I used:
- 1/2 cup of Witch Hazel
- 1/2 cup of brewed green tea
- 1 teaspoon of baking soda
I poured my ingredients into the container and shook it up pretty well to dissolve the baking soda and mix everything together. This container should be kept in the refrigerator, and will be good for up to 2 weeks.
I've been using it for a couple days now. I've ditched my old facial cleanser, and toner, and am now using RAW honey to cleanse my face (I rub it on and let it set for a half hour), then follow by applying the toner to my face with a cotton ball.
It's so far, surprisingly going well! It's boggling to me that my face can actually feel clean, without squeaking. Literally, the things I have been using, strips my face of so much oil that my face is squeaky. But this, my face feels moisturized, yet clean. And it feels great. The better news is that: I haven't noticed any new breakouts since I've been using it, and my face is definitely appearing less red. Which is awesome.
A few notes, mainly for myself:
- I read that using unfiltered apple cider vinegar works well, in place of the witch hazel. (Though, for me, I was very nervous to spend $7 on it when I wasn't sure how well this DIY would turn out in the first place). If this works well for me, I will likely spend the extra money and purchase the organic apple cider vinegar. the witch hazel was a little more do-able because it was only about $1.50.
- For acne, a couple drops of tea tree oil is supposed to do really well in a toner. I fully intend to purchase some and try that out in my toner as well.
- Once this is taken out of the refrigerator for use, it needs a little shaking up to re-mix everything, I have noticed.
Hopefully, my face will look fabulous by the time I go back home to California for a couple of weeks in May!
Subscribe to:
Posts (Atom)