Social Icons

Showing posts with label Health. Show all posts

Monday, April 27, 2015

Jawbone Up

As the weather is warming up, and Amelia growing to be such a large dog, I have been wanting to take her out for walks, to burn off some of her energy, and possibly work on getting me slightly more in shape than what I am. At least, once her heat is over. I have also purchased her a Easy Walk Harness, because her Gentle Leader is no longer working for us at all. She pulls way to hard still, even with the gentle leader on - so hard that she's wounding her under eye area. Here's hoping that the harness works better for her!

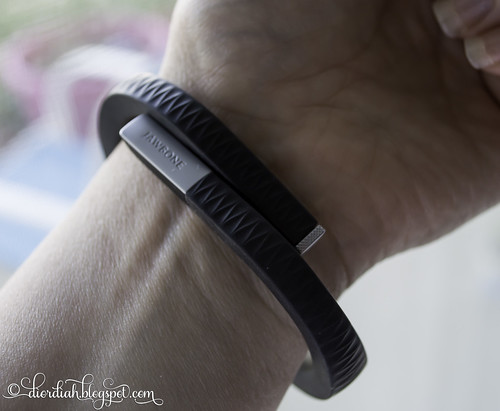
Yesterday, my husband returned home with a new little fitness gadget that will hopefully be awesome with me walking Amelia. He got a Jawbone Up from someone who did not want it anymore. Last night I did a lot of research about it, and it seems to be something similar to the Fitbit, which I have been wanting.

Jawbone Up

I set it up, got the app downloaded onto my phone, and got my account all up and running. I amm very excited to use this new to me gadget! It seems that it can be a pedometer, fitness tracker, and can even track sleeping habits. From what I have read, it seems to be very good in giving true data. We will see.

I see a lot of fun adventuring with this thing!

Tuesday, April 1, 2014

DIY Face Moisturizer

Yes, I am back with yet, another natural DIY skincare! Before, I blogged about my Green Tea Toner, then again about my Spice Honey Mask. Now, I have my own Facial Moisturizer using only coconut oil, and vitamin E oil.

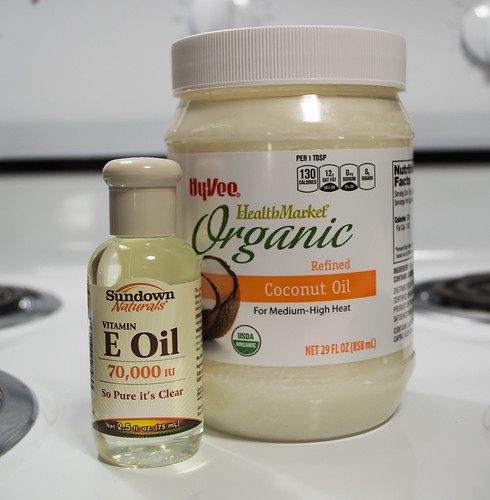
First, I went shopping for coconut oil, not realizing that there was 2 different kinds of coconut oil. There was unrefined (which was almost twice the cost), and a refined. I stood in the isle, Googling on my phone what the difference was.

I concluded that the unrefined was unbleached, has more benefits when cooked, and had more of a coconut smell. however, this was going on my face, and I don't really mind if it's bleached, or smelled like coconut, and I wasn't going to eat it. So I got the cheaper, refined one.

When I was checking out, the cashier mentioned that his daughter makes bread with it. I informed him, proudly, that it was going on my face instead. He looked, baffled, at the woman in line behind me, who then chimed in and said she uses coconut oil on her face too. Woo! I'm not the only crazy person!

I was going to use use the coconut oil by itself, but once I got home and opened the jar... there was no way this was going to be creamy enough for applying, by any stretch of the imagination. So, after Pinteresting, I found this blog post. I definitely used her recipe as a guide, which seemed so much better than the idea I started out with in my head

moisturizer-ingredients

However, I didn't want to make very much. Since my teenage years, I've been told that I have oily skin, and I should never use oil on my face. Well, this is two different kinds of straight oil. It made me nervous, and I don't want to go making this large batch of face moisturizer that I'm not going to like. So, I started off small.

My mixture was as follows:
  • 1/2 cup of coconut oil
  • 1 Teaspoon of vitamin E

Even with that amount, I was still terrified that I was making too much. But I went on.

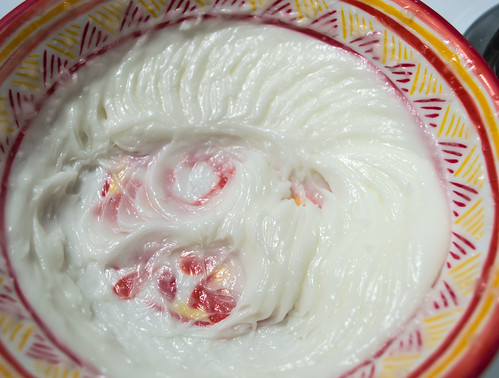
moisturizer-mixed

I don't have a stand mixer, or anything, so I used my hand mixer. I mixed it for a total of 7 minutes. And that's what I ended up with. It's got a lotion-like consistency, until touched. Once touched, it turns into oil.

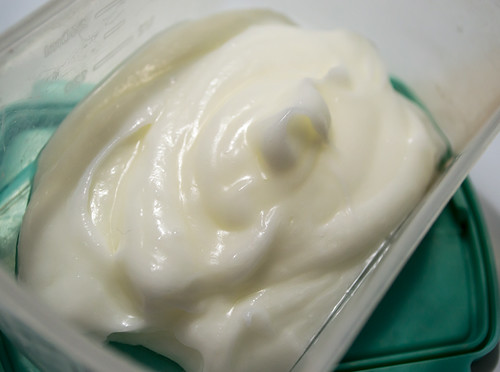
moisturizer-done

I spooned it into a container, as my end result. It turned out really nice, actually a lot like face lotion. I would like to eventually put this in a baby food container of some kind, I think that size of that container would be the perfect amount to make at a time, and be small enough to keep in the bathroom.

I used it the next day, and have learned a few things since.
  • I refrigerated it right away. I keep the apartment rather cool in the winter, our thermostat is usually around 70 degrees. Not a good idea. When I wanted to use it, it was hard and still difficult to get out of the container. I will leave this out in the bathroom, until it gets hotter outside, then I'll probably refrigerate it.
  • First time I used it, I used waaay too much. My face felt like an oil slick for the majority of the day. It was gross and I kept wiping my face all day long to get some off. Since then, I only just use a TINY bit. I mean.... tiny. It works out so much better. After applying, my face feels oily for about 5 or 10 minutes, while it absorbs, but after that, it feels better on the face.
  • I feel like it is super-important to wash my face before applying this and before going to bed. I don't also suggest to use this at night, because it will get on your sheets and pillowcase. Also, night time is when your face replenishes itself, so adding cream or treatment at night, I don't think is a good idea. (At least for my face.)
  • For me, I found that I probably shouldn't try to re-apply during the day. At one point a few days ago, my face felt a little dry about mid-day, so I added just a tiny bit more on my face. Afterward, I had the same issue as when I applied too much. Note to self: Once a day is good.

I've only been using it for a little while, so I haven't really seen any drastic results, but my face definitely feels more moisturized, and I haven't had any new pimples pop up since I have been using my DIY skincare routine.

Sunday, March 30, 2014

DIY Spice Face Mask

Okay, so my last post where I explained my issues with acne throughout my life, and my quest to conquer it. Like I mentioned in my previous post, I have been washing my face with only raw honey, morning and night, but once a week, I use a special concoction of spices and honey.

My recent regimen seems to be working really well for me, it's making my face look so much better with every day I use it. Anyway! Moving on to my face mask recipe.

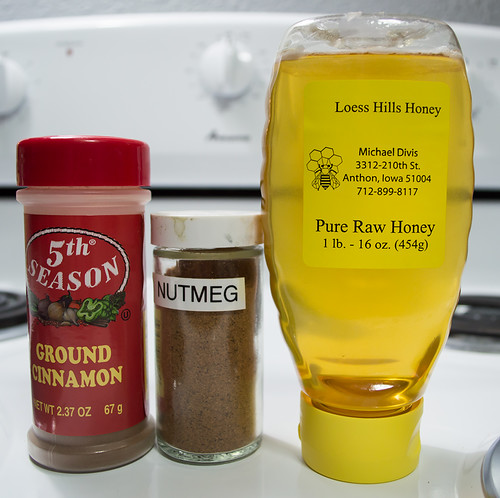
honey-mask-ingredients

These are my ingredients. The ground cinnamon is like an anti-bacterial, the nutmeg is supposed to face acne scars, and the honey, well, is a fantastic skin soother and cleanser.

  • 1 Tablespoon of RAW honey (It has to be raw honey, bought from a health food store. I live in Iowa here, and got mine from my local HyVee's heath food section. This company is also at the farmer's market once that starts up again. To be safe, if it doesn't say raw, don't use it.). I also just kind of eyeball how much honey I might need to cover my face.
  • 1/2 Teaspoon of nutmeg
  • 1/2 teaspoon of cinnamon

I also add one drop of water to mine. I turn on my kitchen facet until the water runs warm, then turn it almost off to where it drips. One drop does the trick to make it smoother to apply on my face.

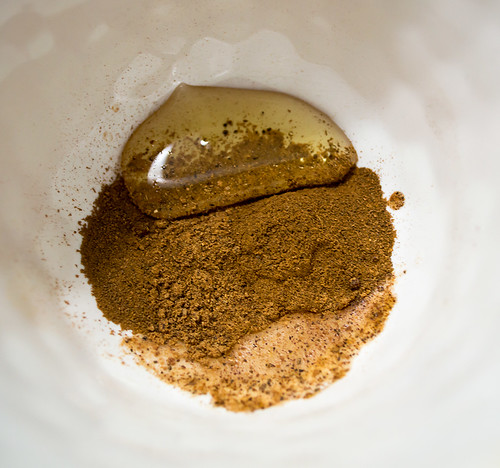
honey-mask-inbowl

Here's my concoction before I mix it. The raw honey, spices, and my one drop of water.


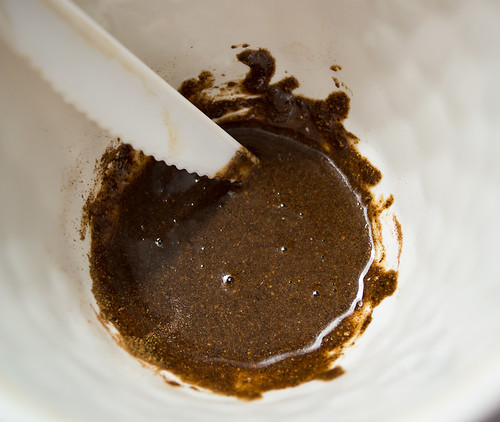
honey-mask-mixed

And here it is all mixed together, I like to use a plastic knife. Looks weird, right? Mine looks like a syrup-y paste when I'm done mixing. I don't know if it is supposed to be that kind of consistency, but it works for me. My husband laughs at me whenever I start putting it on my face.

I just use my fingers, take a glob of it and start putting it on my face. Once my face is covered with it, I let it sit for about 30 minutes, then rinse off with warm water (I'm apparently really messy with rinsing it off my face, because this gets everywhere. If you're like me, put a old hand towel or something down before rinsing). Follow with toner afterward.

A note: Try not to scrub this in your face. With the spices, it is important to just gently apply them, because this can be quite coarse on the skin if you scrub too hard.

I did also take a photo of what this stuff looks like on my face, but I'll spare my readers the horror of looking at that. So I won't post it.

Wednesday, March 26, 2014

DIY Green Tea Toner

I am currently at a point in my life, where I am exhausted from dealing with acne. It has always been a problem since I was a teenager. I always thought that once I got older, it would go away. I am now 28 years old, and I am still battling it on a daily basis. I tell you, it's exhausting to have acne so bad that make-up won't even cover it, at my age.

I have tried practically every product on the market, from Neutrogena, Clinique, Proactiv. Different kinds of toners, creams, cleansers and moisturizers. Nothing seems to work. So, now I am at the point where, I am thinking I need to re-evaluate what I am putting on my face.

That being said, I have decided to stop putting chemicals on my face, and try going natural with my acne solutions. I did research of what things are good for your face, and have come up with a toner, that I whipped up a couple nights ago.

This is just my solution, one that I am trying right now. Keep in mind, as you read this, it is still a new-to-my-face recipe that I'm working on.

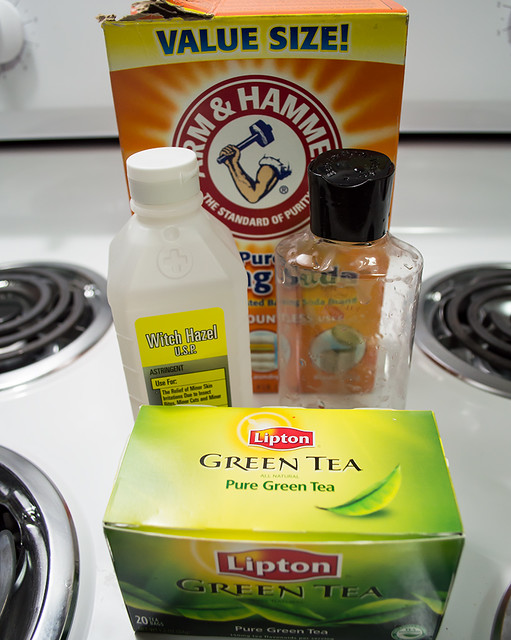
diy-toner-ingredients

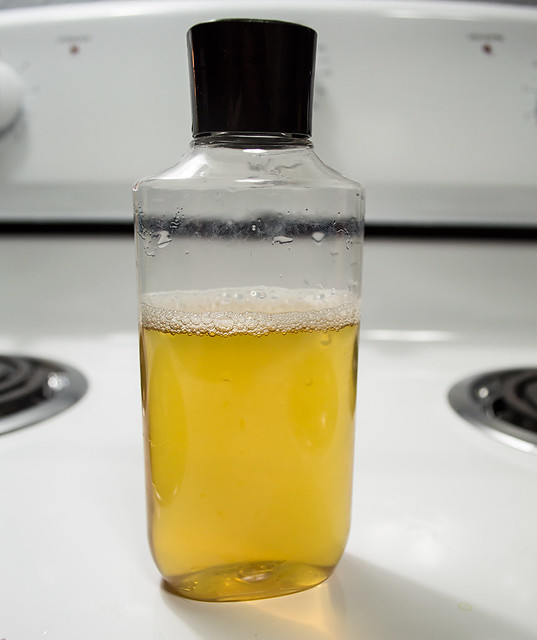
These are my current ingredients for my toner. I use about a teaspoon of baking soda, because I hear it is good for the face (and frankly, I put baking soda in everything now). Witch hazel, from my research, is a plant extract, this is a good astringent, and will cleanse the pores out pretty well and has anti-oxidants. And, green tea, for calming my sad, irritated skin (which also has anti-oxidants, as well). Also, I have a bottle to put it all in. All I had was my husband's body wash container, that was promptly cleaned out well.

diy-toner-brewedtea

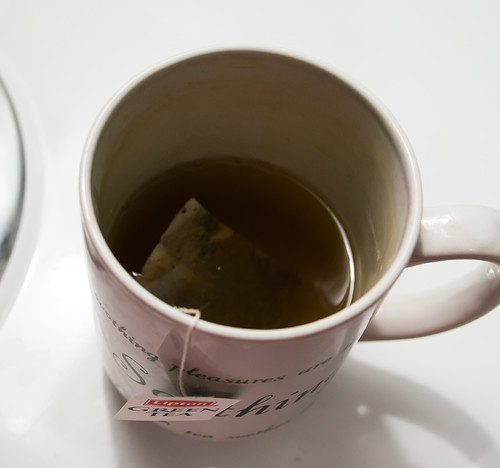
First step was brewing the tea. I just brewed my green tea as normal, as if I was going to drink it. Don't mind my stained, Dollar Tree mug. It's very well used.

So, the amount of ingredients I used:
  • 1/2 cup of Witch Hazel
  • 1/2 cup of brewed green tea
  • 1 teaspoon of baking soda

I poured my ingredients into the container and shook it up pretty well to dissolve the baking soda and mix everything together. This container should be kept in the refrigerator, and will be good for up to 2 weeks.

diy-toner

I've been using it for a couple days now. I've ditched my old facial cleanser, and toner, and am now using RAW honey to cleanse my face (I rub it on and let it set for a half hour), then follow by applying the toner to my face with a cotton ball.

It's so far, surprisingly going well! It's boggling to me that my face can actually feel clean, without squeaking. Literally, the things I have been using, strips my face of so much oil that my face is squeaky. But this, my face feels moisturized, yet clean. And it feels great. The better news is that: I haven't noticed any new breakouts since I've been using it, and my face is definitely appearing less red. Which is awesome.

A few notes, mainly for myself:
  • I read that using unfiltered apple cider vinegar works well, in place of the witch hazel. (Though, for me, I was very nervous to spend $7 on it when I wasn't sure how well this DIY would turn out in the first place). If this works well for me, I will likely spend the extra money and purchase the organic apple cider vinegar. the witch hazel was a little more do-able because it was only about $1.50.
  • For acne, a couple drops of tea tree oil is supposed to do really well in a toner. I fully intend to purchase some and try that out in my toner as well. 
  • Once this is taken out of the refrigerator for use, it needs a little shaking up to re-mix everything, I have noticed.

Hopefully, my face will look fabulous by the time I go back home to California for a couple of weeks in May!

Saturday, December 15, 2012

Diabetic Lunches

So, in the month that I have not been blogging, a lot of.... stuff has happened. I got a very painful urinary tract infection that would not go away, so I found myself at the urgent care clinic. When I was there, they gave me medication for my infection, and told me that I was diabetic. Now, diabetes runs in my family, and my grandmother died of it. So, I knew it was just a matter of time before I was going to come up with it. I never thought I would get it so soon though. But now I have it, and there is no going back, I suppose. We literally spent the majority of that Monday at the clinic, being pushed from doctor, to nutritionist, to the financial department. It was a horrible experience. I was unemployed, with no money, so being diabetic, I know is going to cost a fortune. My next doctor's appointment, 2 weeks later, coast us over $200. When we went to the grocery store the next time, I cringed at the cost of healthier foods. Just getting whole wheat bread cost almost 75 cents more. It doesn't seem like much but you add it up on everything, it really amounts.

Luckily, the fiance seems to be understanding with my diabetic issues. He raises no issues with the cost, and even sacrifices some of the things he wants from the store, just so I could get my sugar-free necessities. It was hard, looking at all the labels of the food I enjoy, seeing how many carbs they have. I looked at a Sprite bottle, and it was 64 grams of carbs! A limit for an entire meal I can eat is only 60 carbs. It was an eye opener. I got as many sugar free things I could, but still tried to maintain the foods I love to eat. I still have a lot of work to do, but I have my successes. I have trouble saying no to fast food, Red Robin, and some things, but on the other hand, I have successfully cut out my sugary drinks, which was a HUGE thing for me. I would drink a 52 ounce soda in just four hours, which I could never do again. Instead, I found that diet soda does not taste all that bad, and unsweetened tea with Splenda isn't bad either. I've switched my coffee creamer to sugar free, and the sugar in my coffee to Splenda. So, I'm trying to work on it.

However, lunches. I recently started working full time, and the lure of vending machines and the food place on site look really good. I sit with co-workers who order burgers, hash browns, tuna melts, and I'm usually caught, staring longing at their food. I've been offered chocolate, cookies, candy, and I force myself to say no. So, I've been eating a small breakfast, and fixing my lunch before I leave home every morning. The night before, I will take my fruit (which for now, are usually raspberries, or strawberries), and put them in a cup. I save all the those little condiment cups I get from restaurant to-go orders and planned on using them for my African violets - but they are even more awesome for lunch packing, too! I'll then take out a can of diet soda, for now, I'm drinking diet 7-up, because it was cheapest at the store. Also, I'll mix up some tuna salad, and put it in bowl in the refrigerator. I'll gather up my vegetable, in this case, carrots, and put them in a container, and put some hummus in a condiment cup to dip my carrots in. Right before I go to bed, I get my coffee ready and put the water in the machine, so all I have to do is turn it on in the morning.

lunch

When I wake up the next morning, I'll bathe, dress and if I have time, eat a yogurt while my hair dries. If I don't, then I pack a granola bar into my bag and eat it at work. So, before I go out the door, I fix my coffee, put the tuna salad on some bread, pack everything in the lunch bag, and that's it. So much nicer than eating all those carbs at work.What is nice, is that where I'm working, I can have soda and my coffee at my desk, and I can have little snacks. So if I don't eat all my carrots at lunch, I can eat them at my desk later if I get hungry... instead of going to the vending machines and buying Doritos. My lunch is filling though, and I am usually good until dinnertime.

Moving to another subject, Yes! I finally got a job! I looked for a job for a while, and couldn't find one. When retail around here started hiring for the holidays, I jumped on it as soon as I could. I had a phone interview at one place, and a group interview at another. I was not good enough for either. I was depressed and stopped looking. After being told I was diabetic though, I knew I was going to need money for medical care, prescriptions, and healthier food, so I applied at one more place. The place I wasn't really excited about. I applied at the company Tyler worked at. I was hired on the spot, and was told I was "too good to be true". For the past couple weeks, I have been in crazy intensive training, and finally start the actual job on Monday. I am terrified, but kind of excited. They offer really good medical, dental, and vision plans, and they even provide a 401K.
 
 
Blogger Templates