Lately, I have been getting into a new hobby, called
smash booking. Or, junk journaling. Over the past couple weeks, I have spent quite a bit of money buying supplies and getting ready to start actually creating. Smash booking, is what I like to think of as scrapbooking, without all the photos. It focuses less on pictures, but more on embellishments, or whatever else you want to "smash" into the book.
In my quest to buy supplies for this new thing, I came across something called
Washi Tape. This is like a low-tack tape that is decorative, perfect for smashbooking. However, the price... Makes me cringe every time I come across it. For a little roll,the price is at least $3. Sure,it doesn't sound like much, but when you have at least 4 different patterns that you feel you can't leave the store without... It adds up. So, my cheap self, decided to find a way to make my own. I googled, and came across a video. I wish I would have saved the link, because it was really helpful. (If anyone knows the video where this tutorial came from, please let me know!).
I took photos of the process of how I made my own washi tape. It was rather easy, but quite time consuming. However, I love being able to find any kind of paper I like, and be able to make tape out of it. Will be great for unique projects, where you just can't find the right kind of washi tape for. Anyway, on to the photos!
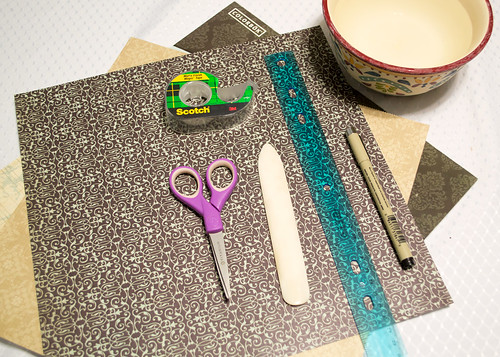
These are the supplies you will need.
- A ruler. Instead of the ruler and pen, you can use a paper cutter if you have one. I didn't, so I took the time to measure the paper out with a ruler and cut by hand.
- Scissors. To cut the paper if you don't have a paper cutter, and to cut excess tape.
-
Patterned paper. I used a sheet from a scrapbooking pad of paper that I bought from Walmart for $5.
- Tape. Obviously. I used just regular scotch tape, with a matte finish. You will need quite a bit of it.
- A bowl of water.
- Bone folder. I am not really sure if this is needed, but I think it is handy to have for this project.
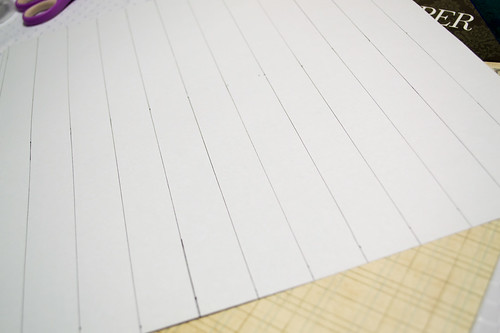
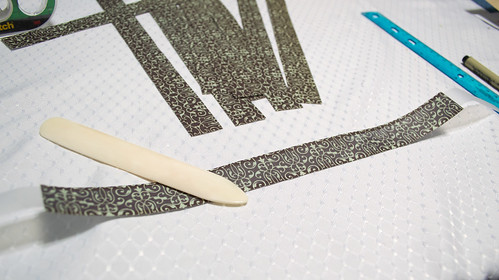
First thing you want to do, is to measure how big you need your strips. My tape was 3/4 inch thick,so I cut my paper to be a bit bigger than the width of the tape. I measured them an inch wide, each strip.
Next, cut out your strips from the paper. Again, this would be tons easier and quicker if you had a paper trimmer on hand. I did not.
Third, you are going to apply the tape directly to the front of each paper strip. Trim off any extra tape from the sides. I personally, didn't bother with trimming the paper off the sides, because you'll end up rubbing the paper off anyway. But, you can trim up the sides if you want to. However, if you have extra tape hanging off the paper, be sure to cut that off. I ran the bone folder over the top a few times, just to be sure I got a good transfer seal on them.
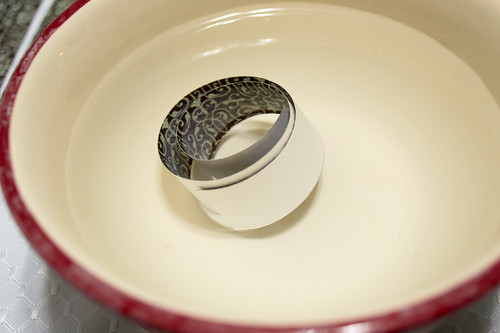
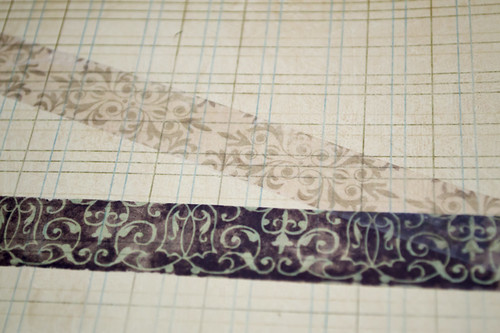
Now that you have your paper with tape attached, dunk into the water for a few seconds. I have found you don't want to leave them in the water too long because the pattern will kind of chip off with the paper in the next step.
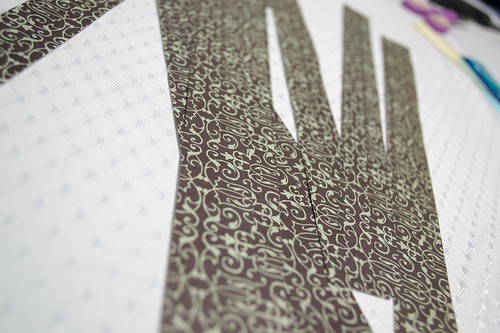
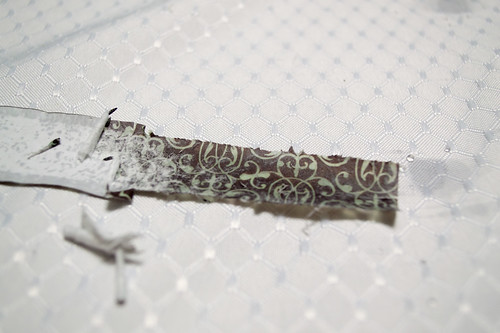
After a few seconds, the paper should be wet and saturated. Take it out of the water, and rub your fingers over the paper. It should start to ball up, and separate from the tape, leaving the pattern behind. Keep rubbing until all the paper is gone. If it gets too difficult to remove, dunk it in more water and continue rubbing.
Some tips, mainly for myself if I intend to keep at this project.
- After being attached to paper, doused in water, and then rubbed on, the tape will lose the majority of it's sticky-ness. I suggest to use a clear adhesive of some kind to stick it to wherever you need to to stick to.
- The tape will also not lay completely flat, usually. Again, use a strong, clear adhesive of some kind to force it to lay straight.
- I found that different sheets of paper, yield different results. For example, one sheet of paper from the scrapbooking pad, came off rather easily when rubbed, while another sheet (from the same pad) didn't come off nearly as easily, and still had quite a bit of paper attached. Which can be good, depending on how grungy and opaque you'd like your tape. I don't mind, in fact, I prefer to have some differences in my tape.
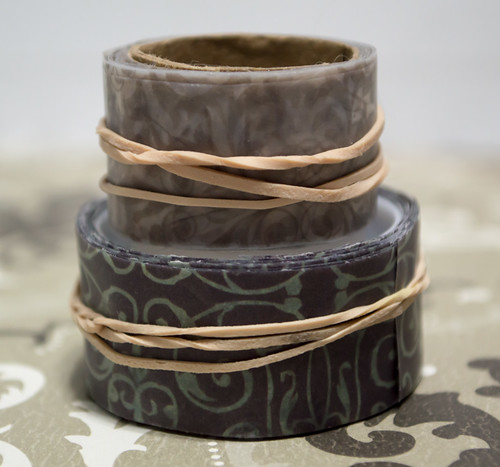
Pretty cool, huh?