Social Icons

Sunday, March 30, 2014

DIY Spice Face Mask

Okay, so my last post where I explained my issues with acne throughout my life, and my quest to conquer it. Like I mentioned in my previous post, I have been washing my face with only raw honey, morning and night, but once a week, I use a special concoction of spices and honey.

My recent regimen seems to be working really well for me, it's making my face look so much better with every day I use it. Anyway! Moving on to my face mask recipe.

honey-mask-ingredients

These are my ingredients. The ground cinnamon is like an anti-bacterial, the nutmeg is supposed to face acne scars, and the honey, well, is a fantastic skin soother and cleanser.

  • 1 Tablespoon of RAW honey (It has to be raw honey, bought from a health food store. I live in Iowa here, and got mine from my local HyVee's heath food section. This company is also at the farmer's market once that starts up again. To be safe, if it doesn't say raw, don't use it.). I also just kind of eyeball how much honey I might need to cover my face.
  • 1/2 Teaspoon of nutmeg
  • 1/2 teaspoon of cinnamon

I also add one drop of water to mine. I turn on my kitchen facet until the water runs warm, then turn it almost off to where it drips. One drop does the trick to make it smoother to apply on my face.

honey-mask-inbowl

Here's my concoction before I mix it. The raw honey, spices, and my one drop of water.


honey-mask-mixed

And here it is all mixed together, I like to use a plastic knife. Looks weird, right? Mine looks like a syrup-y paste when I'm done mixing. I don't know if it is supposed to be that kind of consistency, but it works for me. My husband laughs at me whenever I start putting it on my face.

I just use my fingers, take a glob of it and start putting it on my face. Once my face is covered with it, I let it sit for about 30 minutes, then rinse off with warm water (I'm apparently really messy with rinsing it off my face, because this gets everywhere. If you're like me, put a old hand towel or something down before rinsing). Follow with toner afterward.

A note: Try not to scrub this in your face. With the spices, it is important to just gently apply them, because this can be quite coarse on the skin if you scrub too hard.

I did also take a photo of what this stuff looks like on my face, but I'll spare my readers the horror of looking at that. So I won't post it.

Wednesday, March 26, 2014

DIY Green Tea Toner

I am currently at a point in my life, where I am exhausted from dealing with acne. It has always been a problem since I was a teenager. I always thought that once I got older, it would go away. I am now 28 years old, and I am still battling it on a daily basis. I tell you, it's exhausting to have acne so bad that make-up won't even cover it, at my age.

I have tried practically every product on the market, from Neutrogena, Clinique, Proactiv. Different kinds of toners, creams, cleansers and moisturizers. Nothing seems to work. So, now I am at the point where, I am thinking I need to re-evaluate what I am putting on my face.

That being said, I have decided to stop putting chemicals on my face, and try going natural with my acne solutions. I did research of what things are good for your face, and have come up with a toner, that I whipped up a couple nights ago.

This is just my solution, one that I am trying right now. Keep in mind, as you read this, it is still a new-to-my-face recipe that I'm working on.

diy-toner-ingredients

These are my current ingredients for my toner. I use about a teaspoon of baking soda, because I hear it is good for the face (and frankly, I put baking soda in everything now). Witch hazel, from my research, is a plant extract, this is a good astringent, and will cleanse the pores out pretty well and has anti-oxidants. And, green tea, for calming my sad, irritated skin (which also has anti-oxidants, as well). Also, I have a bottle to put it all in. All I had was my husband's body wash container, that was promptly cleaned out well.

diy-toner-brewedtea

First step was brewing the tea. I just brewed my green tea as normal, as if I was going to drink it. Don't mind my stained, Dollar Tree mug. It's very well used.

So, the amount of ingredients I used:
  • 1/2 cup of Witch Hazel
  • 1/2 cup of brewed green tea
  • 1 teaspoon of baking soda

I poured my ingredients into the container and shook it up pretty well to dissolve the baking soda and mix everything together. This container should be kept in the refrigerator, and will be good for up to 2 weeks.

diy-toner

I've been using it for a couple days now. I've ditched my old facial cleanser, and toner, and am now using RAW honey to cleanse my face (I rub it on and let it set for a half hour), then follow by applying the toner to my face with a cotton ball.

It's so far, surprisingly going well! It's boggling to me that my face can actually feel clean, without squeaking. Literally, the things I have been using, strips my face of so much oil that my face is squeaky. But this, my face feels moisturized, yet clean. And it feels great. The better news is that: I haven't noticed any new breakouts since I've been using it, and my face is definitely appearing less red. Which is awesome.

A few notes, mainly for myself:
  • I read that using unfiltered apple cider vinegar works well, in place of the witch hazel. (Though, for me, I was very nervous to spend $7 on it when I wasn't sure how well this DIY would turn out in the first place). If this works well for me, I will likely spend the extra money and purchase the organic apple cider vinegar. the witch hazel was a little more do-able because it was only about $1.50.
  • For acne, a couple drops of tea tree oil is supposed to do really well in a toner. I fully intend to purchase some and try that out in my toner as well. 
  • Once this is taken out of the refrigerator for use, it needs a little shaking up to re-mix everything, I have noticed.

Hopefully, my face will look fabulous by the time I go back home to California for a couple of weeks in May!

Tuesday, March 25, 2014

DIY Letters

I find myself on Pinterest quite often lately. I'm a really bad DIY-er, so I wanted to start with something simple. I chose my project wisely, and looked like these little letters were do-able for me.

eat

I decided on the word "Eat" in the kitchen, and "Bath" for the bathroom. I didn't want them to look identical, so I decided on two different colors for them. Copper metallic for Eat, and Nickel metallic for Bath.

bath-02

The letters were more expensive that I thought they were going to be ($2.49 a piece at Hobby Lobby). I guess when it comes down to it - it wasn't THAT expensive, but I had told myself I was going to wait for them to go on sale. But once I got my mind to it, I didn't feel like waiting. The spray paint was about $6.50 each from Lowes, which did not amuse my husband, either. There was a point during the shopping for this project where he just threw his hands up and said, "do what you want." So I did.

eatbath

We took them to our patio and spray painted them. Actually, he spray painted them, while I watched through the sliding glass door. We had a couple mishaps with the "Eat", that we just couldn't fix, mainly because the day we painted these had to have been one of the windiest days this year. I'm hoping that only I can see them because I know they are there. But, this was our learning experience, ad we aren't quite DIY-er's yet. Hopefully, we will get better. And, I think we kind of did better on "Bath" because those turned out pretty good, I think.

eat-02

Here is our Eat, over the kitchen sink. I think if you look really close, you can see the biff-ups on the bottom of the E and the bottom left of the A. But eh, I'm just going to pretend they are not there, and hopefully no one else notices!

I just simply secured them to the wall with little Command hanging things. After dealing with painting these all evening, when I woke up the next morning, I felt like I didn't want to deal with them anymore.

bath

Bath turned out nice! I think they blend in with the wall a little too much though, but I like the nickel look on them.

Saturday, March 22, 2014

New Apartment

So, as promised, I return with photos from our new apartment. Moving was such a crazy day. Every time I move, I am reminded about how much I hate it. But yet, it still happens. I did want to get all my boxes unpacked and the majority of things in it's proper place before I took pictures, so it did take me a while to get photos up.

before-moving 

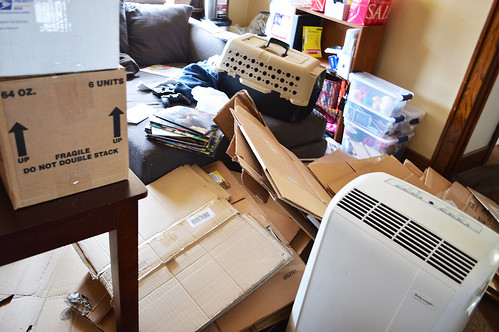
Just to remind myself of what we were dealing with before moving day, this was a photo of our boxing experience at the old place. It was a mess as we were boxing, purging, and getting rid of a lot of our things. The good thing about the amount of purging we did was: now we don't have to do any spring cleaning!

Anyway. That was the reminder of the old apartment, but now we move onto the new!

dining-room 

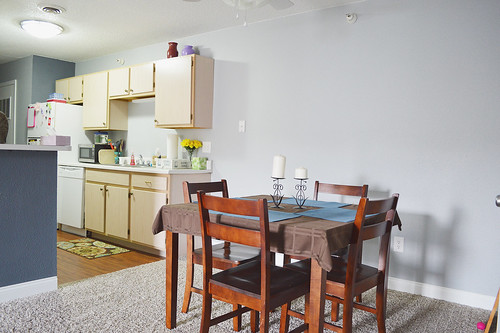
The small dining room, from the view of the front door. We currently have no pictures or items on the walls, but that's something that we are planning on investing in for the next couple of months. I'm thinking for the wall in the dining room - a giant mirror.

kitchen-01

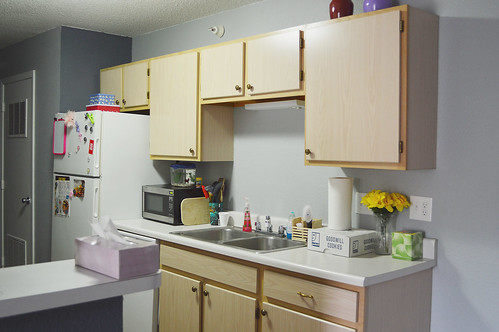
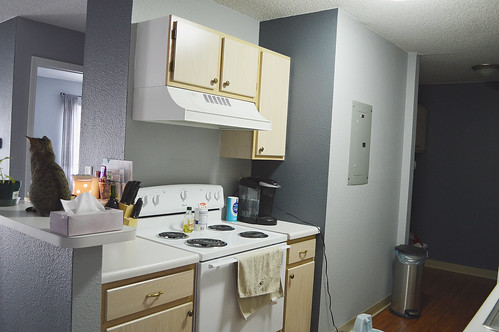
The kitchen. Two of the requirements I had when I was apartment hunting was: it needed to have a dishwasher and a garbage disposal. And I got both.
.
kitchen-02

We were hoping for a built in microwave, like what the model we toured had. But, alas. No microwave. We were a little bummed at that, but for now, we will keep our current one until we can get a newer one.

laundry-room 

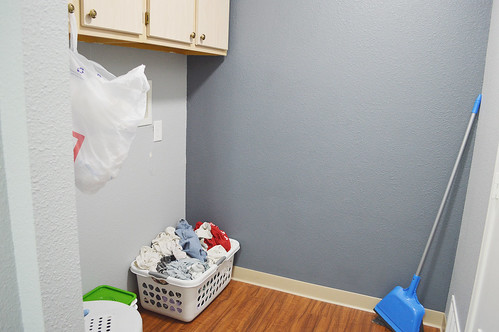
This will be... hopefully sometime soon... a laundry room. We do not have a washer and dryer (and after this move, we also won't have money for a washer a dryer for a rather long time...), but one day. For now, it is pretty much the cat's litterbox room and laundry overflow, that won't fit in the bathroom hamper.

 living-room

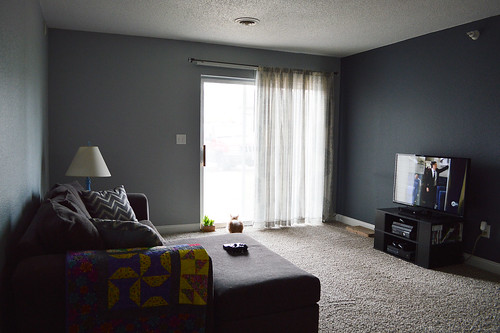
Living room, obviously. (Don't mind Lost there playing in the background.) Another one of my requirements was that I wanted a patio area. Our last place, where it logically should have been a patio, was this enclosed room that we called a "sunroom." It was an awkward room with impossible to cover south facing windows, that did nothing but bake our apartment in the summer. Also, I really love the fireflies in the summer, so I wanted a place to go outside and admire them. Turns out, our new place not only has a patio, but it's also on the ground floor, too! Double win!

hallway

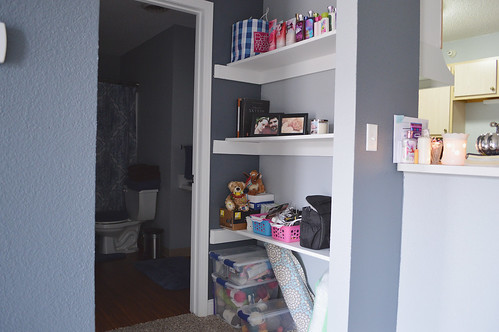
This is the most awkward storage in an apartment I think I have ever seen. I'm not sure whether I want to try to use them as just decorative storage for things like pictures, and kick-knacks, or do I put up a tension rod with a curtain to use it as normal storage? Don't know yet, but for now, it's a mixture of both.

 bathroom-01 

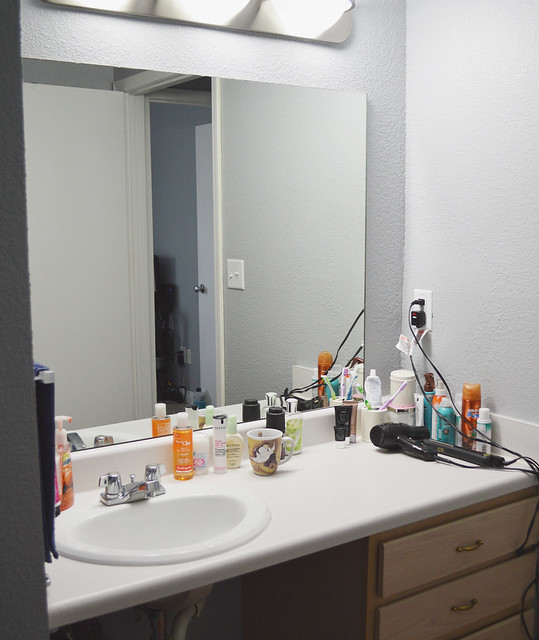
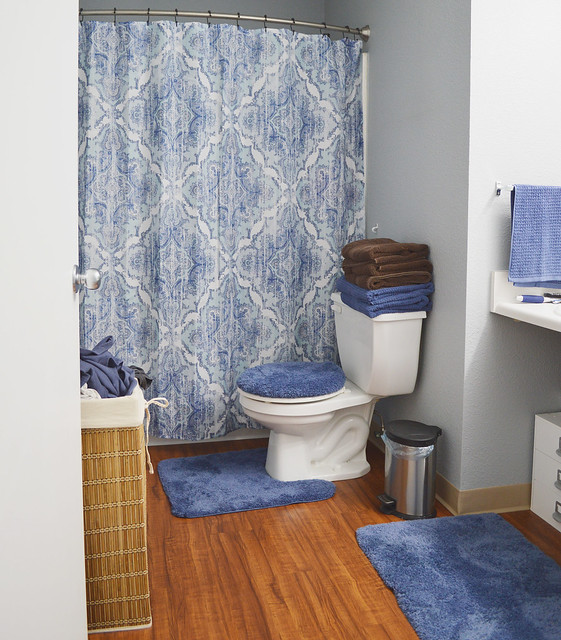
Bathroom! I am boggled at how much counter space I have now! At the old place, I had this little tiny area that was only big enough for a soap dispenser and toothpaste. Now, I actually have space for my hair straighter AND my blow dryer! For a week after moving, I just wanted all the things laid out on my never-ending counter.


bathroom-02 

My bathroom, all decked out in a lot of the things I bought from work. I just still adore that shower curtain. I feel like it's the number one most beautiful thing that I picked out for myself during this move. I still look at it and get excited. Does that make me weird?

Also, a cool thing about that shower curtain rod: It's totally curved.


bedroom 

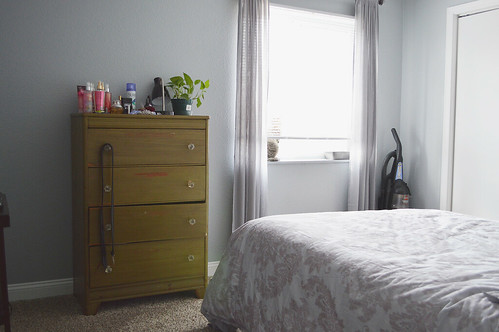
Lastly, the bedroom. Nothing really special here. Just some ugly dresser, boring bed, and some fabulous curtains (hanging on a curtain rod that I broke and cemented back together). While we don't have a walk-in closet, we have a closet that pretty much spans the entire length of the room. At our old place, we had this dinky closet that was really small, and I would constantly run out of room. I was starting to put things in the storage closet out in the living room. I love this new closet, I can hang up all my clothes and look at them when I want.

There you have it! Our new, fabulous place!

In other news with my life, I have quit my job at JCPenney. I loved it there, mainly the associate discount. But, I honestly could not handle several other people I worked with. I am 28 years old, and every day I worked, I felt like I was going back to high school. After several attempts to solve the problem, I decided I had just better let the job go. So now, it's back to job hunting for me!

Wednesday, March 12, 2014

DIY Wax Bars

So, I love the scents of Bath and Body Works. I love the prices of their 3 wick candles (when they go on sale). However, and issue I have is when I light them, I smell more of the burning flame than I do of the candle. Maybe because my nose is weird? Don't know, but it had me wondering if there was another way to get the scent, without the flame smell. It came to my attention, that yes, I probably could buy a candle warmer plate... but that's just money I'd use that we can't currently spend.

Imagine my glee when I saw on Pinterest, that someone made their own wax bars, for a Scentsy warmer. I decided to try it out, with my own spin on things. They used one of those candle warmer plates, but I didn't have one. I used my crockpot. Of course, you should probably use a slow cooker you don't intend on cooking out of again, because this was really messy, and wax obviously isn't safe to eat.

 diy-scentsy 

This is the candle that I chose to use. I did have this candle already lit at one point, so don't mind the black wicks. It was not a brand-new candle.

in-crockpot 

I placed it in my slow cooker, and turned it on the lowest setting. Honestly, I don't even know if I needed to put the lid on, or not. But I did. I did this is kind of spurts. I waited until a good part of it was melted liquid, then poured into an empty Scentsy wax container. Then I put the candle back in the slow cooker to melt some more.

candle-scentsy

Once it was completely melted, I came out with a total of five wax bars (I also read that you could use ice cube trays, as well?). I am really clumsy, so if you do something like this: protect your counters, and fingers. Wax is hot, and a mess to clean up if you miss the molds.

diy-scentsy-reuse 

I heard that sometimes the wax doesn't melt in Scentsy warmers, or there's issues with them. However, I popped three squares into my warmer, and it melted fine, and smelled like the great Bath and Body Works scent, without the flame, just like I wanted.

I feel like this was a little more economical than buying more bars. I spent $11 on one candle, and made five bars out of it, where Scentsy bars are $5 per one. However, I'll probably continue buying the Scentsy bars, because I adore their scents, and only do this alternative on the random times I buy a candle. It turned out okay, but really, Scentsy has just as awesome smells.

In other news, it feels like ages since I last blogged. We have moved into our new apartment, I've officially changed my name on all the important things (I have found that changing your name is a colossal pain in the rear), and we finally just got internet today. More pictures coming later, of our new apartment!
 
 
Blogger Templates