Omigosh has it been forever since I gave this blog some attention! I have been thinking about coming back to it for a while now, but with so many life changes that had happened since my last post, it made it difficult. But, I'm ready to come back and breathe new life into this neglected blog of mine. Starting with... my most recent project I took on!
Late last year, when the NES Classic came out, I had looked everywhere for it. Every time we went into town, we were at every Gamestop, every Walmart, Target, looking to see if they had new stock of them in. The answer was always no. When they announced they weren't making anymore, I gave up. Now, the SNES Classic preorders started, and obviously, they sold out just as fast. I realized that I didn't want to go through the same stress as I did with the NES in trying to find this thing. Disappointed, I started to look at other options, and came across something that I could work with. I decided to make my own! How, you ask? With a Raspberry Pi!
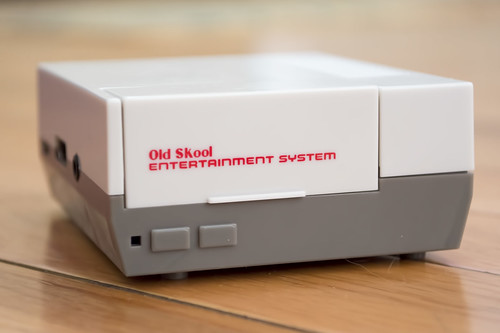
It wasn't really difficult at all, either. With a starter kit from Amazon, an Xbox One controller, and the RetroPie, I had a really workable make-shift console. I later upgraded the SD card that came in the kit to one much bigger (to hold more games), and purchased a Nintendo-inspired case for it.
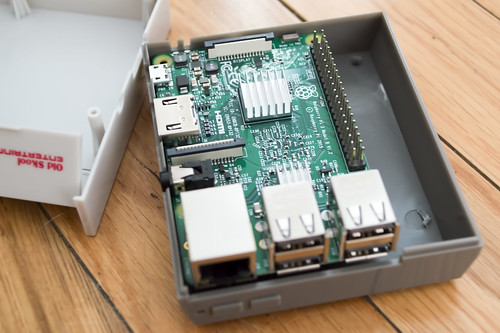
I'm in so much love with this little guy. My favorite game system of all time was without a doubt, the Super Nintendo, so I'm so happy to be able to play all my old, favorite games from my childhood. I remember sitting for HOURS in front of a Super Nintendo as a young child, playing Super Mario. It was some of the best memories I have. Both my mother and I would sit in front of the television for hours playing video games. It was great. I think about it now, and realize that maybe my mother at that time was a bigger gamer than I was!
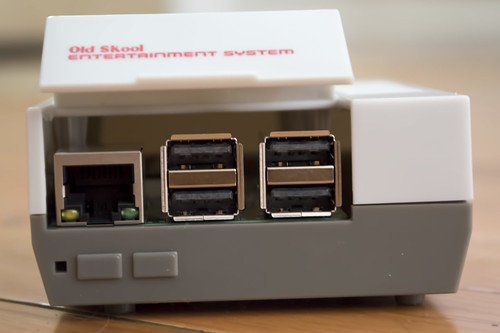
The little flap of the case opens and reveals all the USB ports, and the Ethernet port. This is where I can plug in my controller, or my mini keyboard if I need it. If I don't need them, I can just unplug everything, close the flap, and it'll sit there looking adorable. Unfortunately, the buttons on the front are cosmetic only, as well as the little light to the left of the buttons. I have however, seen people be able to mod this case and their Pi to light the empty square up, and have workable buttons. This is something I wish to do in the future for mine, but right now, I think I'm happy with how it is. (Plus it seems to be a little too technical for me?)
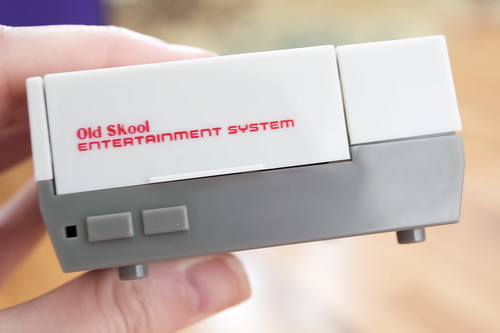
The photos are a little misleading, cause it actually looks rather large! However, in reality, it's actually super-small! It fits in my hand! To anyone wanting a SNES Classic, or NES Classic and can't find one, I will forevermore suggest this to them. There's no need to spend upwards to $200 on ebay for the Nintendo version, do this instead, and get all the games you actually want on it!
I really do adore this thing. It's so easy to think of a game I want, grab a ROM of it and just send it to the system over my Wifi network. It was money well spent for the amount of games and entertainment I can have with this little thing!
Showing posts with label diy. Show all posts
Tuesday, August 29, 2017
Monday, June 1, 2015
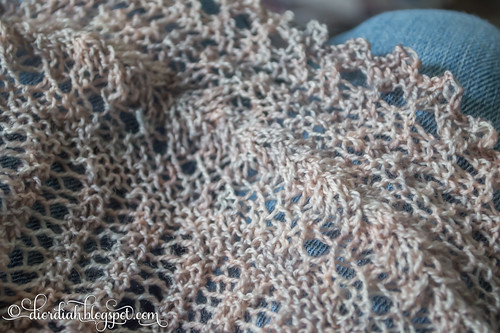
Vostok Shawl Progress
It has been a long time since I blogged about any kind of knitting project I have done! I have not really felt like knitting recently, with my recent craft of Pocket Letters, and junk journals. It's something that I've wanted to really get back into, however. I also want to learn how to crochet, as well. I have told myself once I finish this shawl I'm working on, I will sit down and teach myself how to crochet, just like how I taught myself how to knit.
The shawl I'm working on is called Vostok. In the past, I have knit the Henslowe Shawl by this particular designer. The pattern looked extremely complicated, but it was actually simple to follow, and the shawl came out magnificent. It's one of my favorites. So, I had purchased a pattern after finishing the Henslowe, called Vostok. It is beautiful, but I have been afraid to start it because it is a weight of yarn that I've had nothing but failure with. I felt I needed the challenge, something to bring me back to the knitting hobby.
It was the perfect project. Something that renewed my love for knitting, as this is turning out to be one of the more stunning projects that I have knitted. I have been also saving this madelinetosh yarn for something special (it is one of the most expensive yarns I own), and this pattern is really beautiful with it. I am not finished with it yet, I'm working on the edging, and it is going so slow! Hopefully I will finish it in the next couple weeks!
The shawl I'm working on is called Vostok. In the past, I have knit the Henslowe Shawl by this particular designer. The pattern looked extremely complicated, but it was actually simple to follow, and the shawl came out magnificent. It's one of my favorites. So, I had purchased a pattern after finishing the Henslowe, called Vostok. It is beautiful, but I have been afraid to start it because it is a weight of yarn that I've had nothing but failure with. I felt I needed the challenge, something to bring me back to the knitting hobby.
It was the perfect project. Something that renewed my love for knitting, as this is turning out to be one of the more stunning projects that I have knitted. I have been also saving this madelinetosh yarn for something special (it is one of the most expensive yarns I own), and this pattern is really beautiful with it. I am not finished with it yet, I'm working on the edging, and it is going so slow! Hopefully I will finish it in the next couple weeks!
Thursday, May 28, 2015
How To: Make Spiral Paper Flower Clips
I made another video tutorial! This time, about how to make little spiral paper flowers! You can put them on paper clips like I did, magnets, pins for bulletin boards, or just leave them as is for paper embellishing.
I am so happy with how these came out! I will admit, however, to film this, it took the better half of an entire day. I messed up a few times, had several false starts, and then filmed the whole thing, to find that it stopped only 13 minutes in. Let us not even mention the battery in the camera had died as well. So, yes, the enamel dot fell off in this tutorial, and I was able to put it back on. I was so exhausted from spending all day working on this video, that I just let it go. Hah. That being said, please pretend that the video is perfect, and the enamel dot did not fall off on me.
I hope you enjoy the tutorial! As always, If you have any questions or comments about the video, let me know and I will try to answer them as best I can. Also, if you would like to see more videos from me, be sure to subscribe to my channel on YouTube!
I am so happy with how these came out! I will admit, however, to film this, it took the better half of an entire day. I messed up a few times, had several false starts, and then filmed the whole thing, to find that it stopped only 13 minutes in. Let us not even mention the battery in the camera had died as well. So, yes, the enamel dot fell off in this tutorial, and I was able to put it back on. I was so exhausted from spending all day working on this video, that I just let it go. Hah. That being said, please pretend that the video is perfect, and the enamel dot did not fall off on me.
I hope you enjoy the tutorial! As always, If you have any questions or comments about the video, let me know and I will try to answer them as best I can. Also, if you would like to see more videos from me, be sure to subscribe to my channel on YouTube!
Thursday, May 21, 2015
How To: Make DIY Enamel Dots
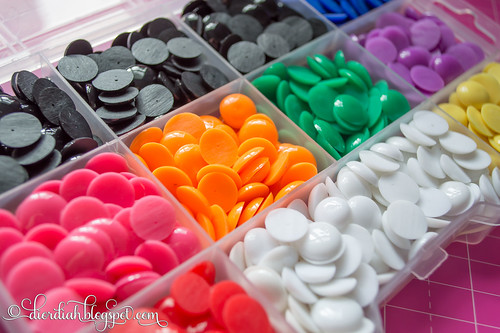
With my paper clip tutorial videos I have been doing lately, I seem to get quite a few questions on one thing: how do I make my enamel dots. I love my enamel dots, I use them on everything I can. They hide joins, hot glue messes, and they even just look adorable sitting on paper. I can't get enough of them. Unfortunately, with how many I use (and making paper clip art in bulk), buying them name brand would cost me a small fortune. My husband already makes fun of me about how much money goes into my crafting hobby, so if I can make them for cheap at home, no doubt I will be trying it!
I came across several videos of how to make enamel dots online, and made a ton of them! I bought a small tub of them from our local Walmart, and spent the weekend melting them down a few months ago. So, because I had been questions about how I made them, I created my own how to video, in case it helps someone out there!
As usual, If you have any questions, or comments about the video, let me know, I will try to answer them as best I can. Also, if you would like to see more videos from me, be sure to subscribe to my channel on YouTube!
I came across several videos of how to make enamel dots online, and made a ton of them! I bought a small tub of them from our local Walmart, and spent the weekend melting them down a few months ago. So, because I had been questions about how I made them, I created my own how to video, in case it helps someone out there!
As usual, If you have any questions, or comments about the video, let me know, I will try to answer them as best I can. Also, if you would like to see more videos from me, be sure to subscribe to my channel on YouTube!
Friday, May 8, 2015
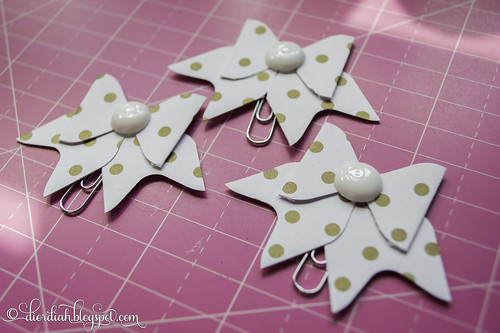
How To: Make Paper Bow Paper Clips
A quick post today, and another video tutorial! I am really making an attempt to get better with talking on my camera, trying to gain confidence, and make better video. I am also trying to work on getting more familiar with Adobe Premiere, and trying to learn how to edit videos properly. That being said, I have been making quite a few short tutorials on how I made small objects (like paper clips). I think I am getting better!
So, the other night, I was making little matching paper bows with my envelope punch board to go into my latest Pocket Letters. I had a bunch of shorter scrap paper, that was just too short to make a second bow. I had the idea to make a smaller bow, and put it on a paper clip!
They were such a success and I absolutely adore them. I wanted to share the measurements that I used on the bows, so I made a little tutorial on how to create them.
Lately, I have found that I have so many tools given to me to be as creative as I can be. Luckily, I have family who is just as into crafts as I am, and many of my tools are gifted to me. I feel so lucky to have many blessings (for lack of a better word), in my life. A husband who supports my crafting in whatever I want to do, a family who will gift me with whatever they do not want, and wonderful crafty booths in my local thrift stores. With all these things that I have now, I finally feel like I can have a successful creative outlet. So, many more tutorials from me will be happening!
As usual, If you have any questions, or comments about the video, let me know, I will try to answer them as best I can. Also, if you would like to see more videos from me, be sure to subscribe to my channel on YouTube!
So, the other night, I was making little matching paper bows with my envelope punch board to go into my latest Pocket Letters. I had a bunch of shorter scrap paper, that was just too short to make a second bow. I had the idea to make a smaller bow, and put it on a paper clip!
They were such a success and I absolutely adore them. I wanted to share the measurements that I used on the bows, so I made a little tutorial on how to create them.
Lately, I have found that I have so many tools given to me to be as creative as I can be. Luckily, I have family who is just as into crafts as I am, and many of my tools are gifted to me. I feel so lucky to have many blessings (for lack of a better word), in my life. A husband who supports my crafting in whatever I want to do, a family who will gift me with whatever they do not want, and wonderful crafty booths in my local thrift stores. With all these things that I have now, I finally feel like I can have a successful creative outlet. So, many more tutorials from me will be happening!
As usual, If you have any questions, or comments about the video, let me know, I will try to answer them as best I can. Also, if you would like to see more videos from me, be sure to subscribe to my channel on YouTube!
Wednesday, May 6, 2015
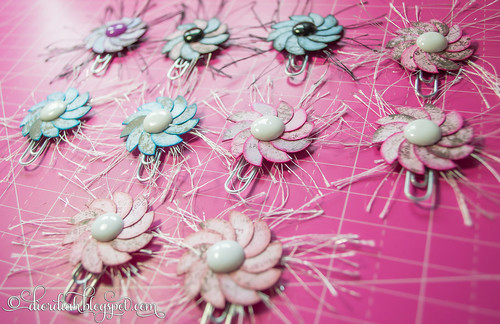
How To: Make Pinwheel Paper Clips
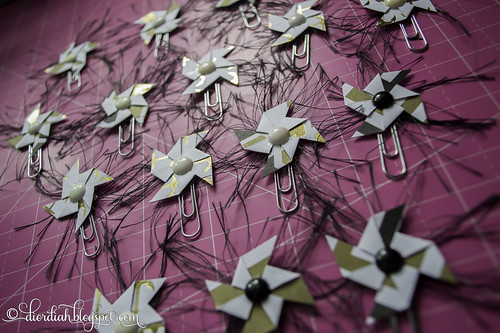
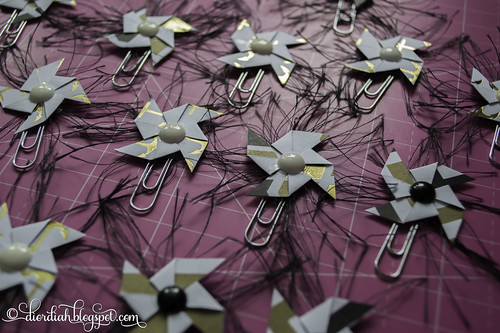
A couple nights ago, I was making some embellishments for my pocket letters. I had scrap paper, and had decided to make little pinwheels. Once I finished, something just didn't look right with them. They did not pop off of the background like I intended, and to me - they just looked kind of bland. They blended in, and I wanted them to pop.
I resorted to the one thing in my craft stash that always makes any embellishment 150% more awesome: fun fur! Seriously, I love this stuff and I find some way to use it with everything that needs a little something extra. I have it in a variety of colors, and the best thing is that it lasts forever! It was perfect for this project.
I made a bunch of them that night. I am working on six similar pocket letters at a time, and needed them all to match the pockets. I used scraps from the paper I used for the letter, and you do not need much of it! Just an inch square to make this size!
Gah, I love them so much! It's not all the time that I do something genuinely creative, but when I do... I am pleased with myself for weeks afterward. Haha!
In fact, I was so pleased with them and happy that they turned out successfully, I made a little tutorial on how I made them.
As usual, If you have any questions, or comments about the video, let me know, I will try to answer them as best I can. Also, if you would like to see more videos from me, be sure to subscribe to my channel on YouTube!
I resorted to the one thing in my craft stash that always makes any embellishment 150% more awesome: fun fur! Seriously, I love this stuff and I find some way to use it with everything that needs a little something extra. I have it in a variety of colors, and the best thing is that it lasts forever! It was perfect for this project.
I made a bunch of them that night. I am working on six similar pocket letters at a time, and needed them all to match the pockets. I used scraps from the paper I used for the letter, and you do not need much of it! Just an inch square to make this size!
Gah, I love them so much! It's not all the time that I do something genuinely creative, but when I do... I am pleased with myself for weeks afterward. Haha!
In fact, I was so pleased with them and happy that they turned out successfully, I made a little tutorial on how I made them.
As usual, If you have any questions, or comments about the video, let me know, I will try to answer them as best I can. Also, if you would like to see more videos from me, be sure to subscribe to my channel on YouTube!
Saturday, April 18, 2015
Amelia's Injured Paw Pads
A few things happened all around the same time, so I can't quite pinpoint the cause, but Amelia somehow injured her paw pads! Within a series of days, I bathed her in new shampoo, and we went to the grand opening of our apartment complex's dog park. We have also changed her food over the past couple weeks. I do not really remember when I first noticed her licking her paws, but it was excessive. When I noticed, I looked at them right away and found that they looked really raw. It was not just one of them, it was both front paws, and one back paw. From her licking? I do not know. One paw was worse than the other, part of her front toe pad was hanging off!
So, it could be a variety of things, I figure. A reaction to the new soap? Did she cut herself on the new mulch at the park? She is a completely indoor dog, so her pads are a little dainty. Allergies to the new adult food, even though we did not change brands or formulas? Naturally, I went into panic mode. I researched online, and went into an even worse panic. Dr. Google is horrifying sometimes!
I decided to do a couple home remedies, before I made a vet appointment. If she wasn't getting better by the third day (which was payday), she was going to be taken to the vet. I went to the Dollar Tree, picked up a couple packages of Epsom Salt, and little toddler socks. I also heard a lot about this stuff called "Bag Balm," which is some kind of ointment/moisturizer used mainly for cow utters. Though, it is good for human moisturizing, and can be used on dogs, as well. I hunted that product down, finally found it at our local Walgreens!
My method was simple: After dinner, I filled up the bathtub with about 1-2 inches of water, and poured some Epsom salt in it. Amelia stood in the bath, for a good ten minutes, while I fed her treats to stay in there. After ten minutes, she got taken out, and her feet were dried as best I could get them, then I rubbed Bag Balm on her paw pads, and covered with the toddler socks. She ripped off the socks right away the first time, so we lightly wrapped a layer of tape around the socks. It helped. When we were ready to go to bed, I took off the socks, and made sure she was not licking her paws, until she calmed down and went to sleep. I took them off before bed because I was worried about the wound turning into a hot spot, and also her taking off the sock while I was sleeping and swallowing it. Which would turn into a worse situation. When I woke up, she got more Bag Balm and socks on for a couple more hours. Then the process repeats at night.
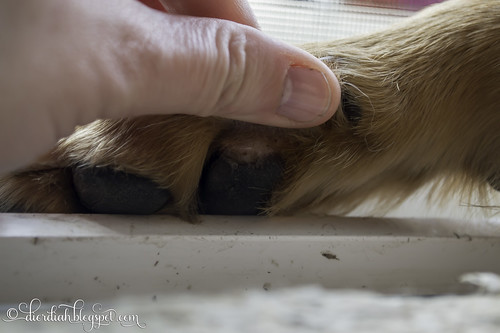
I immediately saw improvement with her paws! The part that was hanging off healed, and now it has turned black again, it's definitely less raw, and I think it is healed enough that we do not need to do our morning/evening ritual anymore. We have not taken her back to the park, or even for a walk since it looked bad, but I think now, it looks okay to start walking her again. The photo is recent, showing her healing. This was the worse paw, you can barely notice where the hanging off part was.
I am, however, extremely nervous about taking her back to the park again, because I really think the rough mulch stuff tore up her pads. But still, I am keeping a close eye on her, making sure there is no more licking, and assuring that it remains healing.
So, it could be a variety of things, I figure. A reaction to the new soap? Did she cut herself on the new mulch at the park? She is a completely indoor dog, so her pads are a little dainty. Allergies to the new adult food, even though we did not change brands or formulas? Naturally, I went into panic mode. I researched online, and went into an even worse panic. Dr. Google is horrifying sometimes!
I decided to do a couple home remedies, before I made a vet appointment. If she wasn't getting better by the third day (which was payday), she was going to be taken to the vet. I went to the Dollar Tree, picked up a couple packages of Epsom Salt, and little toddler socks. I also heard a lot about this stuff called "Bag Balm," which is some kind of ointment/moisturizer used mainly for cow utters. Though, it is good for human moisturizing, and can be used on dogs, as well. I hunted that product down, finally found it at our local Walgreens!
My method was simple: After dinner, I filled up the bathtub with about 1-2 inches of water, and poured some Epsom salt in it. Amelia stood in the bath, for a good ten minutes, while I fed her treats to stay in there. After ten minutes, she got taken out, and her feet were dried as best I could get them, then I rubbed Bag Balm on her paw pads, and covered with the toddler socks. She ripped off the socks right away the first time, so we lightly wrapped a layer of tape around the socks. It helped. When we were ready to go to bed, I took off the socks, and made sure she was not licking her paws, until she calmed down and went to sleep. I took them off before bed because I was worried about the wound turning into a hot spot, and also her taking off the sock while I was sleeping and swallowing it. Which would turn into a worse situation. When I woke up, she got more Bag Balm and socks on for a couple more hours. Then the process repeats at night.
I immediately saw improvement with her paws! The part that was hanging off healed, and now it has turned black again, it's definitely less raw, and I think it is healed enough that we do not need to do our morning/evening ritual anymore. We have not taken her back to the park, or even for a walk since it looked bad, but I think now, it looks okay to start walking her again. The photo is recent, showing her healing. This was the worse paw, you can barely notice where the hanging off part was.
I am, however, extremely nervous about taking her back to the park again, because I really think the rough mulch stuff tore up her pads. But still, I am keeping a close eye on her, making sure there is no more licking, and assuring that it remains healing.
Monday, April 13, 2015
How To: Make Layered Lace Flowers
As those who read my blog know, I am huge on the thrift store shopping. A lot of my crafting supplies are either given to me, or bought from thrift stores. I am particularly fond of vintage sheet music and lace trims. That being said, I have accumulated quite a bit, that I have not even used. My husband was beginning to call me a hoarder, and I can't have that! I sat out to make use of some of my crafting products.
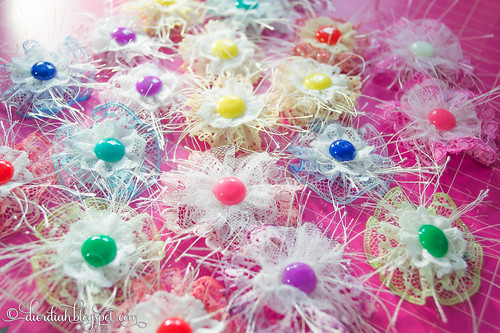
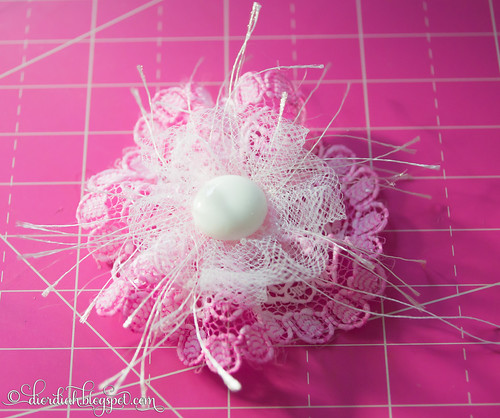
I made a bunch of what I call Layered Lace Flowers! They all turned absolutely gorgeous, I am floored at how awesome each one turned out. Usually, things look better in my head than they do in real life, so the fact that these turned out the way they did is incredible. However, when I think about how I made them, I realize that each one took quite a bit of time. I ended up making these over a course of several days, really. I measured, cut and sewn up each one while leisurely sitting on the couch, watching television. Next was coloring all of them, which required time to dry again. Then all the hot gluing. But it was all worth it!
I simply ADORE how this one came out. I made them in all shapes, sizes, and colors, but some reason, this one is my absolute favorite. I love the way the pink looks, the tulle, size. Pretty much everything.
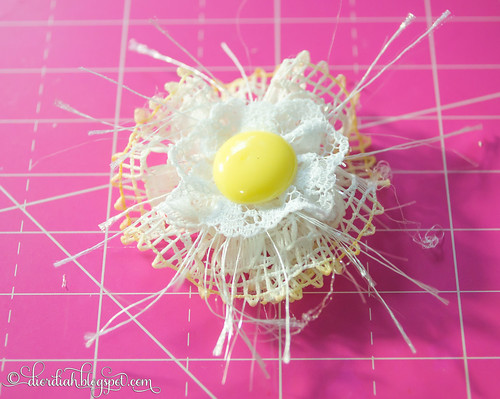
I was surprised at how much I found I like this one, too. The other one I could justify, because it is pink, and I love the tulle look. But this one, I did not think it would be my style. But no! It looks like a little circle of happy!
I actually did a tutorial on how I made them! The camera kept focusing every time I moved, though, so you might not like the tutorial if that bothers you. (I learned to take pictures with it, not video - so I am trying to learn video now). If you enjoyed the video, please subscribe to my channel!
Enjoy, and I hope the video inspires you to make your own in some form!
I made a bunch of what I call Layered Lace Flowers! They all turned absolutely gorgeous, I am floored at how awesome each one turned out. Usually, things look better in my head than they do in real life, so the fact that these turned out the way they did is incredible. However, when I think about how I made them, I realize that each one took quite a bit of time. I ended up making these over a course of several days, really. I measured, cut and sewn up each one while leisurely sitting on the couch, watching television. Next was coloring all of them, which required time to dry again. Then all the hot gluing. But it was all worth it!
I simply ADORE how this one came out. I made them in all shapes, sizes, and colors, but some reason, this one is my absolute favorite. I love the way the pink looks, the tulle, size. Pretty much everything.
I was surprised at how much I found I like this one, too. The other one I could justify, because it is pink, and I love the tulle look. But this one, I did not think it would be my style. But no! It looks like a little circle of happy!
I actually did a tutorial on how I made them! The camera kept focusing every time I moved, though, so you might not like the tutorial if that bothers you. (I learned to take pictures with it, not video - so I am trying to learn video now). If you enjoyed the video, please subscribe to my channel!
Enjoy, and I hope the video inspires you to make your own in some form!
Friday, April 3, 2015
First Pocket Letter
With smashbooks, junk journals, my dog, and gardening, one would think I have enough hobbies, right? Well apparently not, because I just picked up yet another craft! There is a new thing going around, called Pocket Letters! I have been hit hard by this craft, as I adore it! I can really get my creativity going with these pocket letters, as they are small, and much easier to commit to, than say, a junk journal or something similar. I have mentioned before in this blog that I really enjoy having the instant gratification feeling, and these can be punched out in a couple of hours, using all my existing supplies.
Basically, a pocket letter is paper, divided up into a trading card protector, and decorated. You can decorate them however you like, add whatever embellishments you want to add. You can add little goodies in the pockets, such as tea bags, die cuts, or whatever else will fit in the pocket! The only requirement is that you have to add a letter into a pocket. Because these are, after all - pocket letters. Once you finish the page, you send it out to a snail mail pen pal, or for a one time swap with someone.
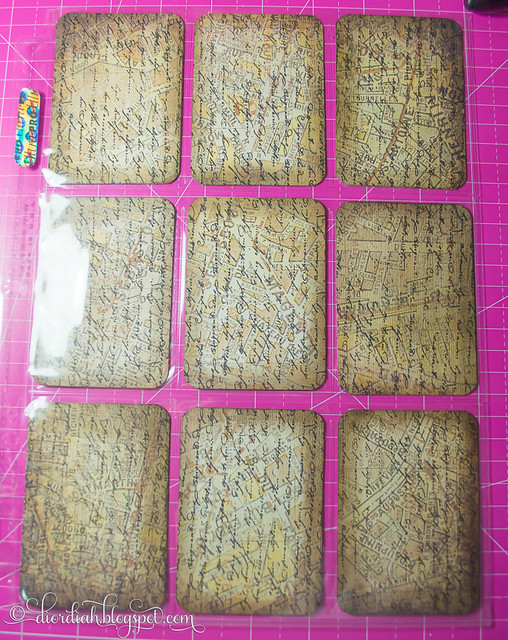
This is my first pocket letter, before I really embellished it. I had cut up my pieces of patterned cardstock, stamped each one with a really beautiful, large script stamp, and inked the edges with some Distress Ink.
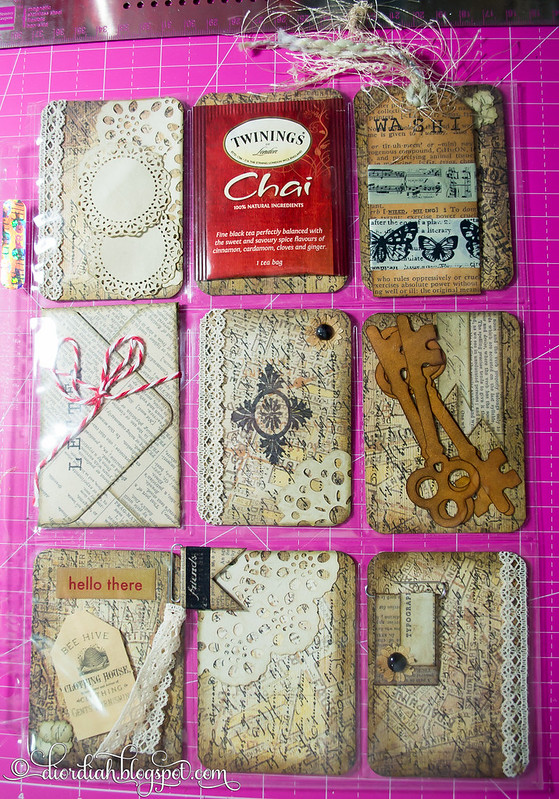
After I got all of that done, I really started to embellish it. I added a envelope using my Envelope Punch Board, some lace edgings, keys that I cut with my Silhouette and inked with Distress Ink, a small tag with washi tape samples, glued a couple of doilies (again, cut with my Silhouette and tea-dyed), and added a few embellished paper clips. It is so pretty, I can't get enough of them!
This one hasn't yet found a home to be sent to. When I am ready to send it out, the awesome part of pocket letters is that they fold up into thirds, and fit brilliantly into a #10 envelope, for easy sending to your swap partner!
If you want to know more about Pocket Letters, there is a huge explanation of them, along with a video, an FAQ, and everything at the creator's blog. Also, if you start making them, definitely go and join the Pocket Letter Pals Network!
Basically, a pocket letter is paper, divided up into a trading card protector, and decorated. You can decorate them however you like, add whatever embellishments you want to add. You can add little goodies in the pockets, such as tea bags, die cuts, or whatever else will fit in the pocket! The only requirement is that you have to add a letter into a pocket. Because these are, after all - pocket letters. Once you finish the page, you send it out to a snail mail pen pal, or for a one time swap with someone.
This is my first pocket letter, before I really embellished it. I had cut up my pieces of patterned cardstock, stamped each one with a really beautiful, large script stamp, and inked the edges with some Distress Ink.
After I got all of that done, I really started to embellish it. I added a envelope using my Envelope Punch Board, some lace edgings, keys that I cut with my Silhouette and inked with Distress Ink, a small tag with washi tape samples, glued a couple of doilies (again, cut with my Silhouette and tea-dyed), and added a few embellished paper clips. It is so pretty, I can't get enough of them!
This one hasn't yet found a home to be sent to. When I am ready to send it out, the awesome part of pocket letters is that they fold up into thirds, and fit brilliantly into a #10 envelope, for easy sending to your swap partner!
If you want to know more about Pocket Letters, there is a huge explanation of them, along with a video, an FAQ, and everything at the creator's blog. Also, if you start making them, definitely go and join the Pocket Letter Pals Network!
Monday, March 30, 2015
Old Candle Jars Repurposed
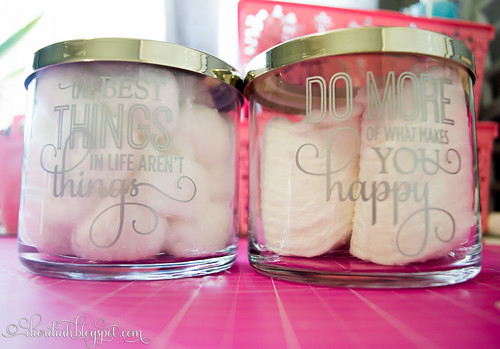
I love re-purposing things! I love making old food containers into pots for my plants, love making old wood into new signs, and most recently, old candle jars into bathroom storage. I had a couple of the three wick candles from Bath and Body Works, that I had used up, and instead of throwing out the jars, I decided to reuse them. I cleaned out the old wax from them - this is is wonderful tutorial on how.
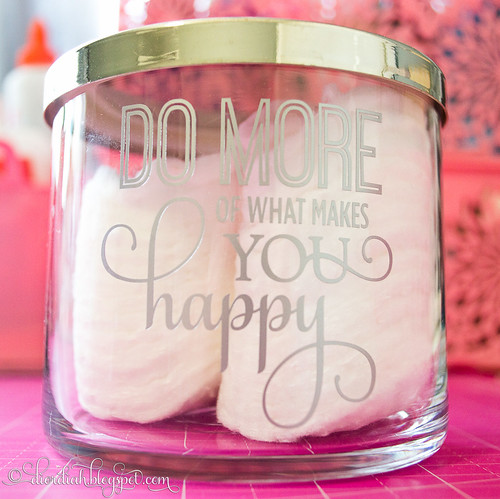
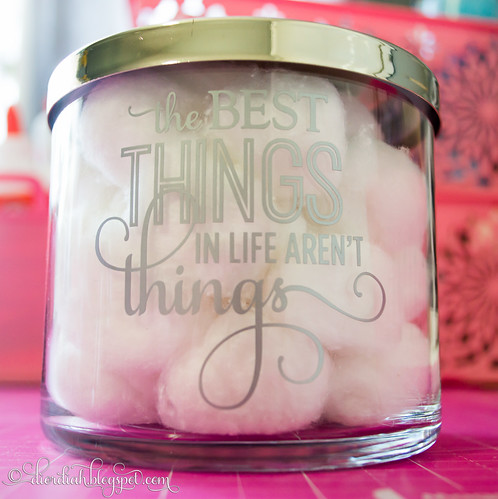
They make amazing jars for bathroom storage, and this really is not a new idea. So, that's what I did with mine. One for cotton balls, and another for makeup circles. I kind of wanted to use the makeup circle one for cotton swabs, but I had purchased a set, that included a container for swabs. I may have to toss that one out, just so that I can use these candle jars instead!
They are beautiful by themselves, and even more gorgeous with some vinyl put onto them! I used a couple phrases that I had purchased from the Silhouette Design Store, and I am very pleased with them, they turned out awesome! I am getting better at putting vinyl on things, as I find little tricks to make thing easier.
I used Oracal 651, which is the waterproof, outdoor vinyl. Sadly, these also took the last of my second favorite metallic silver. (My most favorite is the gold metallic vinyl, that I used or my coasters). I have already ordered much more of it, now that I know it's one of my most used. I love the metallics! My most recent order was pretty much all of the metallic colors. And several feet of just plain white.
I really wanted "inspirational" phrases for my bathroom, because the bathroom is where I visit first thing in the morning, and some days, I just really need to hear something positive. These work well for that purpose, I think!
They make amazing jars for bathroom storage, and this really is not a new idea. So, that's what I did with mine. One for cotton balls, and another for makeup circles. I kind of wanted to use the makeup circle one for cotton swabs, but I had purchased a set, that included a container for swabs. I may have to toss that one out, just so that I can use these candle jars instead!
They are beautiful by themselves, and even more gorgeous with some vinyl put onto them! I used a couple phrases that I had purchased from the Silhouette Design Store, and I am very pleased with them, they turned out awesome! I am getting better at putting vinyl on things, as I find little tricks to make thing easier.
I used Oracal 651, which is the waterproof, outdoor vinyl. Sadly, these also took the last of my second favorite metallic silver. (My most favorite is the gold metallic vinyl, that I used or my coasters). I have already ordered much more of it, now that I know it's one of my most used. I love the metallics! My most recent order was pretty much all of the metallic colors. And several feet of just plain white.
I really wanted "inspirational" phrases for my bathroom, because the bathroom is where I visit first thing in the morning, and some days, I just really need to hear something positive. These work well for that purpose, I think!
Wednesday, March 11, 2015
Decorating Tiles With the Silhouette
Recently, I decided that I wanted to really make my apartment a little more like a home. We have been here almost a full year, and we have basically nothing on our walls, except for some spray painted letters. My apartment just doesn't feel lived in. So, I made the decision to really invest in some pieces to make it a little more home-y.
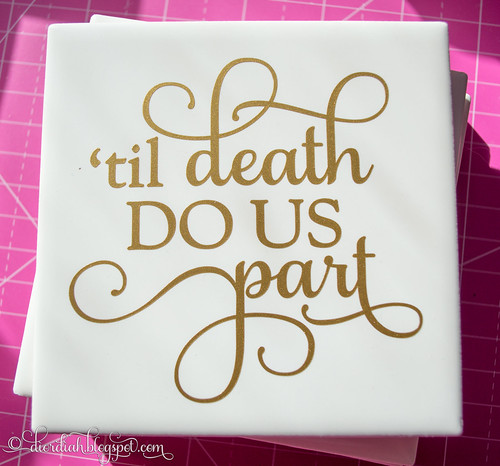
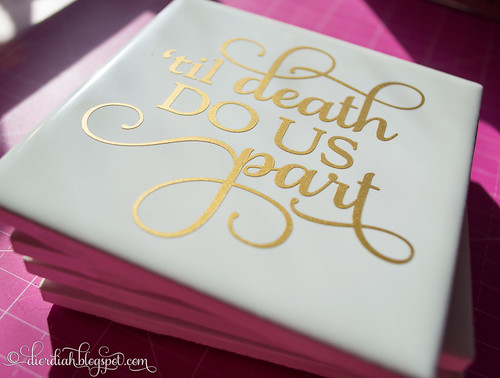
First on my list of things to have: coasters! Since I prefer to do it myself when I can, I went to our local Home Depot and picked up some of the cheapest kitchen floor tiles that I could find. I got four small 3x3 glossy ceramic tiles, priced at only .13 cents each. Then, purchased a design from the Silhouette store and used my machine to cut it out on permanent vinyl. I sized each design at two and a half inches, and adhered them to each tile. Lastly, I cut out little square pieces of white felt and glued them to the back corners, so they don't clink against each other, and scratch surfaces up.
They turned out great! While I had a couple issues - one has an air bubble that I can't get out, and another coaster is missing the dot for the "i". All things considered, they look fabulous. They look very formal, very wedding-like. With the white and the metallic vinyl, I couldn't have asked for a better combination. (Not to mention, these would probably make great wedding gifts!)
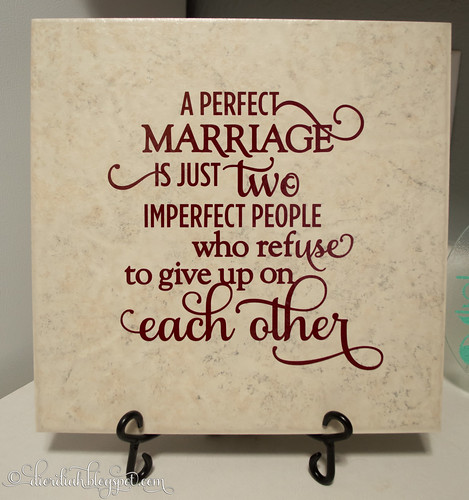
Next project, I wanted a tile just for a simple display. Again, a single, super cheap tile from Home Depot, and a small easel, made for a wonderful foundation to put a phrase on. The easel, I think they are most common for displaying plates, and I found mine at Gordman's. However, I did notice them to be slightly cheaper at Hobby Lobby with a coupon.
I added a different phrase, again purchased from the Silhouette Design Store, cut out in permanent vinyl. My tile was 12x12, and the phrase probably would have looked a lot better larger, but this was as big as my machine could cut. We do what we can, with what we have, right?
A good start to making a bare apartment a nice place to live, I think! It's been FAR to long since I made an attempt at decorating the place I call home.
First on my list of things to have: coasters! Since I prefer to do it myself when I can, I went to our local Home Depot and picked up some of the cheapest kitchen floor tiles that I could find. I got four small 3x3 glossy ceramic tiles, priced at only .13 cents each. Then, purchased a design from the Silhouette store and used my machine to cut it out on permanent vinyl. I sized each design at two and a half inches, and adhered them to each tile. Lastly, I cut out little square pieces of white felt and glued them to the back corners, so they don't clink against each other, and scratch surfaces up.
They turned out great! While I had a couple issues - one has an air bubble that I can't get out, and another coaster is missing the dot for the "i". All things considered, they look fabulous. They look very formal, very wedding-like. With the white and the metallic vinyl, I couldn't have asked for a better combination. (Not to mention, these would probably make great wedding gifts!)
Next project, I wanted a tile just for a simple display. Again, a single, super cheap tile from Home Depot, and a small easel, made for a wonderful foundation to put a phrase on. The easel, I think they are most common for displaying plates, and I found mine at Gordman's. However, I did notice them to be slightly cheaper at Hobby Lobby with a coupon.
I added a different phrase, again purchased from the Silhouette Design Store, cut out in permanent vinyl. My tile was 12x12, and the phrase probably would have looked a lot better larger, but this was as big as my machine could cut. We do what we can, with what we have, right?
A good start to making a bare apartment a nice place to live, I think! It's been FAR to long since I made an attempt at decorating the place I call home.
Friday, January 23, 2015
Monogramming with the Silhouette
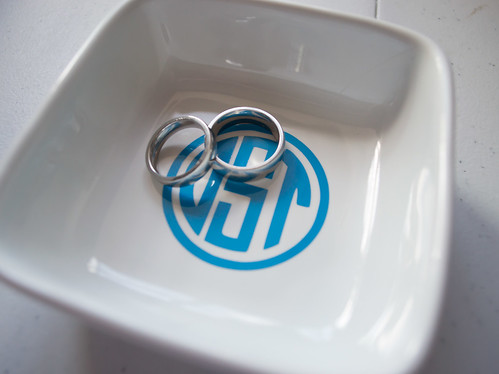
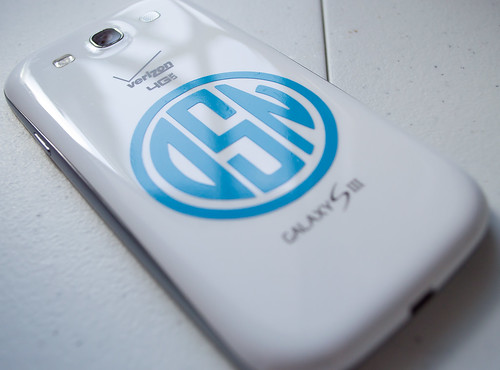
For Christmas, I received a fabulous gift - a Silhouette Portrait! It is just like the Cameo, just a couple inches smaller. I have been playing with cutting paper over the past few weeks, and finally received some vinyl to experiment with. However, recently, I have really taken a liking to monogramming. I purchased an app called Monogram It! for my Android phone (apparently, it's also for iPhone, too), and I started off monogramming my phone wallpaper, but that was not good enough. I wanted to do more! So what was my first vinyl project? A monogrammed ring dish!
The dish is a small porcelain "dip bowl" that was only $2 from Target. I used the app to create a monogram, emailed the image to myself, then traced it into the Silhouette Studio software to cut my vinyl. Once cut, It took me a few tries to get it just right into the dish, and even now it doesn't seem perfectly centered. But, after several attempts, I got frustrated and just decided it was good enough. Haha! It is just for us, so I figure it doesn't need to be perfect.
My husband takes his wedding ring off when he washes his hands, or showers, so I thought the ring dish would be a really cute place for him (and me!) to put our rings when we need to take them off. (Let us not mention the fact that he lost his ring twice over the last 2 weeks. First time, he fell in the snow, and it flew off - we had to wait until the snow melted outside to find it. And more recently, he lost it at the dog park while throwing a frisbee - we had to go back to find it. We were VERY lucky to have found it, both times.)
Anyway, next, I wanted to monogram my phone! This turned out much better, I think. I am totally pleased with how the back of my phone turned out. I keep a clear case over my phone, and this will be completely visible, even with the case on.
I love my Silhouette Portrait, I feel like I can do so much with it! Pretty much anything I can think of to make with it will make fabulous gifts and fun trinkets, not to mention make my smash booking and junk journaling so much better!
The dish is a small porcelain "dip bowl" that was only $2 from Target. I used the app to create a monogram, emailed the image to myself, then traced it into the Silhouette Studio software to cut my vinyl. Once cut, It took me a few tries to get it just right into the dish, and even now it doesn't seem perfectly centered. But, after several attempts, I got frustrated and just decided it was good enough. Haha! It is just for us, so I figure it doesn't need to be perfect.
My husband takes his wedding ring off when he washes his hands, or showers, so I thought the ring dish would be a really cute place for him (and me!) to put our rings when we need to take them off. (Let us not mention the fact that he lost his ring twice over the last 2 weeks. First time, he fell in the snow, and it flew off - we had to wait until the snow melted outside to find it. And more recently, he lost it at the dog park while throwing a frisbee - we had to go back to find it. We were VERY lucky to have found it, both times.)
Anyway, next, I wanted to monogram my phone! This turned out much better, I think. I am totally pleased with how the back of my phone turned out. I keep a clear case over my phone, and this will be completely visible, even with the case on.
I love my Silhouette Portrait, I feel like I can do so much with it! Pretty much anything I can think of to make with it will make fabulous gifts and fun trinkets, not to mention make my smash booking and junk journaling so much better!
Monday, January 19, 2015
Thrift Store Finds
Recently, my love for Smash Booking has turned into something called junk journaling. Junk journaling is all about taking stuff normal people would throw away, such as cereal boxes, old magazines, scraps of fabric, and turning them into a journal. Junk journals usually have pockets, envelopes, and literally anything else you can bind into one. I love the idea, because to be completely honest: we never have any spare money, so crafting without a budget for it is really hard! The fact that I can do my crafts, which is just made from things we normally throw away is awesome.
I don't normally carry cash (perhaps it is the Californian in me who grew up in bad neighborhoods, I prefer to carry cards), so we don't normally go to thrift stores, or anything of the like. Since, the majority of them do not like to allow debit cards on small purchases.
We had a couple extra dollars one day, and I talked my husband into taking me thrifting. We headed out to one of the biggest thrift stores that I know. Well, actually, its a large consignment store, but they have a huge variety of things there! I was after two things: lace ribbon and piano sheet music. Tyler was such a trooper, he was looking through practically every box and every book in each booth. We were there for about 2 hours, looking through everything. But we didn't come out empty handed!
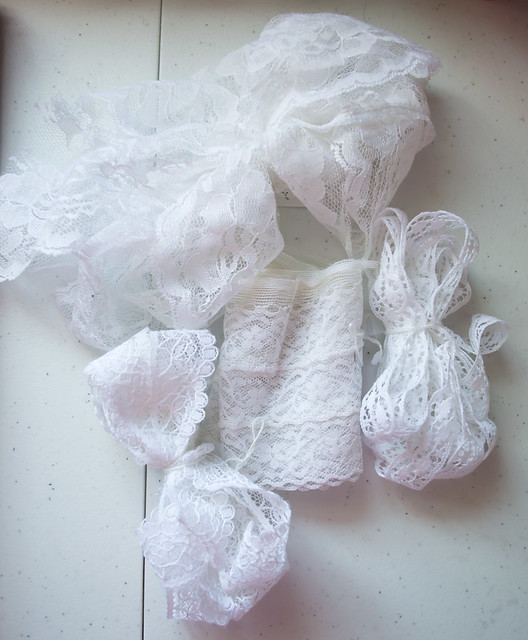
My first find was this lace. Very beautiful scrap pieces of lace, which I love. I am on a huge lace kick right now, I love it!
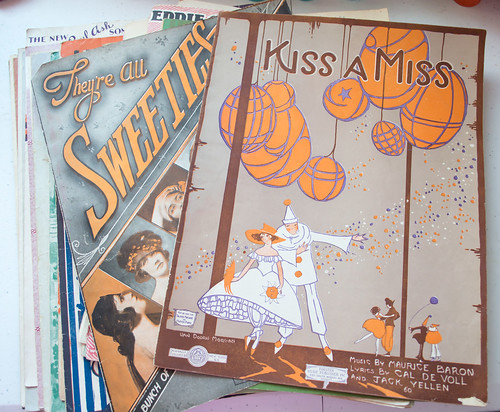
However, my biggest score was these. Little individual pamphlet things, of sheet music. They were the more expensive purchase, but I absolutely love them! They are very old, I have no clue what songs they are, but they literally took my breath away when I saw them on the shelf. They were everything I was looking for. I just know I am going to have a hard time in parting with these beauties.
I don't normally carry cash (perhaps it is the Californian in me who grew up in bad neighborhoods, I prefer to carry cards), so we don't normally go to thrift stores, or anything of the like. Since, the majority of them do not like to allow debit cards on small purchases.
We had a couple extra dollars one day, and I talked my husband into taking me thrifting. We headed out to one of the biggest thrift stores that I know. Well, actually, its a large consignment store, but they have a huge variety of things there! I was after two things: lace ribbon and piano sheet music. Tyler was such a trooper, he was looking through practically every box and every book in each booth. We were there for about 2 hours, looking through everything. But we didn't come out empty handed!
My first find was this lace. Very beautiful scrap pieces of lace, which I love. I am on a huge lace kick right now, I love it!
However, my biggest score was these. Little individual pamphlet things, of sheet music. They were the more expensive purchase, but I absolutely love them! They are very old, I have no clue what songs they are, but they literally took my breath away when I saw them on the shelf. They were everything I was looking for. I just know I am going to have a hard time in parting with these beauties.
Saturday, December 27, 2014
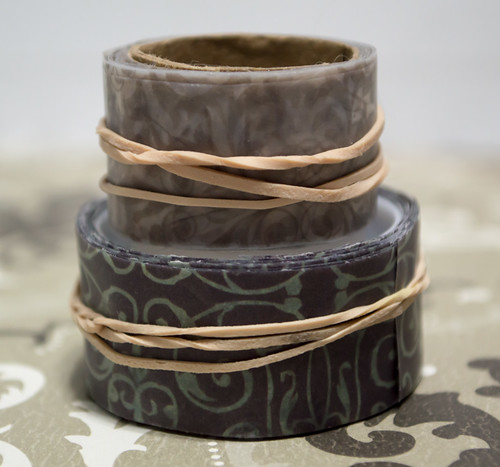
DIY Washi Tape
Lately, I have been getting into a new hobby, called smash booking. Or, junk journaling. Over the past couple weeks, I have spent quite a bit of money buying supplies and getting ready to start actually creating. Smash booking, is what I like to think of as scrapbooking, without all the photos. It focuses less on pictures, but more on embellishments, or whatever else you want to "smash" into the book.
In my quest to buy supplies for this new thing, I came across something called Washi Tape. This is like a low-tack tape that is decorative, perfect for smashbooking. However, the price... Makes me cringe every time I come across it. For a little roll,the price is at least $3. Sure,it doesn't sound like much, but when you have at least 4 different patterns that you feel you can't leave the store without... It adds up. So, my cheap self, decided to find a way to make my own. I googled, and came across a video. I wish I would have saved the link, because it was really helpful. (If anyone knows the video where this tutorial came from, please let me know!).
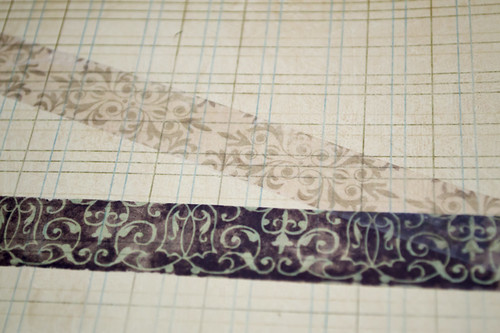
I took photos of the process of how I made my own washi tape. It was rather easy, but quite time consuming. However, I love being able to find any kind of paper I like, and be able to make tape out of it. Will be great for unique projects, where you just can't find the right kind of washi tape for. Anyway, on to the photos!
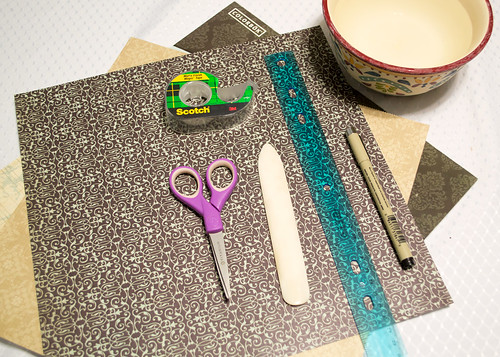
These are the supplies you will need.
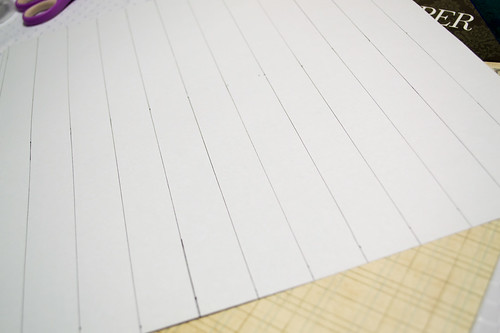
First thing you want to do, is to measure how big you need your strips. My tape was 3/4 inch thick,so I cut my paper to be a bit bigger than the width of the tape. I measured them an inch wide, each strip.
Next, cut out your strips from the paper. Again, this would be tons easier and quicker if you had a paper trimmer on hand. I did not.
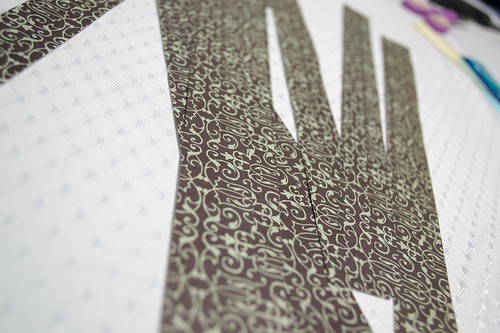
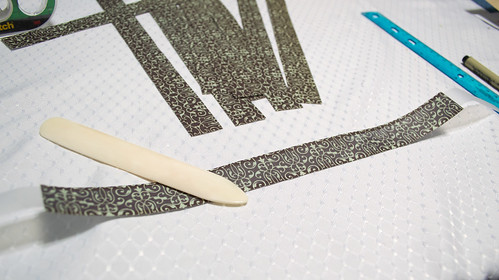
Third, you are going to apply the tape directly to the front of each paper strip. Trim off any extra tape from the sides. I personally, didn't bother with trimming the paper off the sides, because you'll end up rubbing the paper off anyway. But, you can trim up the sides if you want to. However, if you have extra tape hanging off the paper, be sure to cut that off. I ran the bone folder over the top a few times, just to be sure I got a good transfer seal on them.
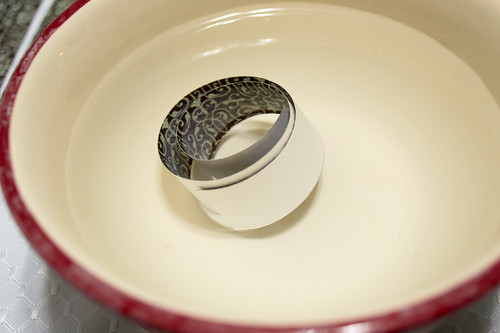
Now that you have your paper with tape attached, dunk into the water for a few seconds. I have found you don't want to leave them in the water too long because the pattern will kind of chip off with the paper in the next step.
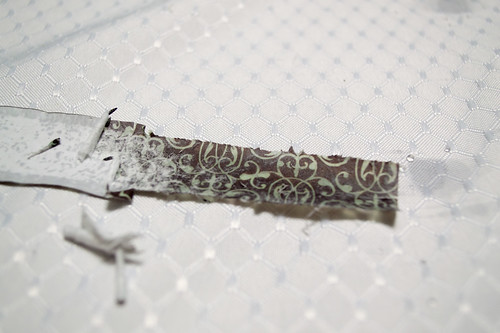
After a few seconds, the paper should be wet and saturated. Take it out of the water, and rub your fingers over the paper. It should start to ball up, and separate from the tape, leaving the pattern behind. Keep rubbing until all the paper is gone. If it gets too difficult to remove, dunk it in more water and continue rubbing.
Some tips, mainly for myself if I intend to keep at this project.
Pretty cool, huh?
In my quest to buy supplies for this new thing, I came across something called Washi Tape. This is like a low-tack tape that is decorative, perfect for smashbooking. However, the price... Makes me cringe every time I come across it. For a little roll,the price is at least $3. Sure,it doesn't sound like much, but when you have at least 4 different patterns that you feel you can't leave the store without... It adds up. So, my cheap self, decided to find a way to make my own. I googled, and came across a video. I wish I would have saved the link, because it was really helpful. (If anyone knows the video where this tutorial came from, please let me know!).
I took photos of the process of how I made my own washi tape. It was rather easy, but quite time consuming. However, I love being able to find any kind of paper I like, and be able to make tape out of it. Will be great for unique projects, where you just can't find the right kind of washi tape for. Anyway, on to the photos!
These are the supplies you will need.
- A ruler. Instead of the ruler and pen, you can use a paper cutter if you have one. I didn't, so I took the time to measure the paper out with a ruler and cut by hand.
- Scissors. To cut the paper if you don't have a paper cutter, and to cut excess tape.
- Patterned paper. I used a sheet from a scrapbooking pad of paper that I bought from Walmart for $5.
- Tape. Obviously. I used just regular scotch tape, with a matte finish. You will need quite a bit of it.
- A bowl of water.
- Bone folder. I am not really sure if this is needed, but I think it is handy to have for this project.
First thing you want to do, is to measure how big you need your strips. My tape was 3/4 inch thick,so I cut my paper to be a bit bigger than the width of the tape. I measured them an inch wide, each strip.
Next, cut out your strips from the paper. Again, this would be tons easier and quicker if you had a paper trimmer on hand. I did not.
Third, you are going to apply the tape directly to the front of each paper strip. Trim off any extra tape from the sides. I personally, didn't bother with trimming the paper off the sides, because you'll end up rubbing the paper off anyway. But, you can trim up the sides if you want to. However, if you have extra tape hanging off the paper, be sure to cut that off. I ran the bone folder over the top a few times, just to be sure I got a good transfer seal on them.
Now that you have your paper with tape attached, dunk into the water for a few seconds. I have found you don't want to leave them in the water too long because the pattern will kind of chip off with the paper in the next step.
After a few seconds, the paper should be wet and saturated. Take it out of the water, and rub your fingers over the paper. It should start to ball up, and separate from the tape, leaving the pattern behind. Keep rubbing until all the paper is gone. If it gets too difficult to remove, dunk it in more water and continue rubbing.
Some tips, mainly for myself if I intend to keep at this project.
- After being attached to paper, doused in water, and then rubbed on, the tape will lose the majority of it's sticky-ness. I suggest to use a clear adhesive of some kind to stick it to wherever you need to to stick to.
- The tape will also not lay completely flat, usually. Again, use a strong, clear adhesive of some kind to force it to lay straight.
- I found that different sheets of paper, yield different results. For example, one sheet of paper from the scrapbooking pad, came off rather easily when rubbed, while another sheet (from the same pad) didn't come off nearly as easily, and still had quite a bit of paper attached. Which can be good, depending on how grungy and opaque you'd like your tape. I don't mind, in fact, I prefer to have some differences in my tape.
Pretty cool, huh?
Monday, August 25, 2014
Laundry Room
When we moved into this apartment back in March, one of the most awesome parts of it is that it came with washer and dryer hookups. So, I could have my own washer and dryer. However, we have never had the money to get them. Every time I would go into Lowes, Home Depot or even Sears, I would price them, then leave because well, they are expensive. I started looking and Craigslist, and Facebook Swap groups for used sets, but we have no truck to pick them up. It was disappointing. We had to find somewhere that delivered.
My birthday is coming up next month, and the only thing I wanted was a way to do my own laundry. My husband currently spends his days off over at his mother's house, doing our laundry. He doesn't remember specific washing instructions I give him, and he left my favorite pair of my shoes over there a few weeks ago, that no one is able to find now. I felt like I need my own way to do laundry.
I considered the Wonderwash. It looks awesome, easy on water, and requires no electricity. I was concerned about the drying time. I feel like the clothes would be soaking wet, and I have no where to dry them. It would be awesome drying outside on a clothesline, but... Well, I live in an apartment. The clothes would have to dry inside somewhere. That being said, the Wonderwash wasn't logical for me.
Tyler told me to start looking for a used set. I called around and found one. They were still way much more than we wanted to pay, but they delivered. We went up there, and purchased them. When we were paying for them, it was an additional $75 for delivery and what she called "installation". This was cool because we never installed a set before, and if installation was included with delivery, that was even better.
Guy came, dropped off the appliances in the middle of the laundry room, and handed us hoses. And left. My husband and I looked at each other after he left, dumbfounded. We both were like, wasn't he supposed to install them? I called the company back, to question why didn't he install them. Apparently, delivery was free, but if they bring it into the house and supply the hoses, that's what they call "Full Service Installation." therefore, he did what he was supposed to and we were not entitled for a refund. I was pissed. Maybe don't use the word installation to people? He paid $75 for what we thought was installation, but really was just to wheel the things 10 yards into the house and putting hoses into our hands. Ugh. Would never purchase another used appliance from them again.
But anyway, he hooked up the washer and dryer, and I spend the whole day doing all my laundry. I love having clean clothes. And I love having my washer and dryer in my own apartment.
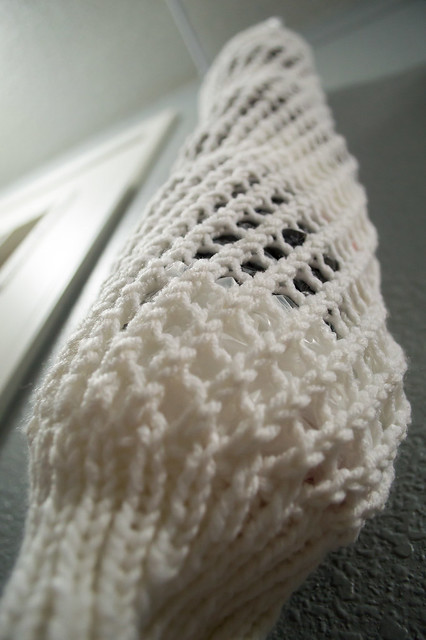
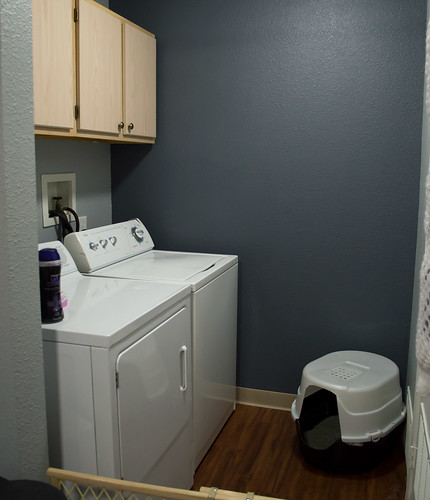
I started to knit a grocery bag caddy a while ago, and finally finished it in time for the appliances to get here. Was trying to pretty up my new laundry room, and it turned out pretty nice! I like it, and it holds a ton of bags in it. Didn't require much yarn, either. I am thinking that I'll revisit this pattern around Christmas, because they will make wonderful gifts.
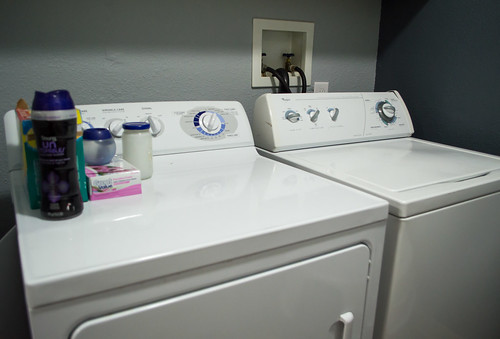
The dryer doesn't go all the way to the wall because our vent is somewhat where it isn't supposed to be, so we have to have a tubing system of some kind back there, which won't let it go all the way back. It is kind of a tight squeeze in there, really only enough room to turn around in. I could, possibly move the wash machine back further,but my OCD wants them side by side. Add the cat litter box in this room, and it feels even smaller.
So pretty! Even with all the drama of that day they came, I love my washer and dryer!
My birthday is coming up next month, and the only thing I wanted was a way to do my own laundry. My husband currently spends his days off over at his mother's house, doing our laundry. He doesn't remember specific washing instructions I give him, and he left my favorite pair of my shoes over there a few weeks ago, that no one is able to find now. I felt like I need my own way to do laundry.
I considered the Wonderwash. It looks awesome, easy on water, and requires no electricity. I was concerned about the drying time. I feel like the clothes would be soaking wet, and I have no where to dry them. It would be awesome drying outside on a clothesline, but... Well, I live in an apartment. The clothes would have to dry inside somewhere. That being said, the Wonderwash wasn't logical for me.
Tyler told me to start looking for a used set. I called around and found one. They were still way much more than we wanted to pay, but they delivered. We went up there, and purchased them. When we were paying for them, it was an additional $75 for delivery and what she called "installation". This was cool because we never installed a set before, and if installation was included with delivery, that was even better.
Guy came, dropped off the appliances in the middle of the laundry room, and handed us hoses. And left. My husband and I looked at each other after he left, dumbfounded. We both were like, wasn't he supposed to install them? I called the company back, to question why didn't he install them. Apparently, delivery was free, but if they bring it into the house and supply the hoses, that's what they call "Full Service Installation." therefore, he did what he was supposed to and we were not entitled for a refund. I was pissed. Maybe don't use the word installation to people? He paid $75 for what we thought was installation, but really was just to wheel the things 10 yards into the house and putting hoses into our hands. Ugh. Would never purchase another used appliance from them again.
But anyway, he hooked up the washer and dryer, and I spend the whole day doing all my laundry. I love having clean clothes. And I love having my washer and dryer in my own apartment.
I started to knit a grocery bag caddy a while ago, and finally finished it in time for the appliances to get here. Was trying to pretty up my new laundry room, and it turned out pretty nice! I like it, and it holds a ton of bags in it. Didn't require much yarn, either. I am thinking that I'll revisit this pattern around Christmas, because they will make wonderful gifts.
The dryer doesn't go all the way to the wall because our vent is somewhat where it isn't supposed to be, so we have to have a tubing system of some kind back there, which won't let it go all the way back. It is kind of a tight squeeze in there, really only enough room to turn around in. I could, possibly move the wash machine back further,but my OCD wants them side by side. Add the cat litter box in this room, and it feels even smaller.
So pretty! Even with all the drama of that day they came, I love my washer and dryer!
Wednesday, July 16, 2014
Michelle's Baby Blanket
A friend of mine recently had a baby late last month. I was excited for her, but at the same time... a little jealous because of my lack of ability to have children (as some may know, my husband and I have been trying for almost a year now). She's one of my closest friends I have here, and she has done a lot for me. Such as, photographing my wedding, which was huge.
I don't like to knit for other people. Usually, you know I care about you if I knit something. I will knit the occasional sock for Christmas for a very close family member (Tyler got his first pair of socks last year), but I usually knit things for myself. It's difficult to explain why, though. Everything I make I feel like I put a ton of work into, and a lot of people don't realize how much work goes into knitting. That being said, I need to know that the people I gift handmade knitted items to will appreciate the work put into them.
Michelle has recently become one of the few in my "knitting gift" circle. She loves everything that she receives, has done so much for my husband and I, so I wanted to give something to her to celebrate the beginning of their new baby's life. I decided to make them a baby blanket!
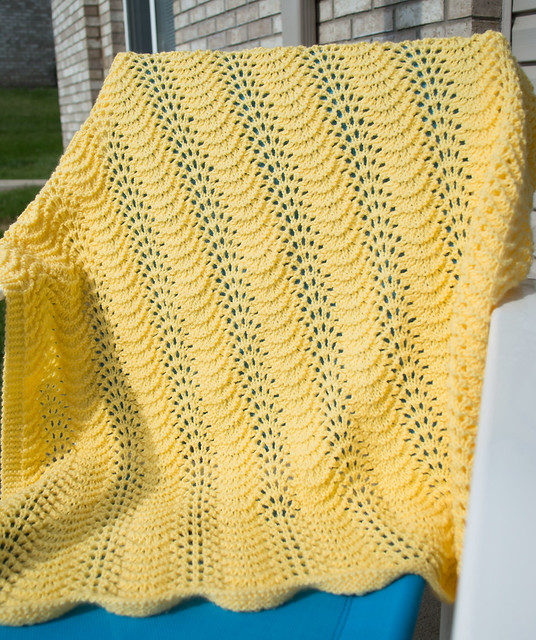
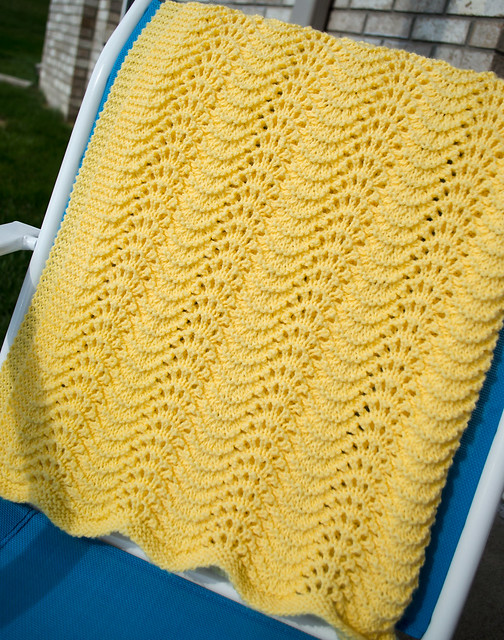
The pattern is just a simple Old Shale pattern found in a stitch dictionary. I wanted to make her something that looked impressive, yet was easy enough to get done in a quick amount of time. I had started this a week before the baby was born, so it needed to be done... quick! I panicked, thinking I wasn't going to be done in time, but after a couple of days of really furious knitting, I finished. I didn't finish before the baby was born, but it was done when I saw her next.
Her and her husband chose not to know the gender of the baby, so I picked out a neutral yellow color. It turned out really pretty! And, she loved the blanket, which definitely made all the furious knitting worth it.
I don't like to knit for other people. Usually, you know I care about you if I knit something. I will knit the occasional sock for Christmas for a very close family member (Tyler got his first pair of socks last year), but I usually knit things for myself. It's difficult to explain why, though. Everything I make I feel like I put a ton of work into, and a lot of people don't realize how much work goes into knitting. That being said, I need to know that the people I gift handmade knitted items to will appreciate the work put into them.
Michelle has recently become one of the few in my "knitting gift" circle. She loves everything that she receives, has done so much for my husband and I, so I wanted to give something to her to celebrate the beginning of their new baby's life. I decided to make them a baby blanket!
The pattern is just a simple Old Shale pattern found in a stitch dictionary. I wanted to make her something that looked impressive, yet was easy enough to get done in a quick amount of time. I had started this a week before the baby was born, so it needed to be done... quick! I panicked, thinking I wasn't going to be done in time, but after a couple of days of really furious knitting, I finished. I didn't finish before the baby was born, but it was done when I saw her next.
Her and her husband chose not to know the gender of the baby, so I picked out a neutral yellow color. It turned out really pretty! And, she loved the blanket, which definitely made all the furious knitting worth it.
Sunday, July 6, 2014
Power Supply Replacement
About a week and a half ago, my husband turned on the computer to play his most recent favorite game, Elder Scrolls Online. He came out to fix me a cup of iced tea. When he was handing it to me, we both heard what sounded like a electrical explosion coming from the other room. We both looked at each other and ran into the bedroom to see what the noise was.
What greeted us was a smell of some kind of burnt plastic or electrical wires. And hey, the computer was off. Nor would it even turn on. It was a huge heart-sink, because just a few days prior - we lost our television due to a cat knocking it off the stand and the screen completely cracked. The only thing left in my head was: What more could go wrong?
Tyler bought a new power supply for it, and yesterday, it finally arrived. He was concerned that when the power supply went out, it took other parts of the computer with it, so I was nervous to put it in, just because I didn't know what I was getting into, and how much damage was really done.
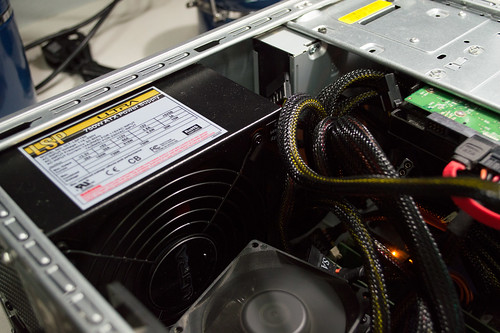
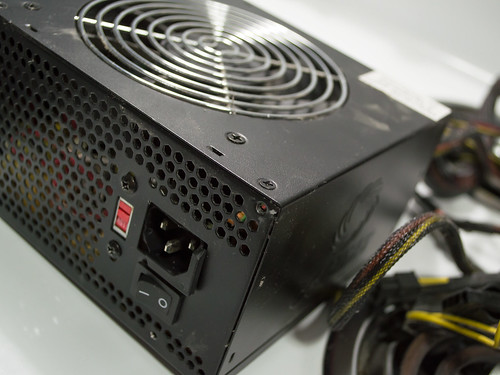
This is my older power supply. I had bought it about the the time when I upgraded my graphics card, several years ago. The graphics card that I got required a higher wattage than what my computer came with. As you can see from the broken piece where the power cord goes, we've been having a few issues with it prior to it going out. I should have known something was going to happen, huh?
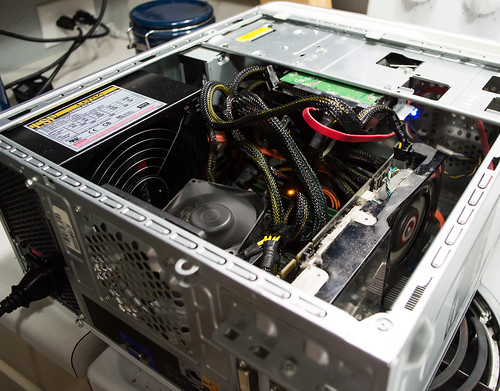
I don't remember it being so complicated when I put in the old one! A lot of cords, needing to go to many different places. And a lot of unused cords. Sheesh! But, eventually we got everything plugged in and successfully working. (Although it looks like the DVD drive was a casualty from the the power supply going out - it doesn't open or work anymore).
And, a last peek at the running computer before I closed it up! I was so excited that the damage wasn't more extensive (and expensive) than what it was. Whew!
I took several photos of Amelia puppy last night, so be looking out for those in the next few days!
What greeted us was a smell of some kind of burnt plastic or electrical wires. And hey, the computer was off. Nor would it even turn on. It was a huge heart-sink, because just a few days prior - we lost our television due to a cat knocking it off the stand and the screen completely cracked. The only thing left in my head was: What more could go wrong?
Tyler bought a new power supply for it, and yesterday, it finally arrived. He was concerned that when the power supply went out, it took other parts of the computer with it, so I was nervous to put it in, just because I didn't know what I was getting into, and how much damage was really done.
This is my older power supply. I had bought it about the the time when I upgraded my graphics card, several years ago. The graphics card that I got required a higher wattage than what my computer came with. As you can see from the broken piece where the power cord goes, we've been having a few issues with it prior to it going out. I should have known something was going to happen, huh?
I don't remember it being so complicated when I put in the old one! A lot of cords, needing to go to many different places. And a lot of unused cords. Sheesh! But, eventually we got everything plugged in and successfully working. (Although it looks like the DVD drive was a casualty from the the power supply going out - it doesn't open or work anymore).
And, a last peek at the running computer before I closed it up! I was so excited that the damage wasn't more extensive (and expensive) than what it was. Whew!
I took several photos of Amelia puppy last night, so be looking out for those in the next few days!
Wednesday, June 18, 2014
DIY Frozen Dog Treats
I bought a rather large container of yogurt for mixing into a rubber Kong toy as a treat for her. However, it is quickly coming up to it's expiration date, and I still have half of it left. I wanted to find something that would be good for my puppy, that would use up more of this yogurt.
Looking around Pinterest (what was my life like without Pinterest, jeez!), I came across this recipe. I tried it as written, but found that I didn't really like how it turned out. I had purchased a really cute dog bone silicone mold from Kitchen Collections when I got my bone cookie cutters, so I was really excited to finally get to use them.
Anyway, this is what I came out with. They are cute, though obviously not as cute as the person who originally came up with them. But I tried. I can't really place what I didn't like about doing them this way though. Maybe because I froze them overnight, and the peanut butter was still not frozen? I had to take them out and place them on a plate to get completely frozen. Maybe I wasn't fond of doing the extra step of microwaving the peanut butter? I don't know.
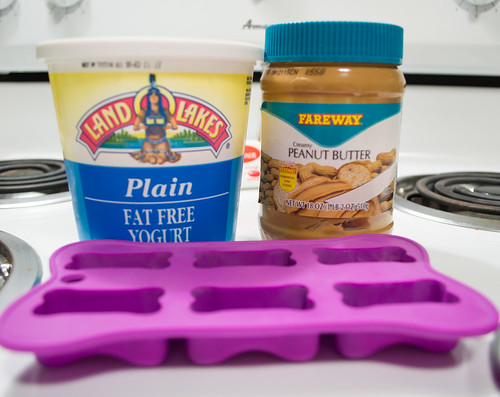
I took the idea of these and just made a small change to make it work better for me. I used the same ingredients I had used prior, peanut butter, plain fat free yogurt, and my silicone mold.
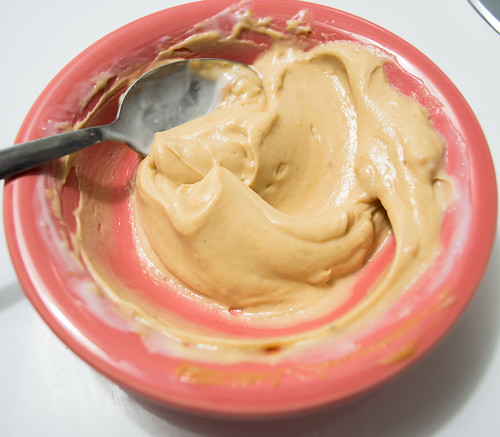
I just took a spoonful of peanut butter, and maybe two spoonfuls of the yogurt, and mixed them together. That's the only deviation that I took, which made it much easier for my lazy self. Less messy too!
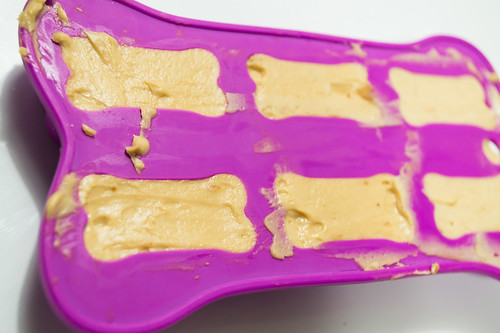
Spoon it into the mold. Now, I just kind of dropped it in there. Next time I will maybe jiggle the mold or tap the bottoms of the mold a bit to get the mixture to settle all the way down. And yes, I realize that my mold is messy and weird looking, but hey... once they are done, you won't see all that ugly, right?? Wipe off any excess that isn't even with the mold. I just swiped a butter knife across the top.
Place the mold in the freezer over night.
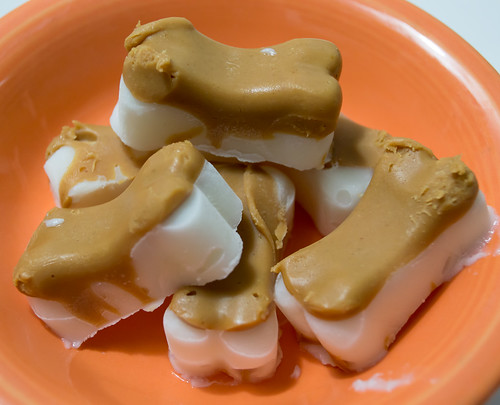
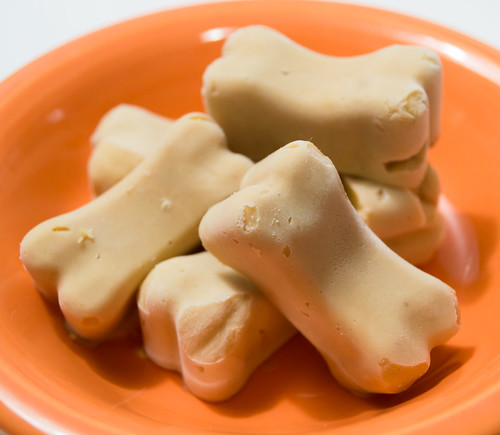
The next day, pop them out of the molds and this is what you get! Store them in a freezer bag and keep them in the freezer until ready to give to your dog.
These turned out nice, I think. Amelia loves peanut butter and goes crazy for yogurt, so naturally, she loves these! Of course, I had hoped that she would make them last longer, but as soon as I give them to her, they are gone. Still makes a good summer treat for her when we come in from a walk though.
Looking around Pinterest (what was my life like without Pinterest, jeez!), I came across this recipe. I tried it as written, but found that I didn't really like how it turned out. I had purchased a really cute dog bone silicone mold from Kitchen Collections when I got my bone cookie cutters, so I was really excited to finally get to use them.
Anyway, this is what I came out with. They are cute, though obviously not as cute as the person who originally came up with them. But I tried. I can't really place what I didn't like about doing them this way though. Maybe because I froze them overnight, and the peanut butter was still not frozen? I had to take them out and place them on a plate to get completely frozen. Maybe I wasn't fond of doing the extra step of microwaving the peanut butter? I don't know.
I took the idea of these and just made a small change to make it work better for me. I used the same ingredients I had used prior, peanut butter, plain fat free yogurt, and my silicone mold.
I just took a spoonful of peanut butter, and maybe two spoonfuls of the yogurt, and mixed them together. That's the only deviation that I took, which made it much easier for my lazy self. Less messy too!
Spoon it into the mold. Now, I just kind of dropped it in there. Next time I will maybe jiggle the mold or tap the bottoms of the mold a bit to get the mixture to settle all the way down. And yes, I realize that my mold is messy and weird looking, but hey... once they are done, you won't see all that ugly, right?? Wipe off any excess that isn't even with the mold. I just swiped a butter knife across the top.
Place the mold in the freezer over night.
The next day, pop them out of the molds and this is what you get! Store them in a freezer bag and keep them in the freezer until ready to give to your dog.
These turned out nice, I think. Amelia loves peanut butter and goes crazy for yogurt, so naturally, she loves these! Of course, I had hoped that she would make them last longer, but as soon as I give them to her, they are gone. Still makes a good summer treat for her when we come in from a walk though.
Tuesday, June 10, 2014
DIY Lotion Bars
I am finally getting through the pictures that I took for my visit in California! I'm still working on the majority of them, but I also did some DIY projects while I was there. It was much easier to do these beauty DIY things, because my family there literally had most of the stuff on hand. While, I, usally have to buy a lot of the stuff I want to DIY on Pinterest.
So, one thing I did while I was there was made some Lotion Bars. I was eyeballing this recipe forever on Pinterest, and we decided to make some. I took some photos along the way. I probably quickly became the family weirdo, taking photos of the process of making lotion bars. Hah.
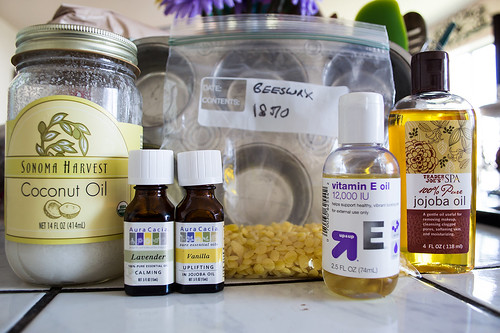
Here's the ingredients we used. Not pictured, but we also used grape seed oil. I had forgotten to include it in the photo. Anyway, grape seed oil, unrefined coconut oil, essential oils (we had Lavender and Vanilla), beeswax, vitamin E oil, and jojoba oil. You'll also need a cupcake pan. We were not sure if this recipe was going to ruin her cupcake tins, so just to be safe, we picked up one from the local Goodwill for 25 cents.
Finding the beeswax was a chore. We had tried Joann's - they didn't carry it. Michaels normally carried it, but they were sold out. We ended up at a local health food store, where they finally had it, sold by the pound. We only picked up half a pound of it, which was plenty for us.
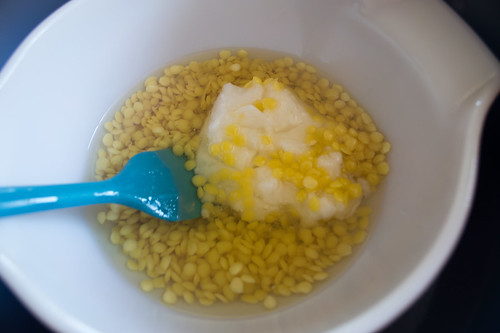
First thing we did was create a double boiler with a large pot and some Pyrex container that she had in her kitchen. It worked out well!
You'll want to mix equal parts together:
Wait for the mixture to melt completely in the double boiler, which for us, took about 10 or 15 minutes. Once it's a pure liquid, you'll want to add your essential oils, and other things. We did a couple of drops of vanilla and lavender together, then about a teaspoon of each Vitimin E oil, and jojoba oil. Mix it together again, and have the cupcake pan ready.
Start pouring into your cupcake tins! It will probably be messy, and it will be hot! Mine was a mess, but you can't really tell now. I poured mine straight into the cupcake pan, but my particular family member poured hers into cupcake liners that she put in the tins. It's just a matter of preference. I've seen it done with soap molds, and silicone molds.
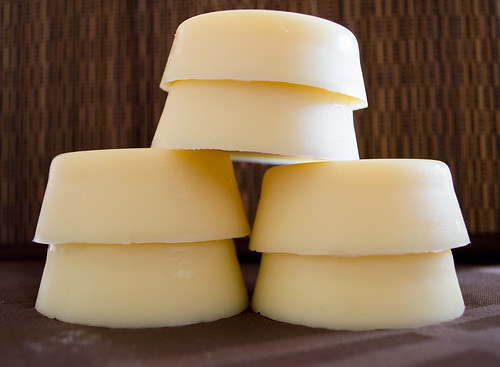
Once they are in the tins, allow to cool completely. I put mine in the refrigerator for about 3 hours. Once hardened, they just popped out of the tin with a little nudge from a butter knife. The 1/2 pound of beeswax we got made about 16 bars, which was not bad at all. My family kept 6, and sent the rest back home with me.
A few notes:
So, one thing I did while I was there was made some Lotion Bars. I was eyeballing this recipe forever on Pinterest, and we decided to make some. I took some photos along the way. I probably quickly became the family weirdo, taking photos of the process of making lotion bars. Hah.
Here's the ingredients we used. Not pictured, but we also used grape seed oil. I had forgotten to include it in the photo. Anyway, grape seed oil, unrefined coconut oil, essential oils (we had Lavender and Vanilla), beeswax, vitamin E oil, and jojoba oil. You'll also need a cupcake pan. We were not sure if this recipe was going to ruin her cupcake tins, so just to be safe, we picked up one from the local Goodwill for 25 cents.
Finding the beeswax was a chore. We had tried Joann's - they didn't carry it. Michaels normally carried it, but they were sold out. We ended up at a local health food store, where they finally had it, sold by the pound. We only picked up half a pound of it, which was plenty for us.
First thing we did was create a double boiler with a large pot and some Pyrex container that she had in her kitchen. It worked out well!
You'll want to mix equal parts together:
- 1/2 cup of grape seed oil
- 1/2 cup of coconut oil
- 1/2 cup of the beeswax pellets
Wait for the mixture to melt completely in the double boiler, which for us, took about 10 or 15 minutes. Once it's a pure liquid, you'll want to add your essential oils, and other things. We did a couple of drops of vanilla and lavender together, then about a teaspoon of each Vitimin E oil, and jojoba oil. Mix it together again, and have the cupcake pan ready.
Start pouring into your cupcake tins! It will probably be messy, and it will be hot! Mine was a mess, but you can't really tell now. I poured mine straight into the cupcake pan, but my particular family member poured hers into cupcake liners that she put in the tins. It's just a matter of preference. I've seen it done with soap molds, and silicone molds.
Once they are in the tins, allow to cool completely. I put mine in the refrigerator for about 3 hours. Once hardened, they just popped out of the tin with a little nudge from a butter knife. The 1/2 pound of beeswax we got made about 16 bars, which was not bad at all. My family kept 6, and sent the rest back home with me.
A few notes:
- These can be really greasy for a while after application. I personally love them right after drying off from a shower, I just wipe the bars on my body and get dressed. My family member, however finds them too greasy, so she applies it before drying off, which works better for her.
- Next time I make these, I think I will sprinkle some lavender buds on the bottom of the mold, so they have a bit more flair in appearance.
Subscribe to:
Posts (Atom)