I made another video tutorial! This time, about how to make little spiral paper flowers! You can put them on paper clips like I did, magnets, pins for bulletin boards, or just leave them as is for paper embellishing.
I am so happy with how these came out! I will admit, however, to film this, it took the better half of an entire day. I messed up a few times, had several false starts, and then filmed the whole thing, to find that it stopped only 13 minutes in. Let us not even mention the battery in the camera had died as well. So, yes, the enamel dot fell off in this tutorial, and I was able to put it back on. I was so exhausted from spending all day working on this video, that I just let it go. Hah. That being said, please pretend that the video is perfect, and the enamel dot did not fall off on me.
I hope you enjoy the tutorial! As always, If you have any questions or comments about the video, let me
know and I will try to answer them as best I can. Also, if you would like
to see more videos from me, be sure to subscribe to my channel on YouTube!
A quick update on the blog before today's post - I am really working on making my blog better, more professional looking, while still trying to maintain a "personal" blog here. I enjoy what I blog about, it is really a documentation of my life, as I live it. But, it seems a little... outdated. I am trying my best to update it to today's standards. I have added a new page, where I am offering up SVG files that I have created for myself, thinking others might enjoy them as well. I have changed the comment system from Blogger's commenting to a system called Disqus (I am working on importing the old comments to the new system, though). Looks to be more popular. Maybe I'll get more people commenting. Lastly, I also changed the theme of the blog. If any problems pop up because of these new changes, please let me know!
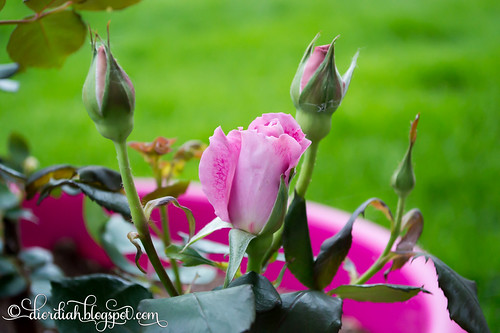
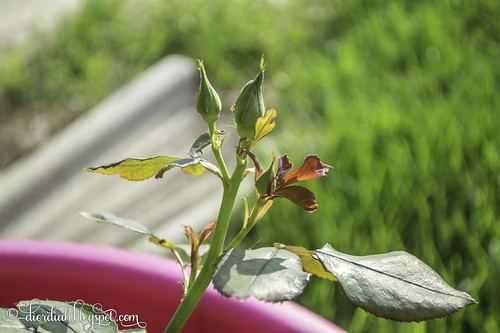
I have blogged about my rose bush several times since I got it. Last post I made, I was excited that it was beginning to have a flower bud. A few days ago, I walked out onto my patio, and saw this little surprise!
It was so close to opening, and gave me a little taste of what kind of coloring it was going to have. I got even more anxious to see what the full bloom was going to be like! All day long, I kept popping my head outside the door to see if it had opened any bigger. Completely illogical, I know. But I could not help it.
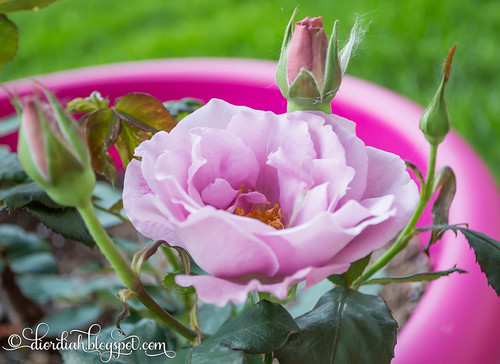
This morning, I went to my patio, and she finally opened up to greet me! My first ever rose bloom, and it is absolutely gorgeous! It is totally worth the wait, to see it in all it's spectacular glory. I counted a total of 7 other buds on the bush, just waiting to bloom like this one. I am very excited to see this flower with the other three buds in full bloom next to it. I think it will be even more beautiful.
Recently I did a little post on my nails and how I feel about them. They have been through so much with me, as I vowed to never chew my nails again, and the constant battle to make them stronger. Well, one negative thing about my nails is that... I have the hardest time keeping nail polish to stay on for longer than 24 hours. I have a TON of polishes, and I have found I have the best of luck with essie polishes. Well, provided that I reapply top coat every day, and even then I only get three days maximum out of it. That being said, I am constantly on the look out for a polish that can last longer than just a few days. I've been told that my nails are oily, and that is why polish peels off in sheets. It makes sense, but it is still very frustrating.
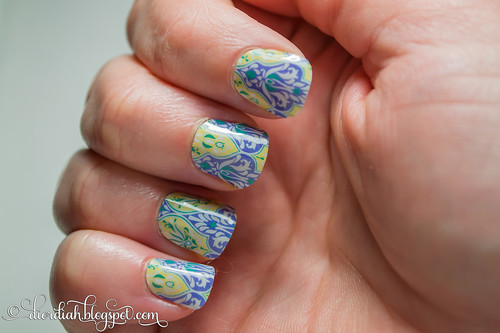
I got my hands on some Jamberry. The idea that they were essentially a sticker that could last for up to three weeks was awesome. I was really excited to try them! I thought they might be the answer to my problem with nail polish - if polish would not stay on, Jamberry might. However, the cost... was way to expensive for me just for daily use. It had to be used for something special.
A few weeks ago, my husband won a "date night" from his work. Where we would have a limo ride, dinner, and a movie. What a perfect opportunity to use the Jamberry that I had been hoarding! All day, I watched videos, read articles and researched the proper way to apply these expensive little stickers, and finally got the courage to put them on. I spent two hours working with them, trying to apply them properly, and was so excited to finally have them on.
They were gorgeous! I loved them, took pictures of them, showed them off to my husband, and I genuinely thought they were the most beautiful things I have ever put on my nails. Until two hours later when I took a shower. I got out of the shower, was running my fingers through my hair, and noticed that my hair got snagged on my nails. Which is never a good thing.
Upon inspection, the whole sticker just peeled right off with hardly any effort on my part. Not just the one either. ALL of them lifted off. I was so heartbroken, I would have been so happy if they had just lasted at least the 24 hours until the date night was over, as that was the whole point of why I put them on. It was completely disappointing. I had to stay up late that night, painting my nails with one of my favorite Different Dimension polishes.
They did not touch my cuticles, or any oils on my skin. I am positive I did nothing wrong, which made the whole experience more irritating. I think I just need to resign myself to the fact that my nails just prefer to be naked.
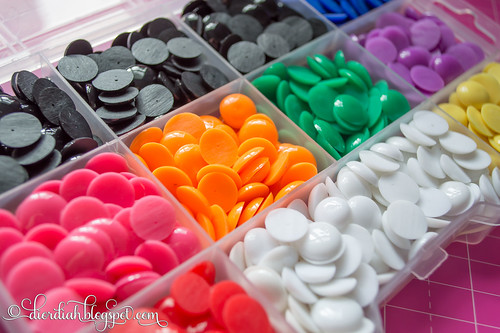
With my paper clip tutorial videos I have been doing lately, I seem to get quite a few questions on one thing: how do I make my enamel dots. I love my enamel dots, I use them on everything I can. They hide joins, hot glue messes, and they even just look adorable sitting on paper. I can't get enough of them. Unfortunately, with how many I use (and making paper clip art in bulk), buying them name brand would cost me a small fortune. My husband already makes fun of me about how much money goes into my crafting hobby, so if I can make them for cheap at home, no doubt I will be trying it!
I came across several videos of how to make enamel dots online, and made a ton of them! I bought a small tub of them from our local Walmart, and spent the weekend melting them down a few months ago. So, because I had been questions about how I made them, I created my own how to video, in case it helps someone out there!
As usual, If you have any questions, or comments about the video, let me know, I will try to answer them as best I can. Also, if you would like
to see more videos from me, be sure to subscribe to my channel on YouTube!
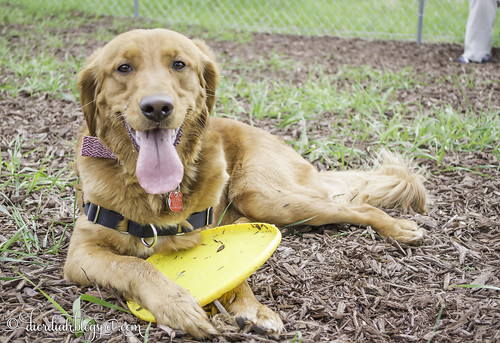
Last time I blogged about Amelia, she was starting her heat cycle. What a insane three weeks that had been! She left messes everywhere, I think my bed comforter is ruined, and she had been forced to stay inside the whole time! Luckily, the bleeding stopped a couple days ago, and she should be getting her body back to normal again soon. We have only started to take her back out to the apartment complex dog park, she has way too much energy! We have been careful and making sure no one else comes into the park, if they do, we are more than willing to leave before they come in. Luckily, we have not came across anyone else in the park, it is only just us.
Anyway, we took her up there on Sunday, just so I could get recent photos of her. I know I have said this before, I love taking photos of her. I get to practice with my camera, which is a constant learning process. Working with a digital SLR is a huge learning curve, and even now, I am still learning more things about it. More recently - I have been figuring out video settings!
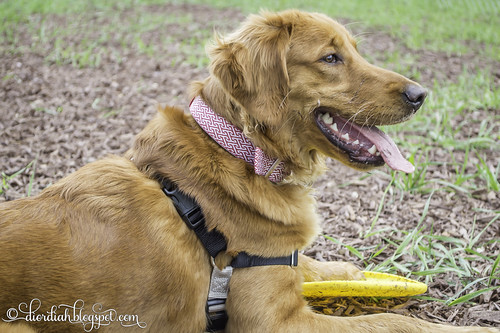
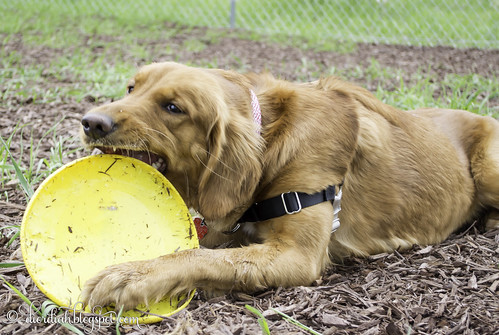
At the park is when I really notice how beautiful she is. In the house, she's barking, growling at people through the sliding glass door, staring at my food when I try to eat, or getting stepped on in the kitchen (seriously, who lays down in the middle of the floor while I am trying to fix dinner?). But, at the park is where she will just run circles with a frisbee in her mouth, and I really see her for what she is. Her long tail, swaying behind her, how graceful she just prances around the park, or how her ears perk forward while she listens for a bird. She is gorgeous in these moments.
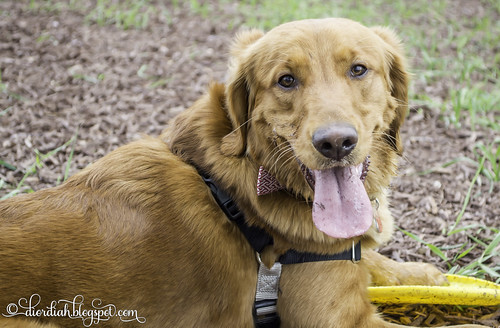
I have always adored golden retrievers for my entire life. I even remember admiring them as a young child. They are the dogs on the cover of books, in advertisements, in movies... the perfect family dog. When I blogged about picking out Amelia, as an 8 day old puppy, I really could not believe that it was me who was getting a golden retriever. Perfect families, with perfect lives, perfect homes and perfect children were people who owned goldens. Not people like me, who lives in apartments, has too many flaws to list, and has no children for the family orientated dog to play with. But, it happened, and she has been with us for a while now!
She is the love of my life, the reason I get out of bed in the morning, and the subject of my photography. She is my world, and has been ever since I read that Craigslist advertisement for golden retriever puppies. That was the start of my love affair with Amelia - it started even before I met her, before she could even see me.
That being said, we do still have our issues with her. She is absolutely terrible on walks. We have tried training with treats on a leash, pretending to be a tree until she stops pulling, a Gentle Leader headcollar, and now we have moved on to a Easy Walk Harness. Recently, her newest thing is pulling us, and when we do not go faster, she still whine and groan, then do a complete vertical jump in the air. It is terrible. She jumps on people, which I absolutely hate. However, the husband likes it, he encourages it, so I can not fault her for that. She does not know better.
Bonus video! Just a video I filmed at the park, of her playing "keep away" with my husband.
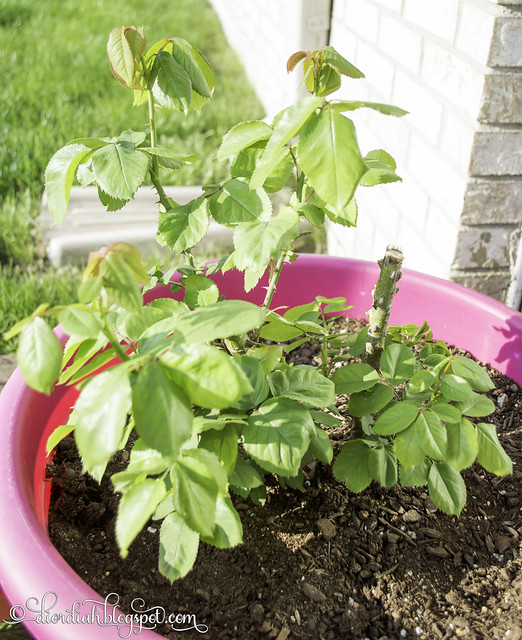
It has been a little while since I posted an update on my rose bushes. I think one is dying, very slowly, but the other looks like it's really flourishing! I added a few plants since my last update, and they are growing steadily, however it is the rose bushes that have been making progress. The other plants will really take off once it starts to warm up I think.
I am finding that plants really do well on my patio, I get full afternoon sun, part shade, and a portion of it gets no sun at all. I think I have officially lost my basil after a infestation of aphids, I got some pesticide too late, and now I think it is not going to recover. It is scraggly, dropping leaves and very wilty. I will have to stop by and pick up another basil plant from the nursery, as I can not imagine a summer without the smell of basil any more!
This is the dying bush, but it has a couple buds on it! They have been like this for a couple weeks now, and at this point I'm not sure if they are going to bloom. The branches are slowly turning black, one by one. It started with one branch, then just kept spreading, shriveling up leaves as it goes along. I feel like I have kind of given up on it at this point, I am just hoping that I could get at least one or two blooms off of it before it goes. I at least want to see what the flowers look like! Not sure that I will buy another bare root rose again.
The double delight rose bush, I blogged about (and again!) a couple of weeks ago, and it was just starting to have little nubs starting off of the branches. Now, it has turned into a beautiful little bush. The leaves look wonderful, healthy and green. The only problem I have found with this is that in the afternoon sun, the leaves will wilt a little. After Googling, I found that it probably does not have enough feeder roots to get water. The listed solution was to move the plant to part shade for a little while. I had been keeping it in part shade now for a couple weeks, and just now got the courage to put it back into full sun. I will be keeping an eye on it for several days, to see if it handles sun better now.
A quick post today, and another video tutorial! I am really making an attempt to get better with talking on my camera, trying to gain confidence, and make better video. I am also trying to work on getting more familiar with Adobe Premiere, and trying to learn how to edit videos properly. That being said, I have been making quite a few short tutorials on how I made small objects (like paper clips). I think I am getting better!
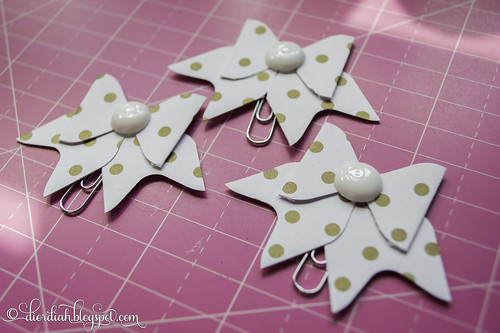
So, the other night, I was making little matching paper bows with my envelope punch board to go into my latest Pocket Letters. I had a bunch of shorter scrap paper, that was just too short to make a second bow. I had the idea to make a smaller bow, and put it on a paper clip!
They were such a success and I absolutely adore them. I wanted to share the measurements that I used on the bows, so I made a little tutorial on how to create them.
Lately, I have found that I have so many tools given to me to be as creative as I can be. Luckily, I have family who is just as into crafts as I am, and many of my tools are gifted to me. I feel so lucky to have many blessings (for lack of a better word), in my life. A husband who supports my crafting in whatever I want to do, a family who will gift me with whatever they do not want, and wonderful crafty booths in my local thrift stores. With all these things that I have now, I finally feel like I can have a successful creative outlet. So, many more tutorials from me will be happening!
As usual, If you have any questions, or comments about the video, let me
know, I will try to answer them as best I can. Also, if you would like
to see more videos from me, be sure to subscribe to my channel on YouTube!
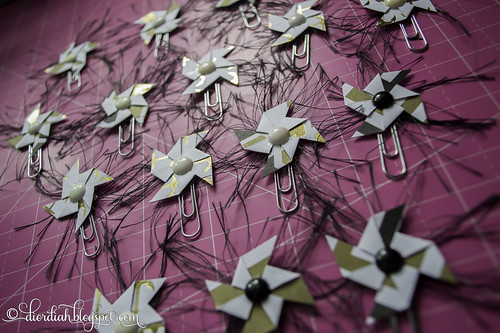
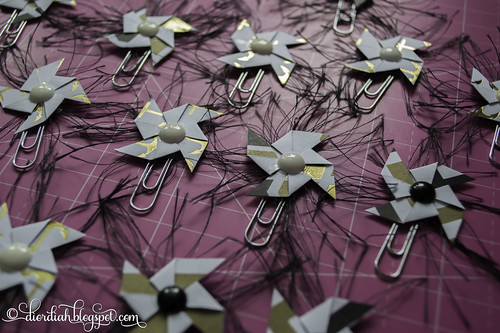
A couple nights ago, I was making some embellishments for my pocket letters. I had scrap paper, and had decided to make little pinwheels. Once I finished, something just didn't look right with them. They did not pop off of the background like I intended, and to me - they just looked kind of bland. They blended in, and I wanted them to pop.
I resorted to the one thing in my craft stash that always makes any embellishment 150% more awesome: fun fur! Seriously, I love this stuff and I find some way to use it with everything that needs a little something extra. I have it in a variety of colors, and the best thing is that it lasts forever! It was perfect for this project.
I made a bunch of them that night. I am working on six similar pocket letters at a time, and needed them all to match the pockets. I used scraps from the paper I used for the letter, and you do not need much of it! Just an inch square to make this size!
Gah, I love them so much! It's not all the time that I do something genuinely creative, but when I do... I am pleased with myself for weeks afterward. Haha!
In fact, I was so pleased with them and happy that they turned out successfully, I made a little tutorial on how I made them.
As usual, If you have any questions, or comments about the video, let me know, I will try to answer them as best I can. Also, if you would like to see more videos from me, be sure to subscribe to my channel on YouTube!