It has been a long time since I blogged about any kind of knitting project I have done! I have not really felt like knitting recently, with my recent craft of Pocket Letters, and junk journals. It's something that I've wanted to really get back into, however. I also want to learn how to crochet, as well. I have told myself once I finish this shawl I'm working on, I will sit down and teach myself how to crochet, just like how I taught myself how to knit.
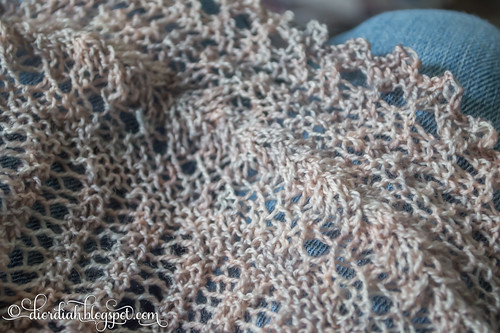
The shawl I'm working on is called Vostok. In the past, I have knit the Henslowe Shawl by this particular designer. The pattern looked extremely complicated, but it was actually simple to follow, and the shawl came out magnificent. It's one of my favorites. So, I had purchased a pattern after finishing the Henslowe, called Vostok. It is beautiful, but I have been afraid to start it because it is a weight of yarn that I've had nothing but failure with. I felt I needed the challenge, something to bring me back to the knitting hobby.
It was the perfect project. Something that renewed my love for knitting, as this is turning out to be one of the more stunning projects that I have knitted. I have been also saving this madelinetosh yarn for something special (it is one of the most expensive yarns I own), and this pattern is really beautiful with it. I am not finished with it yet, I'm working on the edging, and it is going so slow! Hopefully I will finish it in the next couple weeks!
I made another video tutorial! This time, about how to make little spiral paper flowers! You can put them on paper clips like I did, magnets, pins for bulletin boards, or just leave them as is for paper embellishing.
I am so happy with how these came out! I will admit, however, to film this, it took the better half of an entire day. I messed up a few times, had several false starts, and then filmed the whole thing, to find that it stopped only 13 minutes in. Let us not even mention the battery in the camera had died as well. So, yes, the enamel dot fell off in this tutorial, and I was able to put it back on. I was so exhausted from spending all day working on this video, that I just let it go. Hah. That being said, please pretend that the video is perfect, and the enamel dot did not fall off on me.
I hope you enjoy the tutorial! As always, If you have any questions or comments about the video, let me
know and I will try to answer them as best I can. Also, if you would like
to see more videos from me, be sure to subscribe to my channel on YouTube!
A quick update on the blog before today's post - I am really working on making my blog better, more professional looking, while still trying to maintain a "personal" blog here. I enjoy what I blog about, it is really a documentation of my life, as I live it. But, it seems a little... outdated. I am trying my best to update it to today's standards. I have added a new page, where I am offering up SVG files that I have created for myself, thinking others might enjoy them as well. I have changed the comment system from Blogger's commenting to a system called Disqus (I am working on importing the old comments to the new system, though). Looks to be more popular. Maybe I'll get more people commenting. Lastly, I also changed the theme of the blog. If any problems pop up because of these new changes, please let me know!
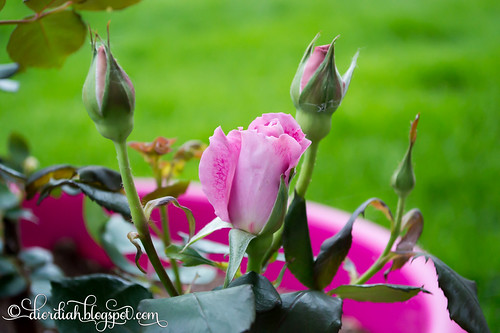
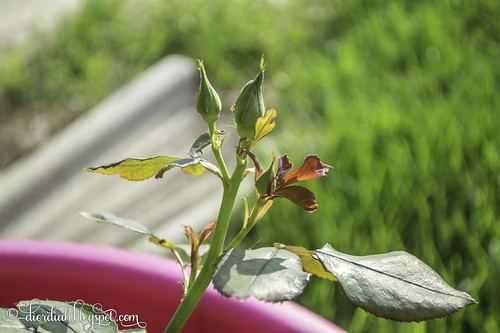
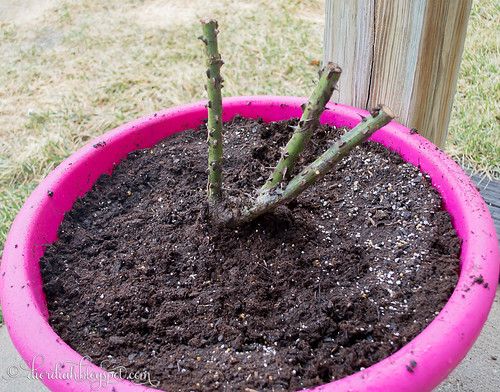
I have blogged about my rose bush several times since I got it. Last post I made, I was excited that it was beginning to have a flower bud. A few days ago, I walked out onto my patio, and saw this little surprise!
It was so close to opening, and gave me a little taste of what kind of coloring it was going to have. I got even more anxious to see what the full bloom was going to be like! All day long, I kept popping my head outside the door to see if it had opened any bigger. Completely illogical, I know. But I could not help it.
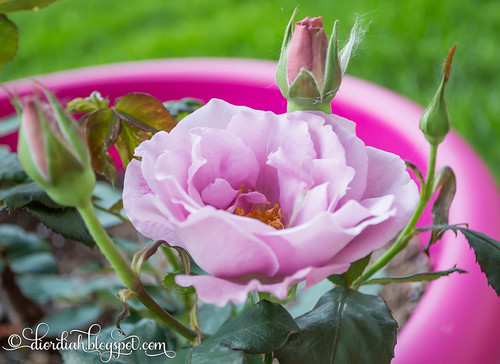
This morning, I went to my patio, and she finally opened up to greet me! My first ever rose bloom, and it is absolutely gorgeous! It is totally worth the wait, to see it in all it's spectacular glory. I counted a total of 7 other buds on the bush, just waiting to bloom like this one. I am very excited to see this flower with the other three buds in full bloom next to it. I think it will be even more beautiful.
Recently I did a little post on my nails and how I feel about them. They have been through so much with me, as I vowed to never chew my nails again, and the constant battle to make them stronger. Well, one negative thing about my nails is that... I have the hardest time keeping nail polish to stay on for longer than 24 hours. I have a TON of polishes, and I have found I have the best of luck with essie polishes. Well, provided that I reapply top coat every day, and even then I only get three days maximum out of it. That being said, I am constantly on the look out for a polish that can last longer than just a few days. I've been told that my nails are oily, and that is why polish peels off in sheets. It makes sense, but it is still very frustrating.
I got my hands on some Jamberry. The idea that they were essentially a sticker that could last for up to three weeks was awesome. I was really excited to try them! I thought they might be the answer to my problem with nail polish - if polish would not stay on, Jamberry might. However, the cost... was way to expensive for me just for daily use. It had to be used for something special.
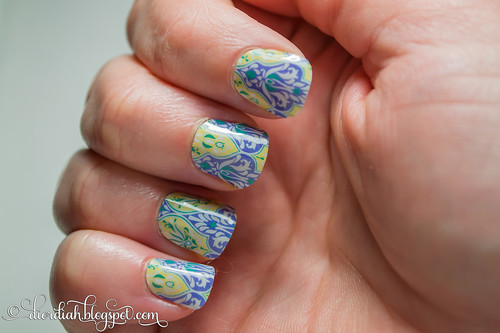
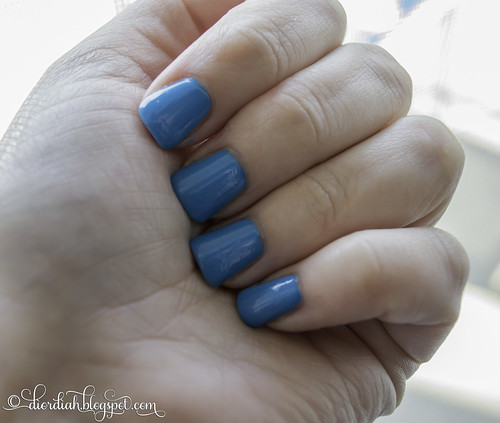
A few weeks ago, my husband won a "date night" from his work. Where we would have a limo ride, dinner, and a movie. What a perfect opportunity to use the Jamberry that I had been hoarding! All day, I watched videos, read articles and researched the proper way to apply these expensive little stickers, and finally got the courage to put them on. I spent two hours working with them, trying to apply them properly, and was so excited to finally have them on.
They were gorgeous! I loved them, took pictures of them, showed them off to my husband, and I genuinely thought they were the most beautiful things I have ever put on my nails. Until two hours later when I took a shower. I got out of the shower, was running my fingers through my hair, and noticed that my hair got snagged on my nails. Which is never a good thing.
Upon inspection, the whole sticker just peeled right off with hardly any effort on my part. Not just the one either. ALL of them lifted off. I was so heartbroken, I would have been so happy if they had just lasted at least the 24 hours until the date night was over, as that was the whole point of why I put them on. It was completely disappointing. I had to stay up late that night, painting my nails with one of my favorite Different Dimension polishes.
They did not touch my cuticles, or any oils on my skin. I am positive I did nothing wrong, which made the whole experience more irritating. I think I just need to resign myself to the fact that my nails just prefer to be naked.
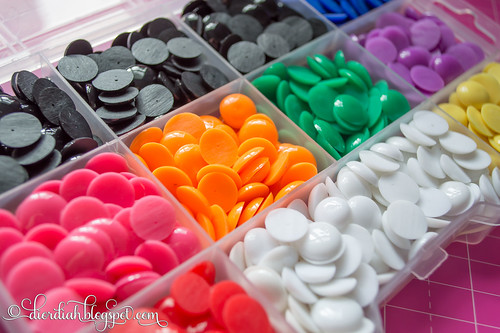
With my paper clip tutorial videos I have been doing lately, I seem to get quite a few questions on one thing: how do I make my enamel dots. I love my enamel dots, I use them on everything I can. They hide joins, hot glue messes, and they even just look adorable sitting on paper. I can't get enough of them. Unfortunately, with how many I use (and making paper clip art in bulk), buying them name brand would cost me a small fortune. My husband already makes fun of me about how much money goes into my crafting hobby, so if I can make them for cheap at home, no doubt I will be trying it!
I came across several videos of how to make enamel dots online, and made a ton of them! I bought a small tub of them from our local Walmart, and spent the weekend melting them down a few months ago. So, because I had been questions about how I made them, I created my own how to video, in case it helps someone out there!
As usual, If you have any questions, or comments about the video, let me know, I will try to answer them as best I can. Also, if you would like
to see more videos from me, be sure to subscribe to my channel on YouTube!
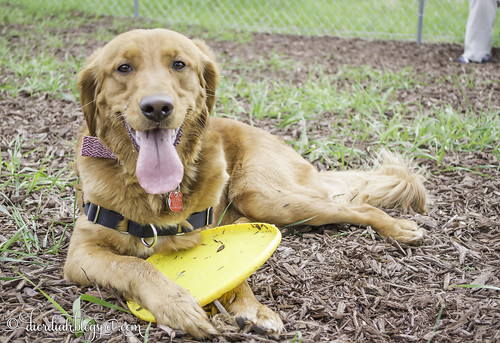
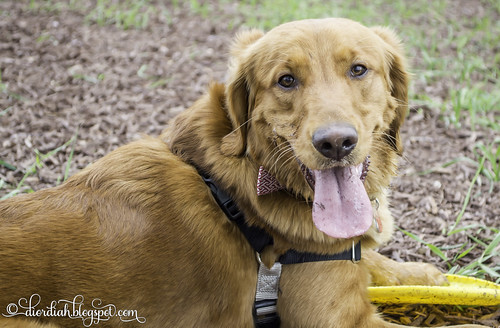
Last time I blogged about Amelia, she was starting her heat cycle. What a insane three weeks that had been! She left messes everywhere, I think my bed comforter is ruined, and she had been forced to stay inside the whole time! Luckily, the bleeding stopped a couple days ago, and she should be getting her body back to normal again soon. We have only started to take her back out to the apartment complex dog park, she has way too much energy! We have been careful and making sure no one else comes into the park, if they do, we are more than willing to leave before they come in. Luckily, we have not came across anyone else in the park, it is only just us.
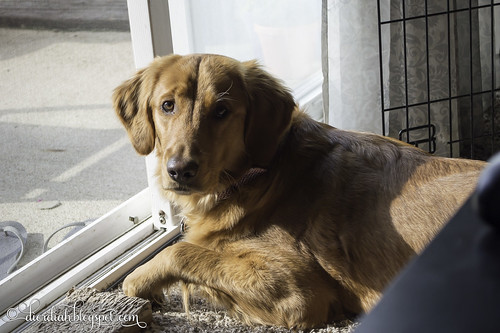
Anyway, we took her up there on Sunday, just so I could get recent photos of her. I know I have said this before, I love taking photos of her. I get to practice with my camera, which is a constant learning process. Working with a digital SLR is a huge learning curve, and even now, I am still learning more things about it. More recently - I have been figuring out video settings!
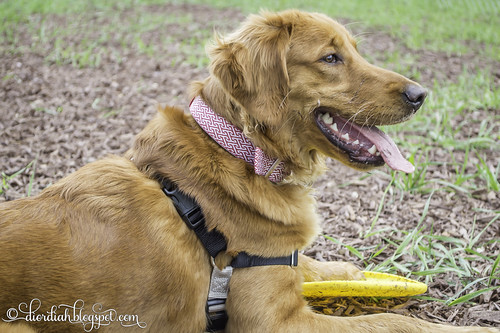
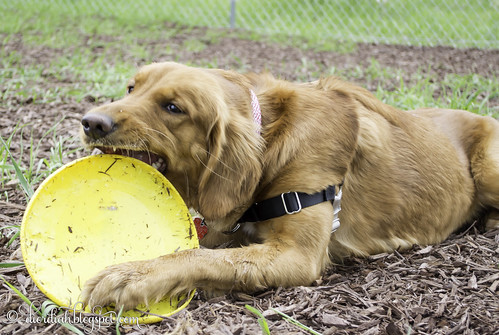
At the park is when I really notice how beautiful she is. In the house, she's barking, growling at people through the sliding glass door, staring at my food when I try to eat, or getting stepped on in the kitchen (seriously, who lays down in the middle of the floor while I am trying to fix dinner?). But, at the park is where she will just run circles with a frisbee in her mouth, and I really see her for what she is. Her long tail, swaying behind her, how graceful she just prances around the park, or how her ears perk forward while she listens for a bird. She is gorgeous in these moments.
I have always adored golden retrievers for my entire life. I even remember admiring them as a young child. They are the dogs on the cover of books, in advertisements, in movies... the perfect family dog. When I blogged about picking out Amelia, as an 8 day old puppy, I really could not believe that it was me who was getting a golden retriever. Perfect families, with perfect lives, perfect homes and perfect children were people who owned goldens. Not people like me, who lives in apartments, has too many flaws to list, and has no children for the family orientated dog to play with. But, it happened, and she has been with us for a while now!
She is the love of my life, the reason I get out of bed in the morning, and the subject of my photography. She is my world, and has been ever since I read that Craigslist advertisement for golden retriever puppies. That was the start of my love affair with Amelia - it started even before I met her, before she could even see me.
That being said, we do still have our issues with her. She is absolutely terrible on walks. We have tried training with treats on a leash, pretending to be a tree until she stops pulling, a Gentle Leader headcollar, and now we have moved on to a Easy Walk Harness. Recently, her newest thing is pulling us, and when we do not go faster, she still whine and groan, then do a complete vertical jump in the air. It is terrible. She jumps on people, which I absolutely hate. However, the husband likes it, he encourages it, so I can not fault her for that. She does not know better.
Bonus video! Just a video I filmed at the park, of her playing "keep away" with my husband.
It has been a little while since I posted an update on my rose bushes. I think one is dying, very slowly, but the other looks like it's really flourishing! I added a few plants since my last update, and they are growing steadily, however it is the rose bushes that have been making progress. The other plants will really take off once it starts to warm up I think.
I am finding that plants really do well on my patio, I get full afternoon sun, part shade, and a portion of it gets no sun at all. I think I have officially lost my basil after a infestation of aphids, I got some pesticide too late, and now I think it is not going to recover. It is scraggly, dropping leaves and very wilty. I will have to stop by and pick up another basil plant from the nursery, as I can not imagine a summer without the smell of basil any more!
This is the dying bush, but it has a couple buds on it! They have been like this for a couple weeks now, and at this point I'm not sure if they are going to bloom. The branches are slowly turning black, one by one. It started with one branch, then just kept spreading, shriveling up leaves as it goes along. I feel like I have kind of given up on it at this point, I am just hoping that I could get at least one or two blooms off of it before it goes. I at least want to see what the flowers look like! Not sure that I will buy another bare root rose again.
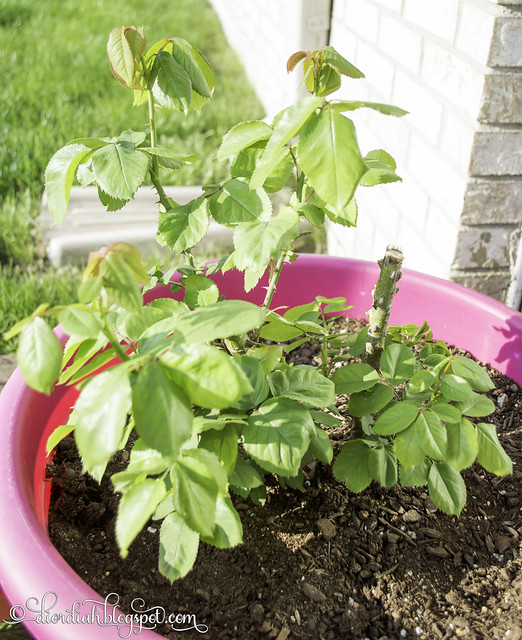
The double delight rose bush, I blogged about (and again!) a couple of weeks ago, and it was just starting to have little nubs starting off of the branches. Now, it has turned into a beautiful little bush. The leaves look wonderful, healthy and green. The only problem I have found with this is that in the afternoon sun, the leaves will wilt a little. After Googling, I found that it probably does not have enough feeder roots to get water. The listed solution was to move the plant to part shade for a little while. I had been keeping it in part shade now for a couple weeks, and just now got the courage to put it back into full sun. I will be keeping an eye on it for several days, to see if it handles sun better now.
A quick post today, and another video tutorial! I am really making an attempt to get better with talking on my camera, trying to gain confidence, and make better video. I am also trying to work on getting more familiar with Adobe Premiere, and trying to learn how to edit videos properly. That being said, I have been making quite a few short tutorials on how I made small objects (like paper clips). I think I am getting better!
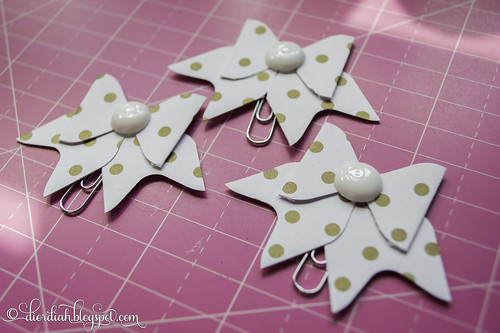
So, the other night, I was making little matching paper bows with my envelope punch board to go into my latest Pocket Letters. I had a bunch of shorter scrap paper, that was just too short to make a second bow. I had the idea to make a smaller bow, and put it on a paper clip!
They were such a success and I absolutely adore them. I wanted to share the measurements that I used on the bows, so I made a little tutorial on how to create them.
Lately, I have found that I have so many tools given to me to be as creative as I can be. Luckily, I have family who is just as into crafts as I am, and many of my tools are gifted to me. I feel so lucky to have many blessings (for lack of a better word), in my life. A husband who supports my crafting in whatever I want to do, a family who will gift me with whatever they do not want, and wonderful crafty booths in my local thrift stores. With all these things that I have now, I finally feel like I can have a successful creative outlet. So, many more tutorials from me will be happening!
As usual, If you have any questions, or comments about the video, let me
know, I will try to answer them as best I can. Also, if you would like
to see more videos from me, be sure to subscribe to my channel on YouTube!
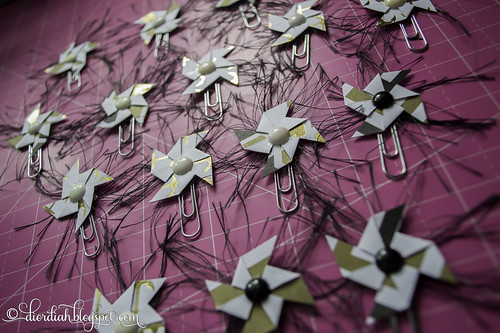
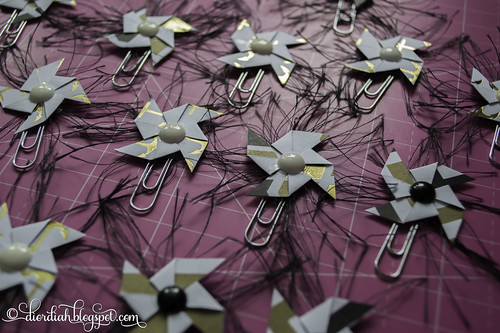
A couple nights ago, I was making some embellishments for my pocket letters. I had scrap paper, and had decided to make little pinwheels. Once I finished, something just didn't look right with them. They did not pop off of the background like I intended, and to me - they just looked kind of bland. They blended in, and I wanted them to pop.
I resorted to the one thing in my craft stash that always makes any embellishment 150% more awesome: fun fur! Seriously, I love this stuff and I find some way to use it with everything that needs a little something extra. I have it in a variety of colors, and the best thing is that it lasts forever! It was perfect for this project.
I made a bunch of them that night. I am working on six similar pocket letters at a time, and needed them all to match the pockets. I used scraps from the paper I used for the letter, and you do not need much of it! Just an inch square to make this size!
Gah, I love them so much! It's not all the time that I do something genuinely creative, but when I do... I am pleased with myself for weeks afterward. Haha!
In fact, I was so pleased with them and happy that they turned out successfully, I made a little tutorial on how I made them.
As usual, If you have any questions, or comments about the video, let me know, I will try to answer them as best I can. Also, if you would like to see more videos from me, be sure to subscribe to my channel on YouTube!
Once upon a time, I was a serious nail chewer. I had been doing it for as long as I could remember. I never had nails, I'd chew my nails and the skin around them until they bled. On a daily basis. My nails were a serious embarrassment, and every time I went out, or anything, I felt like I needed to hide my fingers. They were horrible looking. Stumpy nails, bleeding hangnails, ugh. The latest photo that I took of my fingers in this state, was when I posted about some knitting projects I made. They looked so terrible then! One day, I decided I did not want to hide my fingers anymore. I made the decision that day to stop chewing on them.
It was difficult to do. I had to consciously pull my fingers out of my mouth most of the time, remind myself to stop. I found that if I kept my nails painted, I was more likely to keep them out of my mouth. Because of this, I bought a lot of nail polish. I was making a good amount of money in a job I hated, so I spent a lot of money on polish. A little while ago, I even took my blog on a tour of my nail polish unit. Taking photos of those, and posting them was just a little embarrassing, I (or my husband) did not realize how much I had... or how much money went towards it.
While I do not buy any nail polish anymore, I definitely accomplished my goal of not chewing on my fingers anymore. It was a long process of keeping my nails painted, making sure my cuticles stayed moisturized to stop the hang nails, and constant reminding myself to keep them away from my face.
I am so proud of my nails now. I never bite on them anymore. At this point, they actually grow so long that I have to trim them all the back down because they get in the way. A few years ago, I never imagined that I would ever have that problem. My current nails are proof to myself that I really can do whatever I set my mind to. I just need to make a decision, and commit to it, like I did with my nails.
As the weather is warming up, and Amelia growing to be such a large dog, I have been wanting to take her out for walks, to burn off some of her energy, and possibly work on getting me slightly more in shape than what I am. At least, once her heat is over. I have also purchased her a Easy Walk Harness, because her Gentle Leader is no longer working for us at all. She pulls way to hard still, even with the gentle leader on - so hard that she's wounding her under eye area. Here's hoping that the harness works better for her!
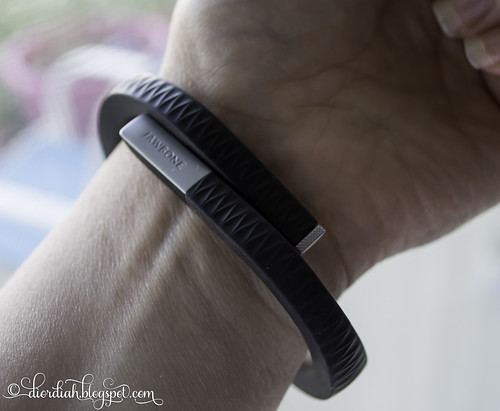
Yesterday, my husband returned home with a new little fitness gadget that will hopefully be awesome with me walking Amelia. He got a Jawbone Up from someone who did not want it anymore. Last night I did a lot of research about it, and it seems to be something similar to the Fitbit, which I have been wanting.
I set it up, got the app downloaded onto my phone, and got my account all up and running. I amm very excited to use this new to me gadget! It seems that it can be a pedometer, fitness tracker, and can even track sleeping habits. From what I have read, it seems to be very good in giving true data. We will see.
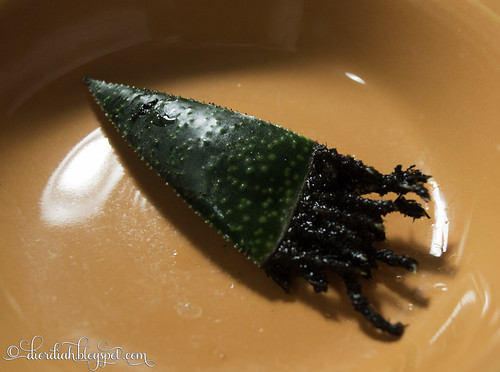
I have had this particular plant for at least a year. The plant came with a tag, saying it was an aloe vera. Turns out, I recently found out that it was not an aloe, but a succulent called a Gasteria. I have been trying to propagate it by leaves that had been broken off by the cat, and have been having a little success!
I had checked for roots periodically, and you can imagine my glee when I saw a small little green nub at the end of the leaf one day. I went running through the house to show my husband, who did not understand my excitement... at all. Shortly after, it had gotten a foothold in the soil, and it would not lift up easily. The other night, I took out the soil to see how the roots look, and if there was any progress on the next step of propagation coming along.
I was shocked at how awesome the roots have gotten! They are a far cry from the little green nub I saw weeks ago. Apparently, it will take a long time to actually grow leaves, however. Now that I have been looking at the proper name for the plant, and what to expect, it could be several years before I have a large enough plant that would need to be repotted.
So, we will see. Currently, it is in a tiny used Keurig cup that I had on hand at the time, covered by a mason jar to keep humidity up. It is not taking up much space as it is right now, so I will just keep doing what I have been doing with it... waiting.
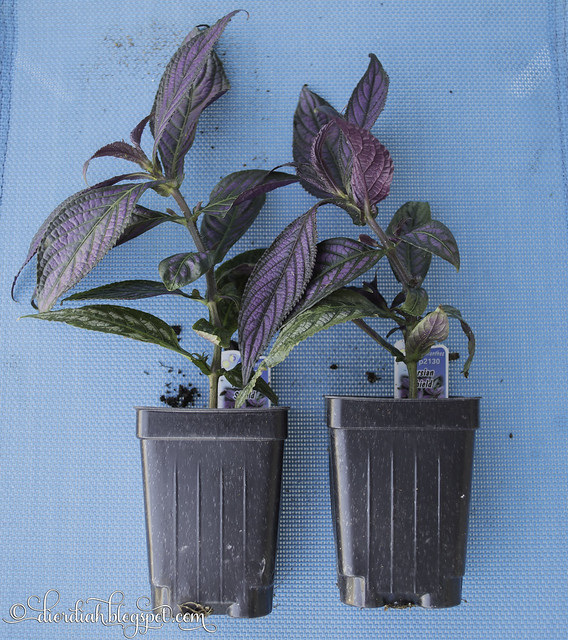
Towards the end of last month, I purchased a Persian Shield plant from a nursery online. It looked okay when I received it, but for some reason, I wanted a couple more. I have been at my local nurseries, and have had no luck in finding it. I had asked the employees even if they could order it for me. They would not. So, I decided to get a couple more. At the very least - so that I could stop obsessively hunting them locally.
I went with a different nursery this time. I have heard good things about Select Seeds, so I decided to try them out. They had a really good price for the plants, and one of the cheapest places I have found for shipping. I ended up paying just under $21 for the two. It kind of does sound like a lot, but when you factor in how much gas we have wasted in trying to find this plant every weekend, and the cost relative to other online nurseries, this price was phenomenal.
VERY pleased with these plants. The leaves are not dried out like the last place I ordered from, and these were packaged gorgeously. They each had their own little specially made cardboard box, the soil is still damp, and they came in their own pots. The leaves need to do a little relaxing from the journey they took to get to me, but they look to be in fantastic shape. I will, without a doubt, be back to order more from them!
Their pot and potting soil has been waiting for them for a week, so I am very excited to pot them up into their new home!
The thing I have been dreading has finally happened: Amelia has went into her first heat cycle. I've been really concerned about it because of the messes I have envisioned in my mind about it. However, I have been slightly worried that she hadn't gotten it yet, so I am a little bit relieved. A lot of the goldens born the same month as her had already gotten their heat. My Amelia is a late bloomer, it seems.
That being said, we are officially confined to the house for the next several weeks, until it is over. It has only been two days, and she is already restless. The only time she goes outside is to go potty. I was told that I shouldn't even walk her by myself outside because a male dog might turn aggressive with me while trying to get to her. I am not taking any chances.
At first, she was not doing a good job at keeping herself clean. I was wiping her once in a while, trying to keep the mess on my carpet and furniture to a minimum, but today it seems she is doing much better. She's cleaning herself more often now, and I have not had to wipe her since. If it gets worse, we may need to look at getting some diapers for her.
She is definitely not herself, however. She's more clingy, wanting more attention, and just seeming to be more tired than usual. She just looks uncomfortable all the time since her heat started. Three weeks of this seems grueling, keeping her in the house, her long, sad stares.... I am not sure how I will survive this with her!
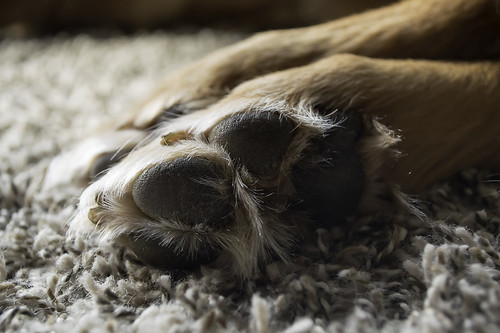
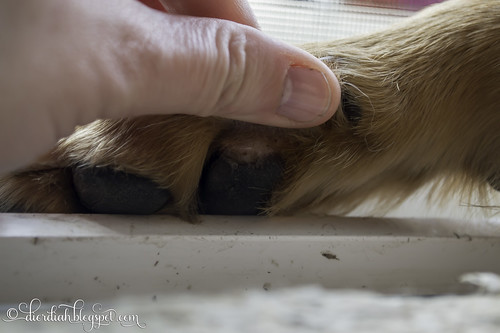
A few things happened all around the same time, so I can't quite pinpoint the cause, but Amelia somehow injured her paw pads! Within a series of days, I bathed her in new shampoo, and we went to the grand opening of our apartment complex's dog park. We have also changed her food over the past couple weeks. I do not really remember when I first noticed her licking her paws, but it was excessive. When I noticed, I looked at them right away and found that they looked really raw. It was not just one of them, it was both front paws, and one back paw. From her licking? I do not know. One paw was worse than the other, part of her front toe pad was hanging off!
So, it could be a variety of things, I figure. A reaction to the new soap? Did she cut herself on the new mulch at the park? She is a completely indoor dog, so her pads are a little dainty. Allergies to the new adult food, even though we did not change brands or formulas? Naturally, I went into panic mode. I researched online, and went into an even worse panic. Dr. Google is horrifying sometimes!
I decided to do a couple home remedies, before I made a vet appointment. If she wasn't getting better by the third day (which was payday), she was going to be taken to the vet. I went to the Dollar Tree, picked up a couple packages of Epsom Salt, and little toddler socks. I also heard a lot about this stuff called "Bag Balm," which is some kind of ointment/moisturizer used mainly for cow utters. Though, it is good for human moisturizing, and can be used on dogs, as well. I hunted that product down, finally found it at our local Walgreens!
My method was simple: After dinner, I filled up the bathtub with about 1-2 inches of water, and poured some Epsom salt in it. Amelia stood in the bath, for a good ten minutes, while I fed her treats to stay in there. After ten minutes, she got taken out, and her feet were dried as best I could get them, then I rubbed Bag Balm on her paw pads, and covered with the toddler socks. She ripped off the socks right away the first time, so we lightly wrapped a layer of tape around the socks. It helped. When we were ready to go to bed, I took off the socks, and made sure she was not licking her paws, until she calmed down and went to sleep. I took them off before bed because I was worried about the wound turning into a hot spot, and also her taking off the sock while I was sleeping and swallowing it. Which would turn into a worse situation. When I woke up, she got more Bag Balm and socks on for a couple more hours. Then the process repeats at night.
I immediately saw improvement with her paws! The part that was hanging off healed, and now it has turned black again, it's definitely less raw, and I think it is healed enough that we do not need to do our morning/evening ritual anymore. We have not taken her back to the park, or even for a walk since it looked bad, but I think now, it looks okay to start walking her again. The photo is recent, showing her healing. This was the worse paw, you can barely notice where the hanging off part was.
I am, however, extremely nervous about taking her back to the park again, because I really think the rough mulch stuff tore up her pads. But still, I am keeping a close eye on her, making sure there is no more licking, and assuring that it remains healing.
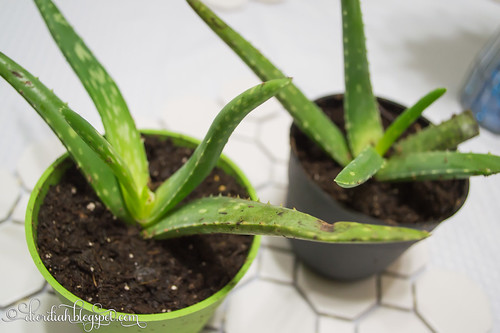
It is a known fact in this house that I have a soft spot for aloe vera plants. Last summer, we had went to an event that was all outside in the middle of the summer, and we were out there all day. Of course, I came home with the worst sunburn I ever had in my life. It was so bad that my face had swelled up. The only thing that made it feel better was some aloe vera gel that we had purchased. Ever since then, I had been wanting to grow my own aloe, in case I need it again. Now I find myself with a total of seven aloe vera plants, in three different species.
When I was browsing through my local Lowes, I came across two very sad looking aloes, on clearance for $1 a piece. They each had several dead, shriveled, brown leaves, as well as several leaves that were broken towards the top, but other than that, they didn't look "sickly." They each had new growth, and it looked healthy.
I repotted them, took off the bad leaves, and all the dead ones. I left some bent and broken leaves on though, thinking that the plant can still get nourishment from them, and not wanting to give it too much of a shock.
Here's hoping that they will continue to thrive, now that they are in a new home, and all it's dead leaves pruned off of it!
As those who read my blog know, I am huge on the thrift store shopping. A lot of my crafting supplies are either given to me, or bought from thrift stores. I am particularly fond of vintage sheet music and lace trims. That being said, I have accumulated quite a bit, that I have not even used. My husband was beginning to call me a hoarder, and I can't have that! I sat out to make use of some of my crafting products.
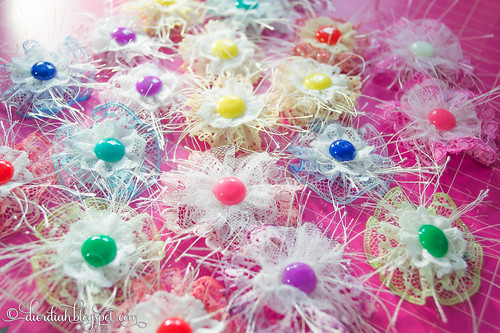
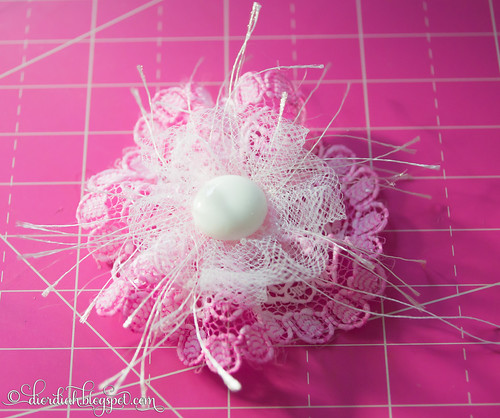
I made a bunch of what I call Layered Lace Flowers! They all turned absolutely gorgeous, I am floored at how awesome each one turned out. Usually, things look better in my head than they do in real life, so the fact that these turned out the way they did is incredible. However, when I think about how I made them, I realize that each one took quite a bit of time. I ended up making these over a course of several days, really. I measured, cut and sewn up each one while leisurely sitting on the couch, watching television. Next was coloring all of them, which required time to dry again. Then all the hot gluing. But it was all worth it!
I simply ADORE how this one came out. I made them in all shapes, sizes, and colors, but some reason, this one is my absolute favorite. I love the way the pink looks, the tulle, size. Pretty much everything.
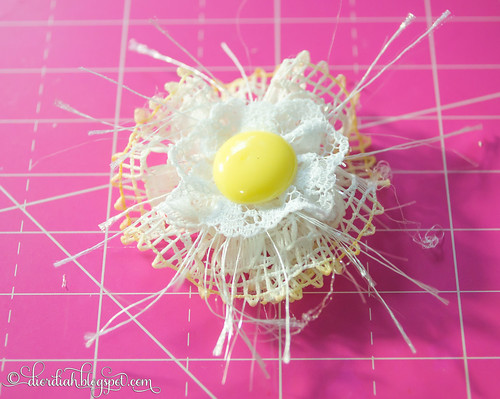
I was surprised at how much I found I like this one, too. The other one I could justify, because it is pink, and I love the tulle look. But this one, I did not think it would be my style. But no! It looks like a little circle of happy!
I actually did a tutorial on how I made them! The camera kept focusing every time I moved, though, so you might not like the tutorial if that bothers you. (I learned to take pictures with it, not video - so I am trying to learn video now). If you enjoyed the video, please subscribe to my channel!
Enjoy, and I hope the video inspires you to make your own in some form!
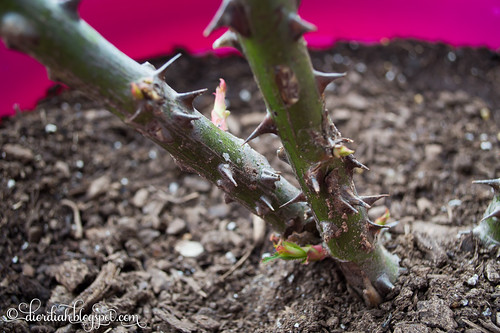
Let's talk more plants! I posted a little while ago, progress on my first bare root rose. Not much has changed really, but I have noticed the growth on it getting larger, and new growths are showing up. Exciting, for me who has never had a rose bush before!
I am kind of disappointed that it isn't growing faster, as people are already seeing blooms on their roses. I need to learn to be patient! Hopefully, when it does bloom, it will be spectacular and totally worth the wait. It has been a bit of a pain, the apartment managers has been telling people to clear off their patios, because they are power washing. My husband, every morning, had been lugging the huge, heavy pot in the house in the morning, and back outside when we decided they were not going to get to us that day. I imagine that all the moving around of it might have hindered the growth progress of it. (In the end, we never got our patio power washed, and I have given up on moving the plants around. At this point, if they want to power wash, they can work around my potted plants.)
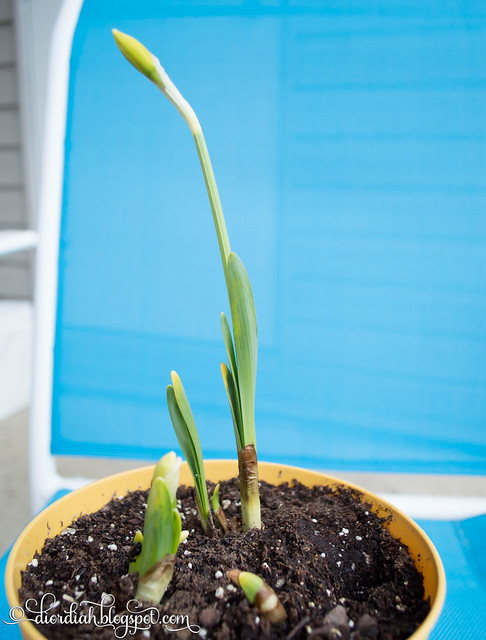
I had purchased daffodil bulbs during last fall, and for some reason, I never got around to planting. I had put the bulbs in the refrigerator, and forgot about them. Cleaning out the fridge, I found them again. They were trying to sprout in the bag, so a few weeks before spring started, I decided to plant them in a small pot, not expecting anything to happen with them. All the information I could gather, said that they need fall weather to grow roots, to get ready to flower in spring. I read that I might get leaves, but that is it. I am amazed to see at least one looks like it is thinking of doing something! It looks like it's wanting to flower! Exciting!
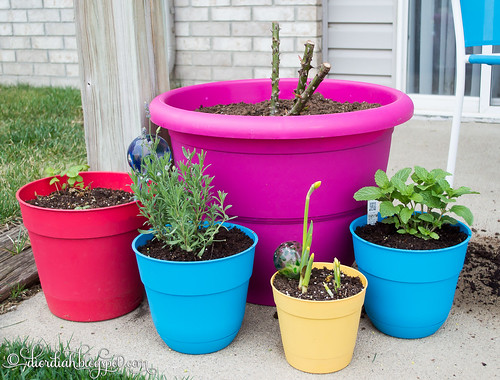
Here's the current status of my "patio garden." I have strawberries in the medium red pot, that I had bare root plants for. Not sure how well they will grow, considering the ones I see in the stores are already much better off than what I currently have. I recently added a lavender, and a sweet mint plant. Just got them over the weekend, and promptly planted them. (Don't mind the mess of potting soil on the concrete, I do need to get my butt out there and sweep it up)
Trial and error is how it goes with my gardening experiences! I am still doing a lot of Googling with my plants, making a serious attempt to do things right! Maybe soon I will need to do a post on my indoor plants, including my crazy, overflowing, windowsill.
With smashbooks, junk journals, my dog, and gardening, one would think I have enough hobbies, right? Well apparently not, because I just picked up yet another craft! There is a new thing going around, called Pocket Letters! I have been hit hard by this craft, as I adore it! I can really get my creativity going with these pocket letters, as they are small, and much easier to commit to, than say, a junk journal or something similar. I have mentioned before in this blog that I really enjoy having the instant gratification feeling, and these can be punched out in a couple of hours, using all my existing supplies.
Basically, a pocket letter is paper, divided up into a trading card protector, and decorated. You can decorate them however you like, add whatever embellishments you want to add. You can add little goodies in the pockets, such as tea bags, die cuts, or whatever else will fit in the pocket! The only requirement is that you have to add a letter into a pocket. Because these are, after all - pocket letters. Once you finish the page, you send it out to a snail mail pen pal, or for a one time swap with someone.
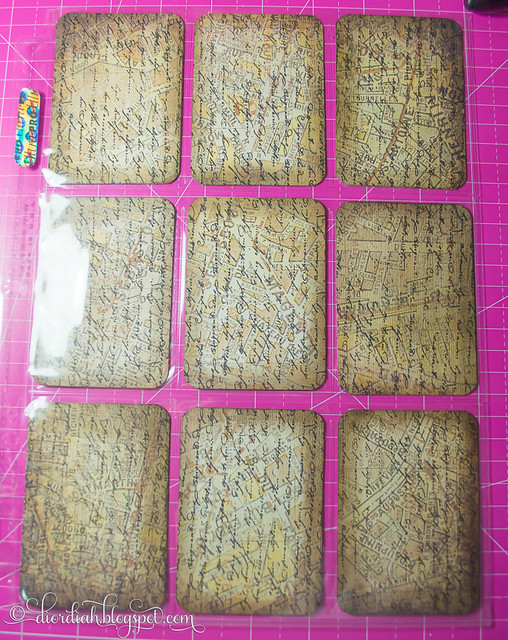
This is my first pocket letter, before I really embellished it. I had cut up my pieces of patterned cardstock, stamped each one with a really beautiful, large script stamp, and inked the edges with some Distress Ink.
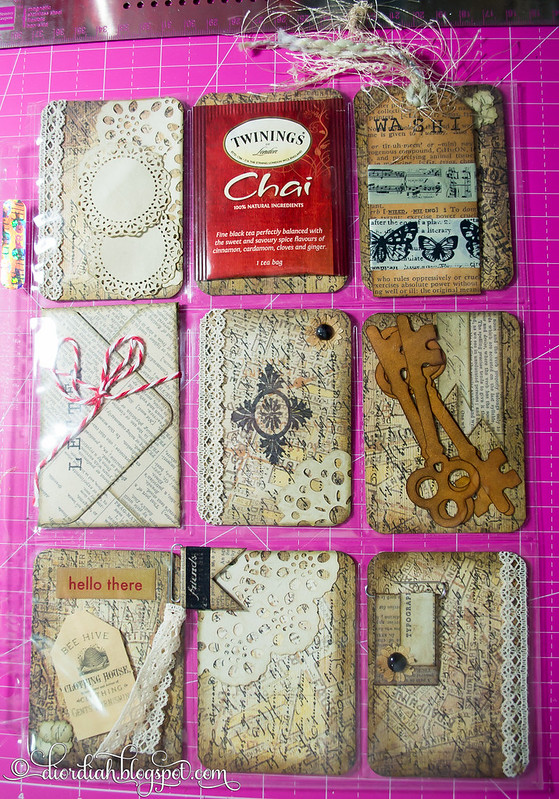
After I got all of that done, I really started to embellish it. I added a envelope using my Envelope Punch Board, some lace edgings, keys that I cut with my Silhouette and inked with Distress Ink, a small tag with washi tape samples, glued a couple of doilies (again, cut with my Silhouette and tea-dyed), and added a few embellished paper clips. It is so pretty, I can't get enough of them!
This one hasn't yet found a home to be sent to. When I am ready to send it out, the awesome part of pocket letters is that they fold up into thirds, and fit brilliantly into a #10 envelope, for easy sending to your swap partner!
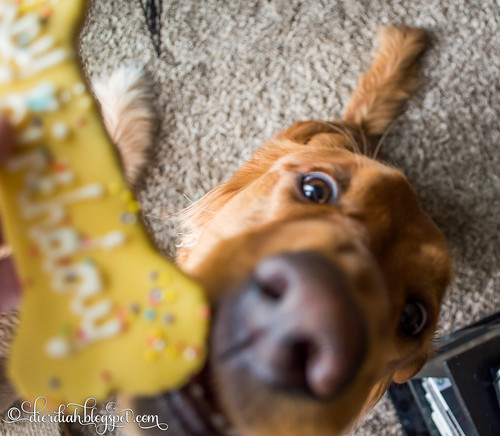
Amelia officially turned one year old on March 29th! We had a little party for her, with a yummy treat, and some new toys! She loved her toys, and loved her treats! Sometimes it feels like she has always been a part of our lives, other times, it seems like just yesterday, I was fighting with her about potty training. I have been expecting her to go through her "teenage" phase, which is supposed to be terrible, but I am very surprised that I haven't seen much of it yet. She is terrible on walks, but other than that, not much teenage phase at all!
Her birthday cookie! I really tried to get a good photo of this. I have seen many really cute pictures of a treat with the dog in the background. However, with my camera, I could either have the cookie in focus, or Amelia. Did not go well, but still cute! I loved the cookie, and at the rate that she ate it at, I am assuming she loved it as well.
We also got her a toy, and my family in California also sent a toy. I ended up putting both toys in the gift bag, and just let her "open" it, by taking out whatever toy she wanted. Naturally, she had no interest in the toy that we bought her, she wanted the toy that her Grandma sent for her. She spent a long time playing with it!
As a little bonus, I took an almost 9 minute video of her opening her toys, and playing with her favorite toy out of the bag.
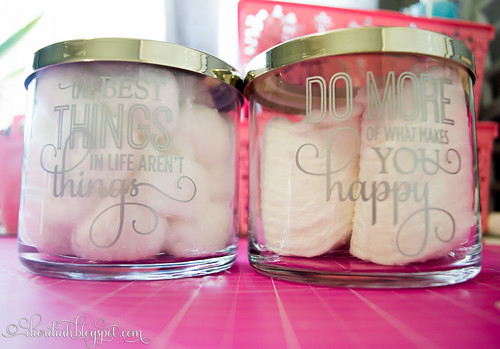
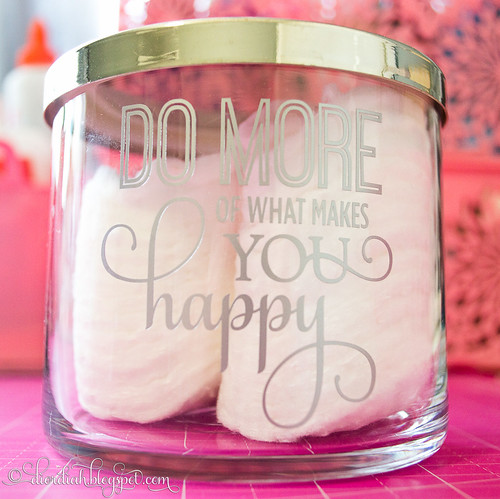
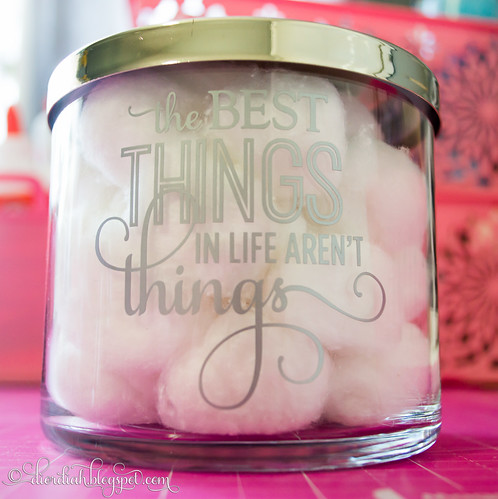
I love re-purposing things! I love making old food containers into pots for my plants, love making old wood into new signs, and most recently, old candle jars into bathroom storage. I had a couple of the three wick candles from Bath and Body Works, that I had used up, and instead of throwing out the jars, I decided to reuse them. I cleaned out the old wax from them - this is is wonderful tutorial on how.
They make amazing jars for bathroom storage, and this really is not a new idea. So, that's what I did with mine. One for cotton balls, and another for makeup circles. I kind of wanted to use the makeup circle one for cotton swabs, but I had purchased a set, that included a container for swabs. I may have to toss that one out, just so that I can use these candle jars instead!
They are beautiful by themselves, and even more gorgeous with some vinyl put onto them! I used a couplephrases that I had purchased from the Silhouette Design Store, and I am very pleased with them, they turned out awesome! I am getting better at putting vinyl on things, as I find little tricks to make thing easier.
I used Oracal 651, which is the waterproof, outdoor vinyl. Sadly, these also took the last of my second favorite metallic silver. (My most favorite is the gold metallic vinyl, that I used or my coasters). I have already ordered much more of it, now that I know it's one of my most used. I love the metallics! My most recent order was pretty much all of the metallic colors. And several feet of just plain white.
I really wanted "inspirational" phrases for my bathroom, because the bathroom is where I visit first thing in the morning, and some days, I just really need to hear something positive. These work well for that purpose, I think!
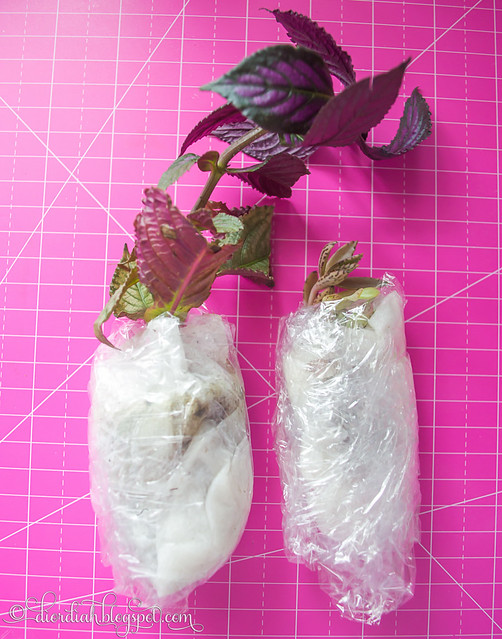
For the longest time, I have been wanting a Persian Shield plant. Ever since I saw this gorgeous photo appear on Pinterest, I have been drooling over it. I have tried to find it in any possible store I went into around me, could never find it. Last week, I decided that I was going to finally just, order it online.
I looked, and searched. The disappointing part of wanting to order it in March, is that places won't ship until after the last frost. Which, apparently, in my case, is the middle of May. Sorry, but I am a impatient person, and I want instant gratification. Besides, I fully intend to keep it as a houseplant, and not as an outside annual, as many online nursery's assume. So, I looked and looked, and eventually found a nursery that will ship it in March, at a decent price. I placed my order.
I essentially paid a little under $13 for my Persian Shield, but in the end, I am glad I went with Morris Nursery, because they even sent a little bonus plant, too!
The Persian Shield is the bigger one, and the bonus is the small one. Apparently, the bonus is a succulent, called "Mother of Million, Alligator Plant", or so said the informational paper they sent. I can not find any other information on the succulent. All the pictures that come up does not look anything like the plant I received. Anyway, They both came wrapped in paper towels, then plastic wrap, and then the whole thing was wrapped in newspaper.
My Persian Shield seems to have several crispy leaves toward the bottom, but I'm thinking that may have been from transport, perhaps? And it's leaning quite a bit, so here's to hoping it can get it's bearings again now that it's back in a pot. The top of the plant looks beautiful, and from what I have read, it roots easily from cuttings. Once it grows up a little bit more, I'm planning on taking a few cuttings so that the pot it is in, can look a little fuller.
A side note: I am really going to have to start looking for alternatives in my apartment for my plants, I have so many now, I do not have any space on my windowsill for any more! I told my husband that we need to move into a two bedroom, so I could have a second windowsill. He was not amused.
Spring is coming, and I am excited! Last year, I made a small attempt at trying to do some container gardening on my patio, but I failed miserably. This year, I'm going to try my hardest to get it right! I grow a variety of things on my windowsill year round (mainly aloe vera plants), but I'm going to try to get going with beautiful, blooming plants outside.
I decided upon getting roses. I have been frequenting the nursery, Home Depot, Lowes, and various big box stores, looking for rose bushes. I've been spending a lot of time researching them, looking at ways to propagate, different varieties. I came across one that I liked, it was beautiful and had good reviews about living in containers. I ordered it, for almost $18, but it will come to me as "bare root", which to my understanding, is a dormant plant. But that's okay! I went out, purchased a huge pot, potting mix. I was ready to receive it.
However, by some fluke, I went to a hardware store that I hadn't been to in a while, since it's kind of out of the way. Imagine my surprise when I find an ENTIRE BOX full of bare root roses. I dug around in them, found a gorgeous bloom called "Double Delight." Upon talking to someone in the store, they told me that they were better off in the ground, that they would only last so long in containers. I didn't care, I wanted something to plant... now.
And here she is, my bare root Double Delight rose bush! It's not much to look at now, but I'm hoping it grows really well, and survives for a couple of years, at least.
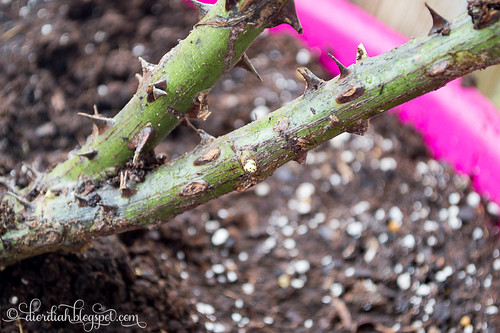
I also made sure that I picked one out that had a little bit of new growth on it. While frankly, I have no idea what this new growth is, I'm taking it as a good sign that the plant is still alive, and ready to live!
A lot of my gardening is just trial, error, and a ton of Googling. As for the rose I ordered... I still have a pot for it (although this one is a bit smaller), potting mix is ready, and it was supposed to have shipped yesterday. It didn't, and I have already contacted the place I bought it from, who told me they are waiting for the weather. Well, thanks for keeping me informed? Sheesh.
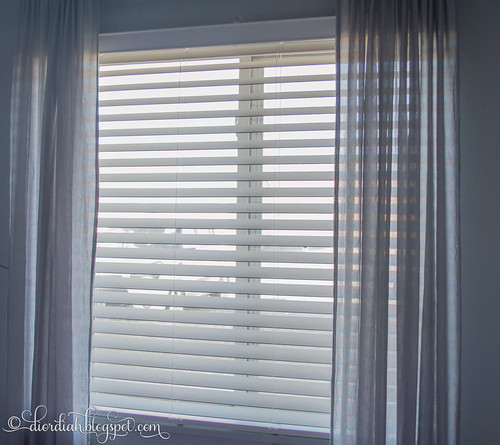
We have been living in our apartment for over one year now! We recently renewed our lease for another year. In doing so, we got to choose an upgrade! There were many things on the list, a curved shower curtain rod, upgraded ceiling fan, USB outlet in the bedroom, or faux wood blinds. What did we choose?
The faux wood blinds of course! Mainly because the cat had destroyed our normal blinds, because they are super flimsy, and some of the slats were bent and broken. I figured these would be just a bit more indestructible. And, it appears that we have most of the other upgrades as well. We already have the ceiling fan, the USB outlet, and the curved shower rod, from the previous tenant's lease renewals.
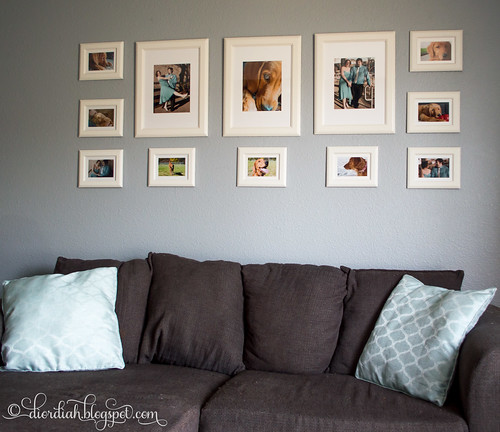
A while ago, I had the idea to make a gallery type wall above my couch. I cut out a variety of sizes of picture frames out of newspaper (I called them "mock pictures"), and hung them on my wall with painter's tape. I spent a couple of days moving them around, trying to get a good configuration of what I liked. Then I ordered my frames. I had shopped around a lot for a good price on frames, and found the best deal for all of them was from Ikea, even after the cost of having them shipped to me. They came with mats, and I was able to order different sizes, since I like everything to be all match-y.
Once the frames came, I used the newspaper cutouts and marked where the holes are on the original frames, and used the newspaper to measure, then had my husband put my nails in the wall. Once the nails were in, I ripped off the newspaper frame.
After those were done, I got access to my wedding pictures, so I ordered my photos (I always seem to find the best deals and coupon codes from Snapfish, I love them!). My prints came the next week, so I put them in the frames and hung them up! It definitely was a lot of waiting for the impatient me!
Now, I will talk about this for a minute. It is very far from perfect. The pictures are not evenly spaced apart, the smaller ones do not match up perfectly in a line like I wanted. However, I knew this project was going to end up like that, to be honest. I had a really hard time measuring, re-measuring, and measuring again. The newspaper looked good and lined up, but the frames... not so much.
My husband and I fiddled around with this wall for hours one Sunday, and I refused to put any more holes in the walls to get them perfect. So, I'm learning to be fine with the imperfections. I may go back later and maybe secure the smaller ones better with Command strips, because with our upstairs neighbor stomping up the stairs, and Amelia bumping into the wall, they sometimes get nudged sideways, making them uneven. It has been a struggle, walking by and straightening them out several times a week. I was trying to avoid the strips, because they are obscenely expensive for what I need - but I am starting to think I may have no choice!
But all things considered, they turned out better than I expected them to be. I like to think that you can't see the issues with them unless you try to look for them, but I'm not sure that is true. LOL!
My love, Amelia, is almost one year old this month! She officially turns one on March 29th. I fully intend on making her a few little puppy cupcakes for her, and possibly and new toy for her to enjoy. It seems like just yesterday that we had gone to pick her up from the breeder, cleaning up her vomit when she got car sick on the way home, having all those sleepless nights, the every ten minute potty breaks... while I do not miss a lot of the puppy stuff, I would not trade it for the world!
It seems just one day, I looked at her, and saw what a beautiful, wonderful dog she had become. There was a period in her puppyhood that I got really frustrated with her, she was nipping constantly, she would pee in the house, even though we had JUST came back in from standing out there for 10 minutes. It was entirely no fault of hers, she was a puppy, and that is what puppies do. However, I thought that it would never end. But one day, I took her over to a friend's house, and would not let her out of my sight, in fear of her peeing in their new house. She shocked me when she started pawing at the sliding glass door, and ran right out to go potty outside. Since that day, our accidents in the apartment became fewer and fewer, as we finally "got" potty training.
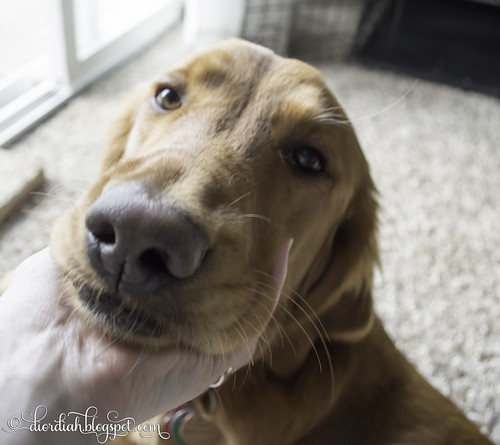
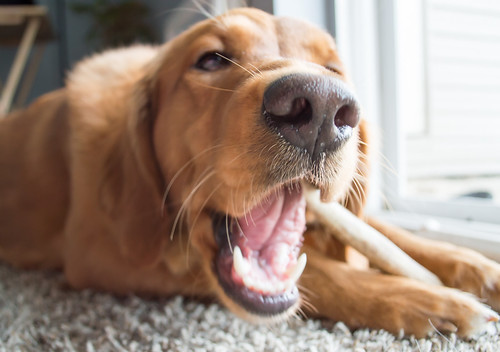
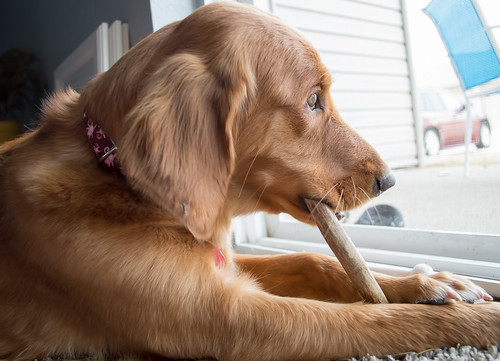
She looks photogenic, but in reality, she is far from it. I will give you all a tip on how to get reasonably good photos of dogs: give them something to chew on. Seriously, if I attempt to get pictures of her without something for her to do, she will just waltz up to the camera, sniff it, and not go away. It makes for disastrous photos, because I really like to get at her level to take photos. I have never been a fan of taking photos from above. So, I shove something in her face (for this session, it was a deer antler), and I will just start snapping. I will probably take about two hundred pictures in a fifteen minute period, then finding which photos I love the most once I download them on to my computer.
We also recently got her officially AKC registered (which, if you ask me, was a complete waste of $40), and after another $31, she got registered with the city as well. We were definitely a little late in doing so, but money never really allowed it until now. Miraculously, we also avoided late fees. Bonus! She's all current and official now! We chose her AKC name to be "Stewart's Miss Amelia," because well... she is. :)
As my readers know, I got married to my husband last year. It wasn't a huge thing, just a simple, tiny ceremony at the county courthouse, and a dinner at a fancy restaurant afterwards. I had a close friend who is trying to get into the photography business offer to take our photos. She took the pictures, but shortly after, she got incredibly busy with various events in her life. I didn't get the photos until last week. (But that's okay, I wasn't in a hurry to get them).
So, I'll share a few of my most favorites here. It was a really stressful day, I wasn't quite myself. I have trouble with being the center of attention, and having people focus on me, so I was extremely fidgety. Also, it was my wedding day, and I didn't have my family there, as they were still in California, so it was also emotional for me. My friend photographer tried her hardest to keep my spirits up and she definitely did the best she could, with me being as (not) photogenic as I am.
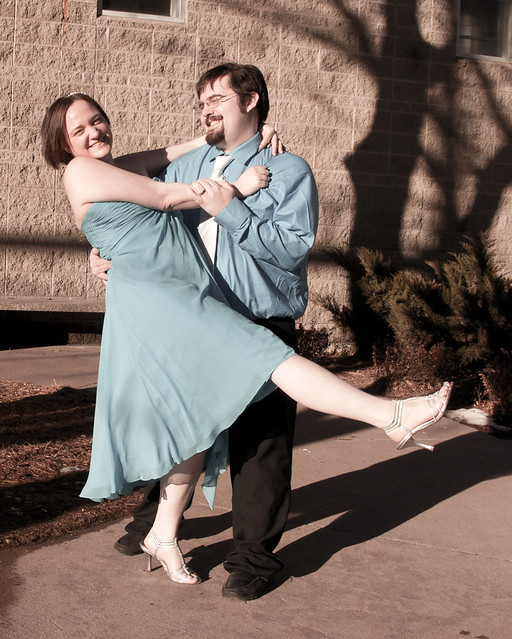
She suggested this pose to me, and I was weary about doing it, because I swore up and down that he was going to drop me! But, it turned out to be my most favorite photo of all the ones she took. I love the way the dress moved, and it really looked like we were having fun! I love this photo, I definitely plan on putting an enlarged version of this on my wall.
Another one of my favorites. She had found a bench within the courthouse that was next to a window. We sat on the bench, and she snapped this one. I love this photo. I think it captures our happiness for that day brilliantly. I wanted to go around and get photos for my family, and his, and found out that this photo was definitely one of the favorites between everyone. Everyone wanted a copy of this photo. I agree with all of them, this photo is fantastic. I even ordered a print of this one for the husband to take to his desk at work.
Another sweet photo of us, outside the courthouse. By this point, my $3 shoes were killing my feet, but my friend kept me going, snapping photos the whole time. She really did a fantastic job at our photos. I don't know what we would have done without her, we probably would have had a lot of cell phone photos, really.
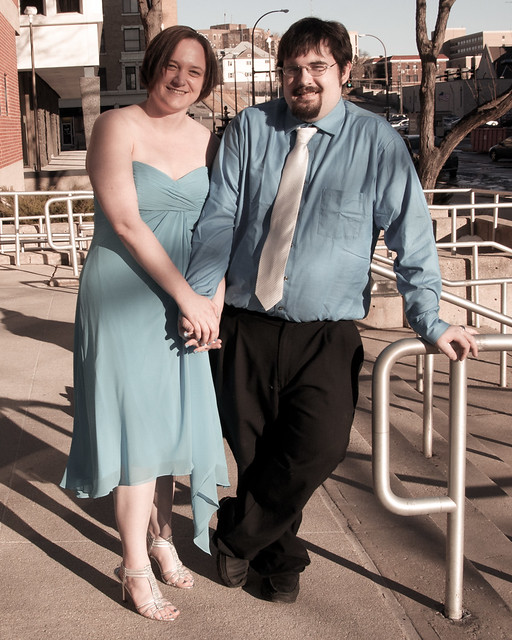
A full length photo of the two of us. This shows off our wedding clothing rather well. I really tried my best to match each other. I think I did pretty well, I had even tried to match my nail polish. Haha, I was completely obsessive over trying to get everything to match well.
Lastly, a solitary photo of me. While my photographer friend took fabulous photos, I find myself finding all sorts of flaws with me. I really wish that I had took longer to find a necklace that matched my hair piece better. A necklace probably would have made my chest not look so large. Should have gotten teeth whiteners, Should have put on makeup that day. I am probably the only one who feels that way about them, because I know that I'm the only one who focuses on every flaw in me.